CLI Tool for interacting with Network Simulation systems to build and interact with Network Labs in an automated way.
Note Under Construction...∏
It is as simple as
pip install labbyYou will need to use poetry to handle installation and dependencies.
# Clone the repository
git clone https://github.com/davidban77/labby.git
cd labby

# Start poetry shell and install the dependencies
poetry shell
poetry installLabby is also packaged under a container, davidban77/labby, based on python-slim image.
 > docker run -v $HOME/.config/labby/labby.toml:/opt/labby/labby.toml \
             -v $HOME/.config/labby/.labby_state.json:/opt/labby/.labby_state.json \
             -i -t \
             davidban77/labby:v0.2.0-py3.8 bash
It is particularly useful if you don't want to setup a virtual environment to install all the dependencies.
Besides having the labby tool installed, you will need:
- A provider. For now the only supported Network Simulation provider is GNS3.
- A labby configuration file. Sets the necessary settings for connecting to a provider.
telnet(for console connection) and/orsshinstalled. So labby can perform some ad-hoc connections actions if needed.
Once you have the configuration file setup, and labby installed on your system then you are good to go!.
The CLI tool serves multiple purposes, for example it is a way great to discover the projects or network topologies available on the Network Simulation system, start or stop the nodes, push configuration, etc...
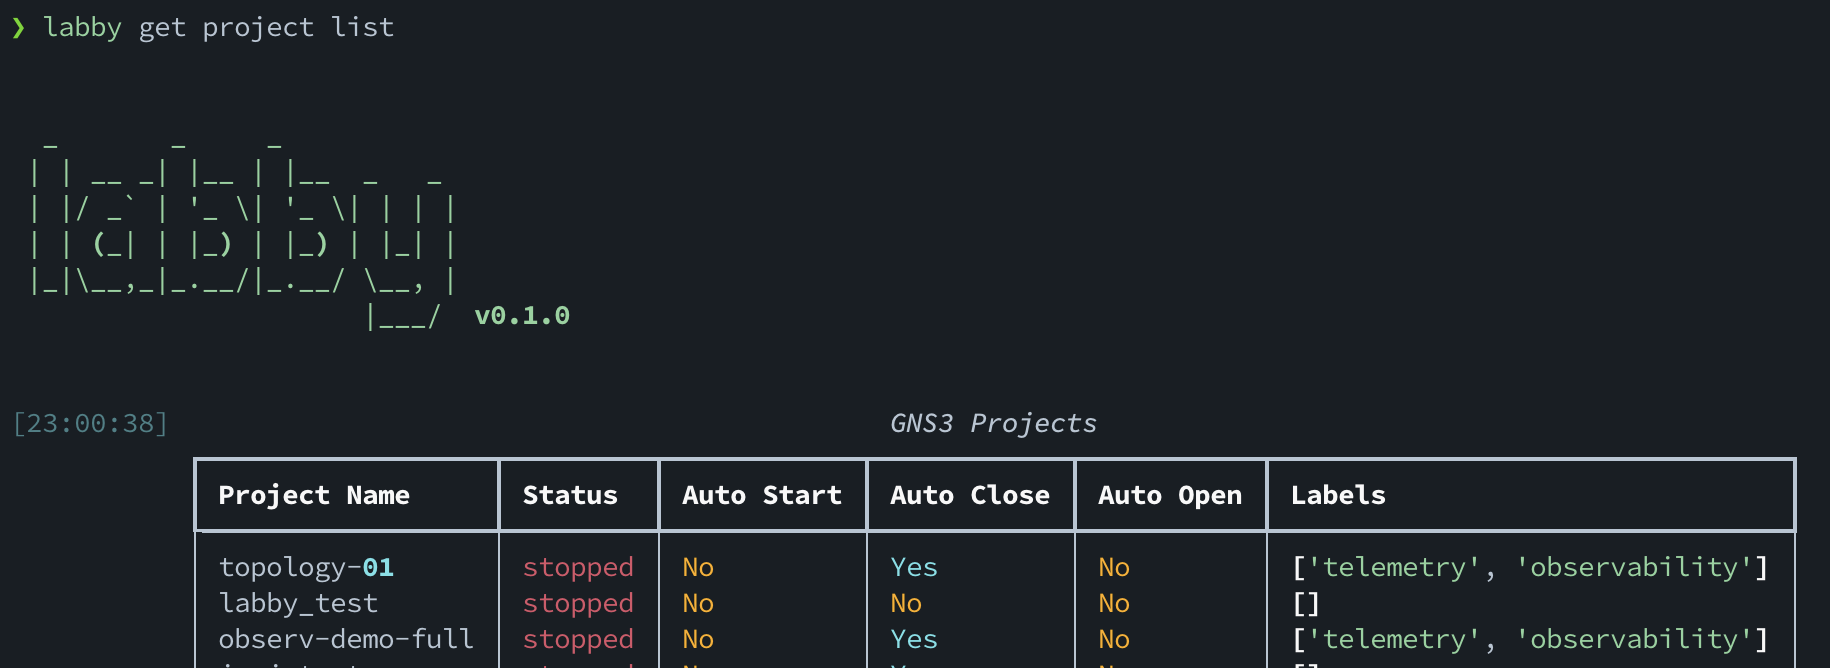
For examplem to show the available projects and their status in GNS3:
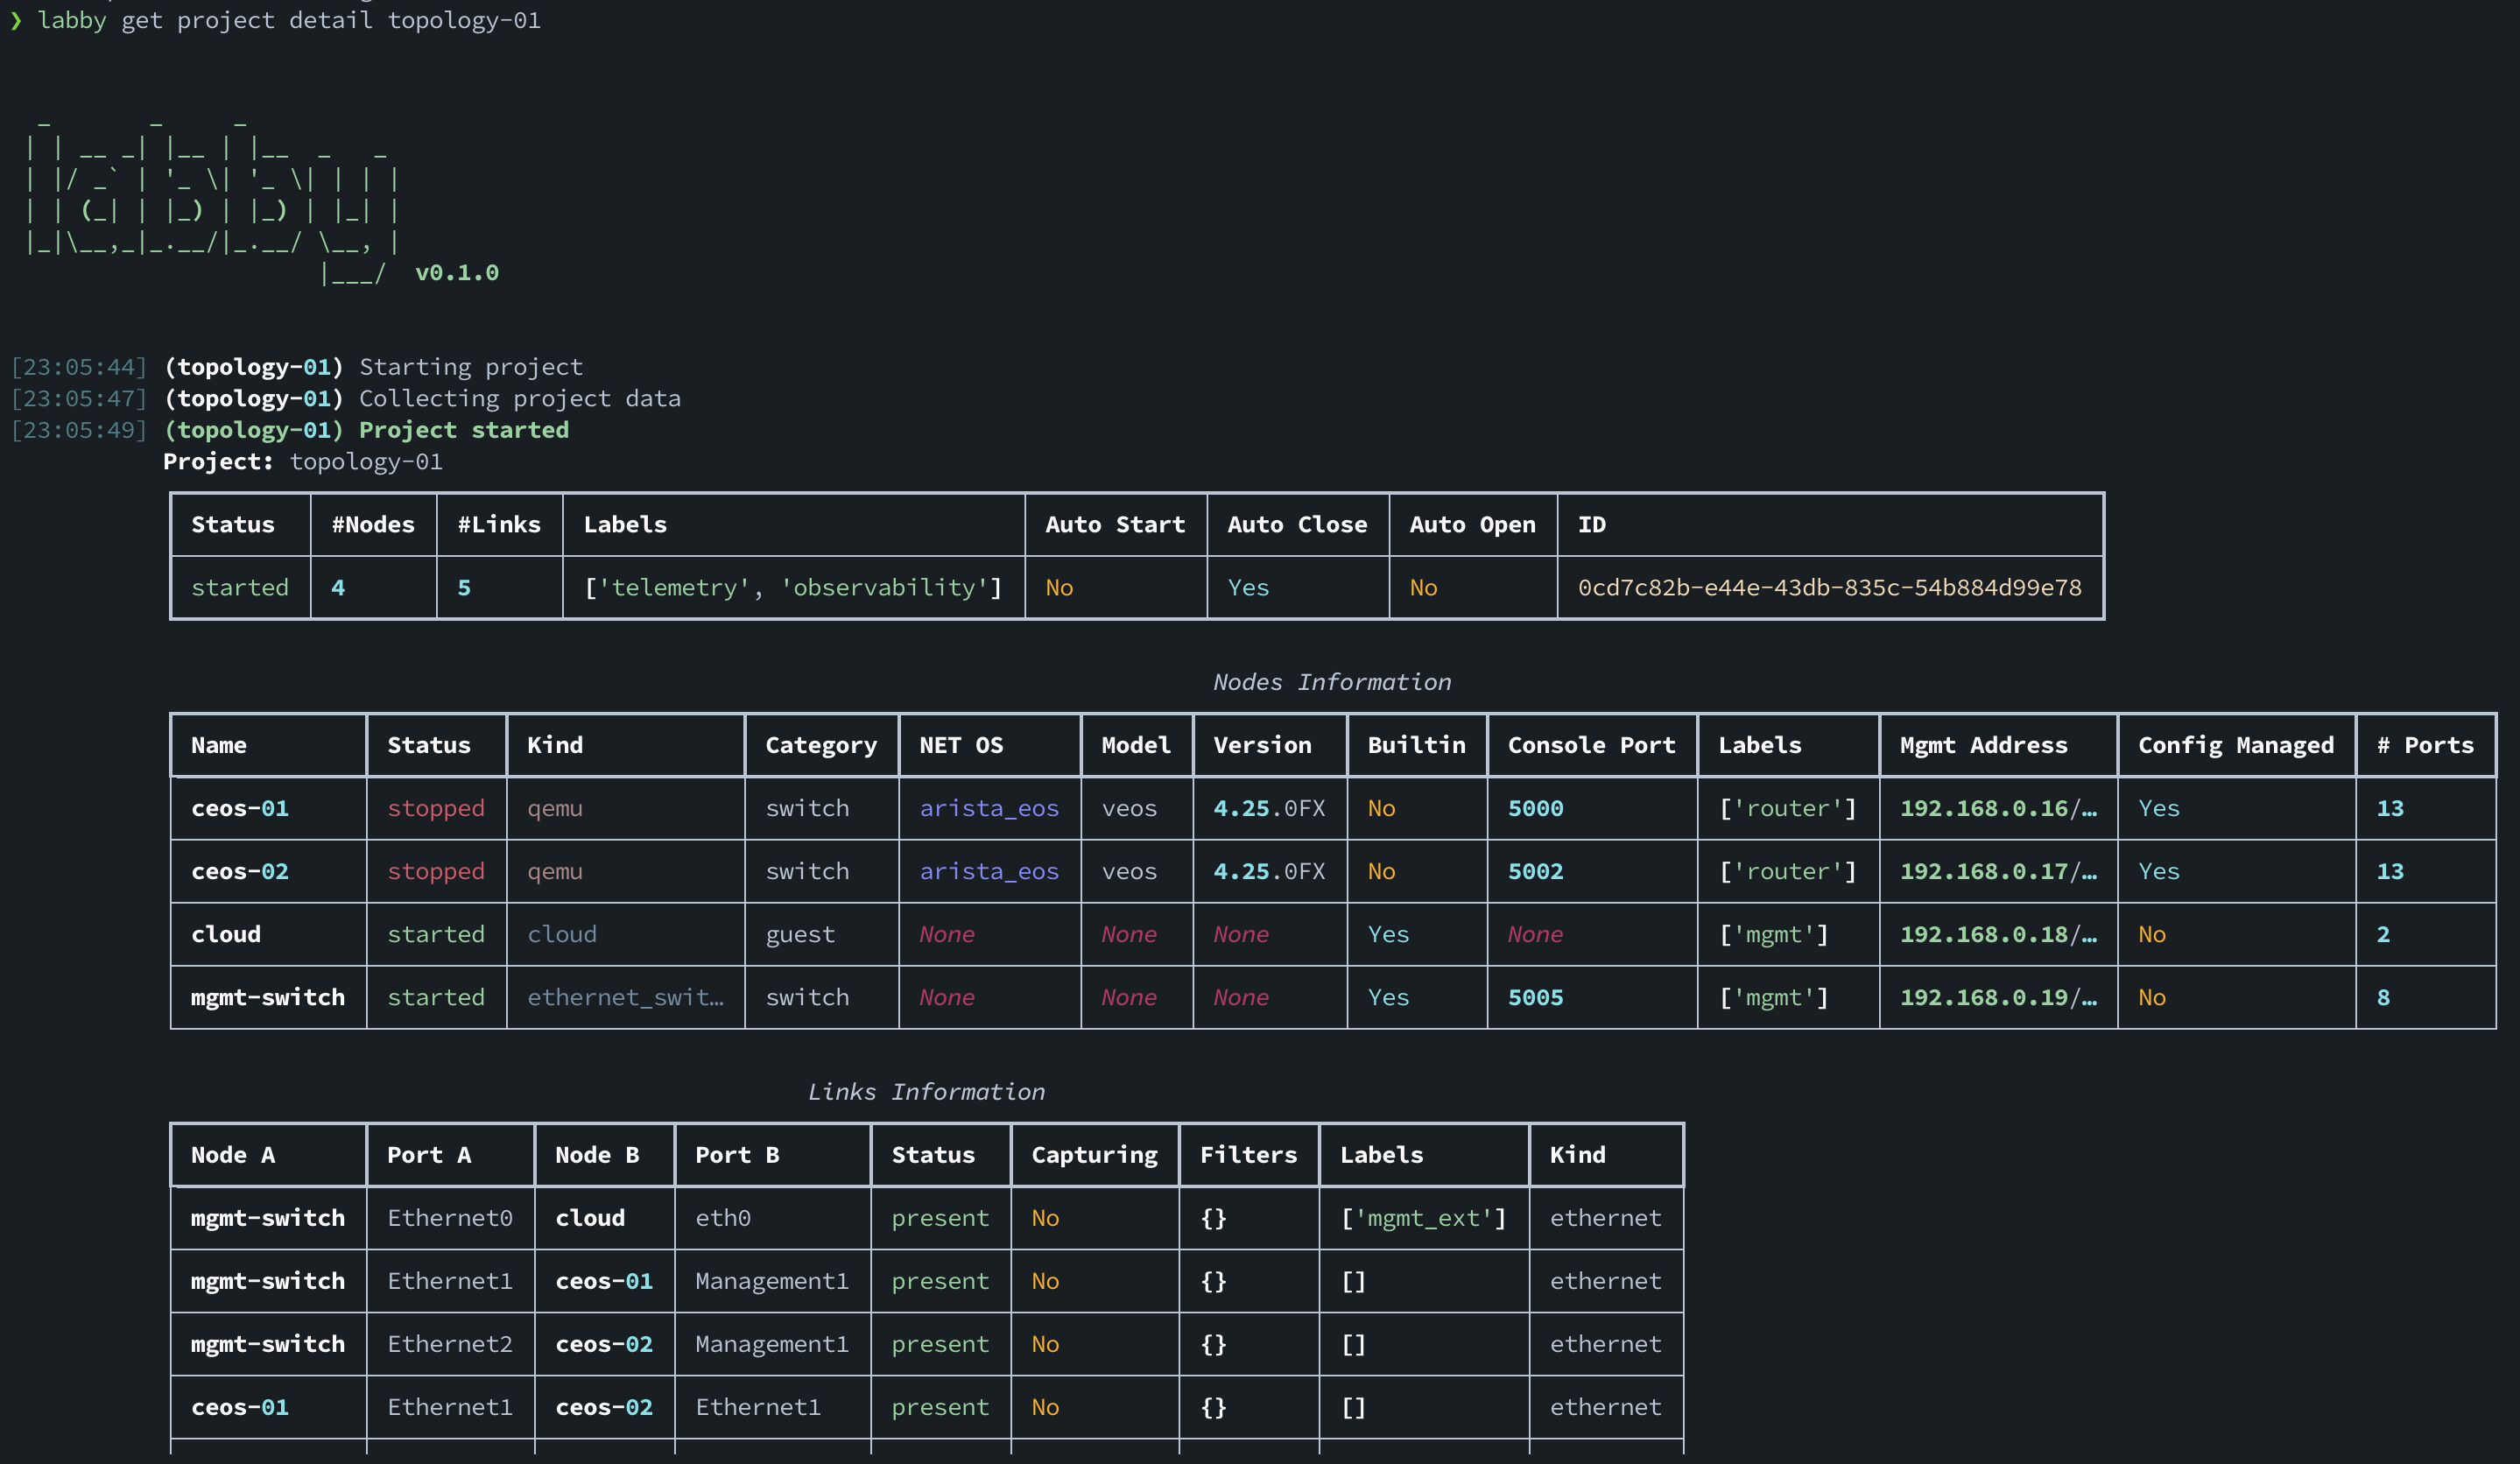
Now, let's get the details of the network lab topology-01:
It is a small topology with 2 Arista ceos devices connected between each other, and are also connected to a cloud and mgmt switch to allow them to be reachable to the outside world.
The Mgmt Address shows the IP address information for their management interfaces. You can find more information in the node configuration section.
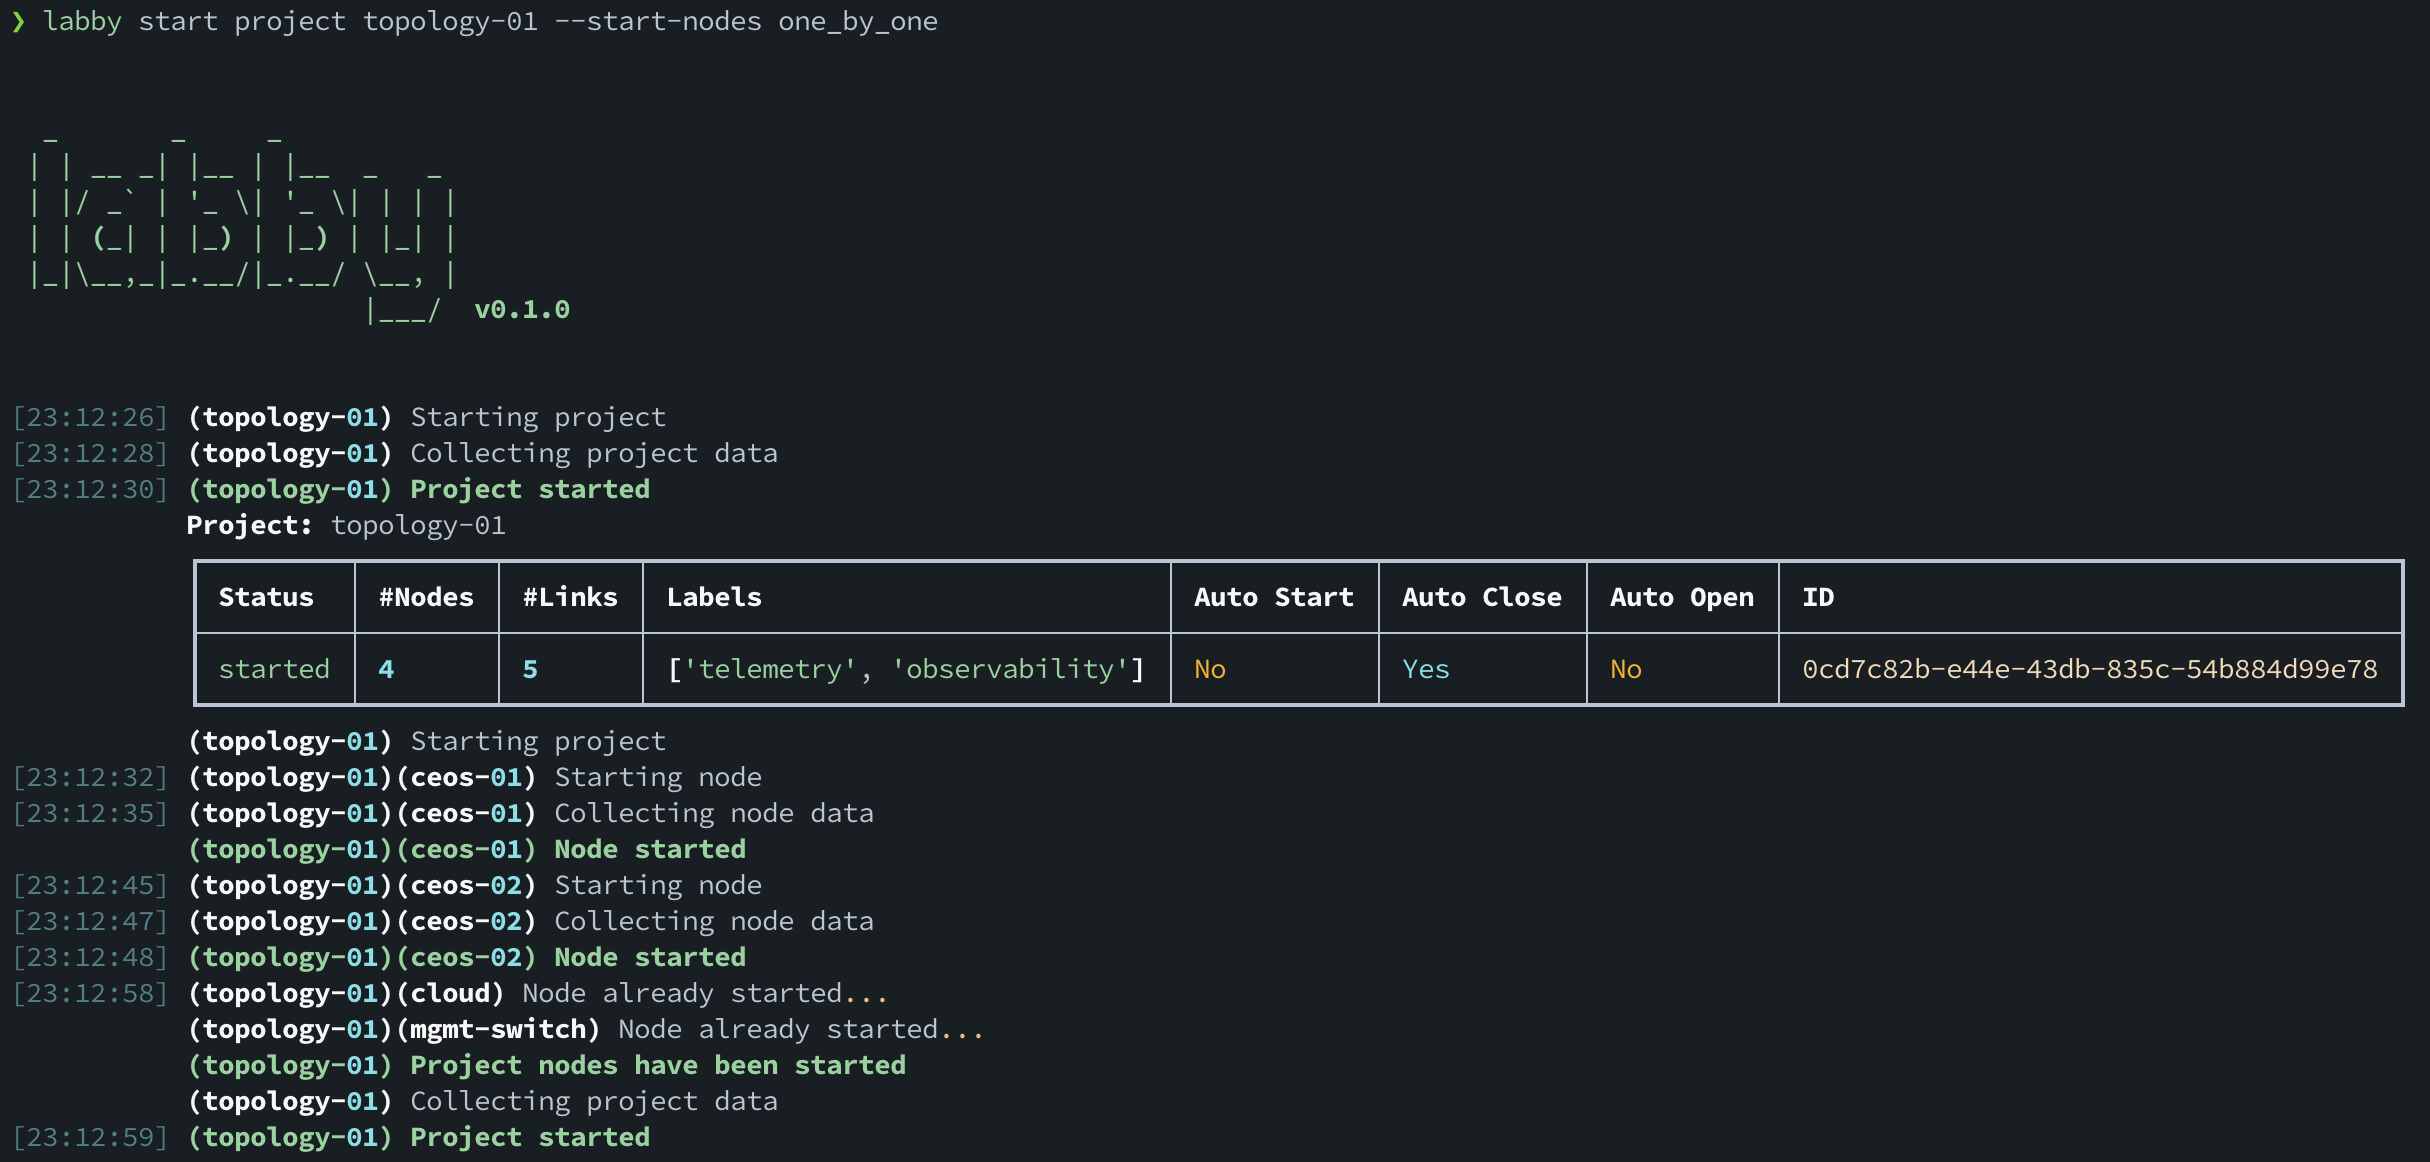
You can start one by one the nodes of the project, for example:
Devices are up and you can check their status and more details:
You can connect to the nodes via SSH (if IP address for management is set and is reachable), or you can connect over console if available. For example:
And there are more features as well...
- Ad-hoc configuration rendering and push
- Automated console configuration bootstrap, this means to start a node and run the configuration dialog to push Day 0 conifguration for the device be reachable via SSH for example. Note: this feature might need some more love.
- Automatic
buildof a network lab in a declarative way. Using thelabby buildcommand, more information can be found at build network labs section.
For labby to work, you need a configuration file (labby.toml) that specifies the providers you have at your disposal to connect.
By default labby will search for the configuration file at the current directory, if not found it will search at the labby configuration space of the user's home directory ($HOME/.config/labby/labby.toml)
Here is an example configuration file:
[main]
environment = "default"

[environment.default]
provider = "home-gns3"
description = "Home lab environment"

    [environment.default.providers.home-gns3]
    server_url = "https://gns3-server:80"
    verify_cert = "false"
    kind = "gns3"
labby introduces providers which should be seen as the Network Simulation system (a GNS3 server for example), and environments which should be seen as the environment where that network simulation is hosted.
The idea behind this structure is to provide flexibility to use multiple providers and labs in different environments (home lab and/or cloud based).
labby relies on providers to interact, create and destroy with the Network Topologies. The provider supported so far is GNS3 by the use of gns3fy.
A provider is just a representation of a Network Simulation systems, like a GNS3 server for example.
An environment serves as a construct that holds attributes of multiple providers.
Each provider provides projects which should be seen as network labs. These projects is where you can create nodes based from templates, and create links to finally build a network topology.
Using the GNS3 provider as an example:
- A
labby projectis a network topology in GNS3. It needs to start in order to access it. - A
labby nodeis a network object. This can be a router, switch or container, among others in GNS3. - A
labby templateis the base settings to be able to create a node. Is where the main information of the node is inherited. - A
labby linkis a network link in GNS3. It provides a way to connect between 2 nodes and can provide functionality like packet loss or jitter on the link.
Labby serves as a CLI tool that interacts with all these entities.
labby relies havily on the state of the current provider to get information about the objects that interacts with. Now, not all the necessary attributes of an object can be retrieved from the provider, so labby uses a state file.
Labby augments these objects by providing extra attributes, like labels for example, and stores them at an specific location ($HOME/.config/labby/.labby_state.json).
Some of these attributes are:
labelsAn array of metadata useful to categorize an object (project,nodeorlink).mgmt_portManagement interface of the node, useful for generating bootstrap configuration for the node.mgmt_ipManagement IP Address of the node, useful for generating bootstrap configuration and also connecting to the node.templateName reference of the node template used to create it.net_os,modelandversionare attributes of the node and its operating system. It is needed to differentiate configuration templates for example.config_managedis a boolean attribute which lets you know if the device can be managed bylabbyor not.
The attributes are generally added at the time of the object creation, but they can also be added at a later stage if needed (this is normally done with labby update command).


