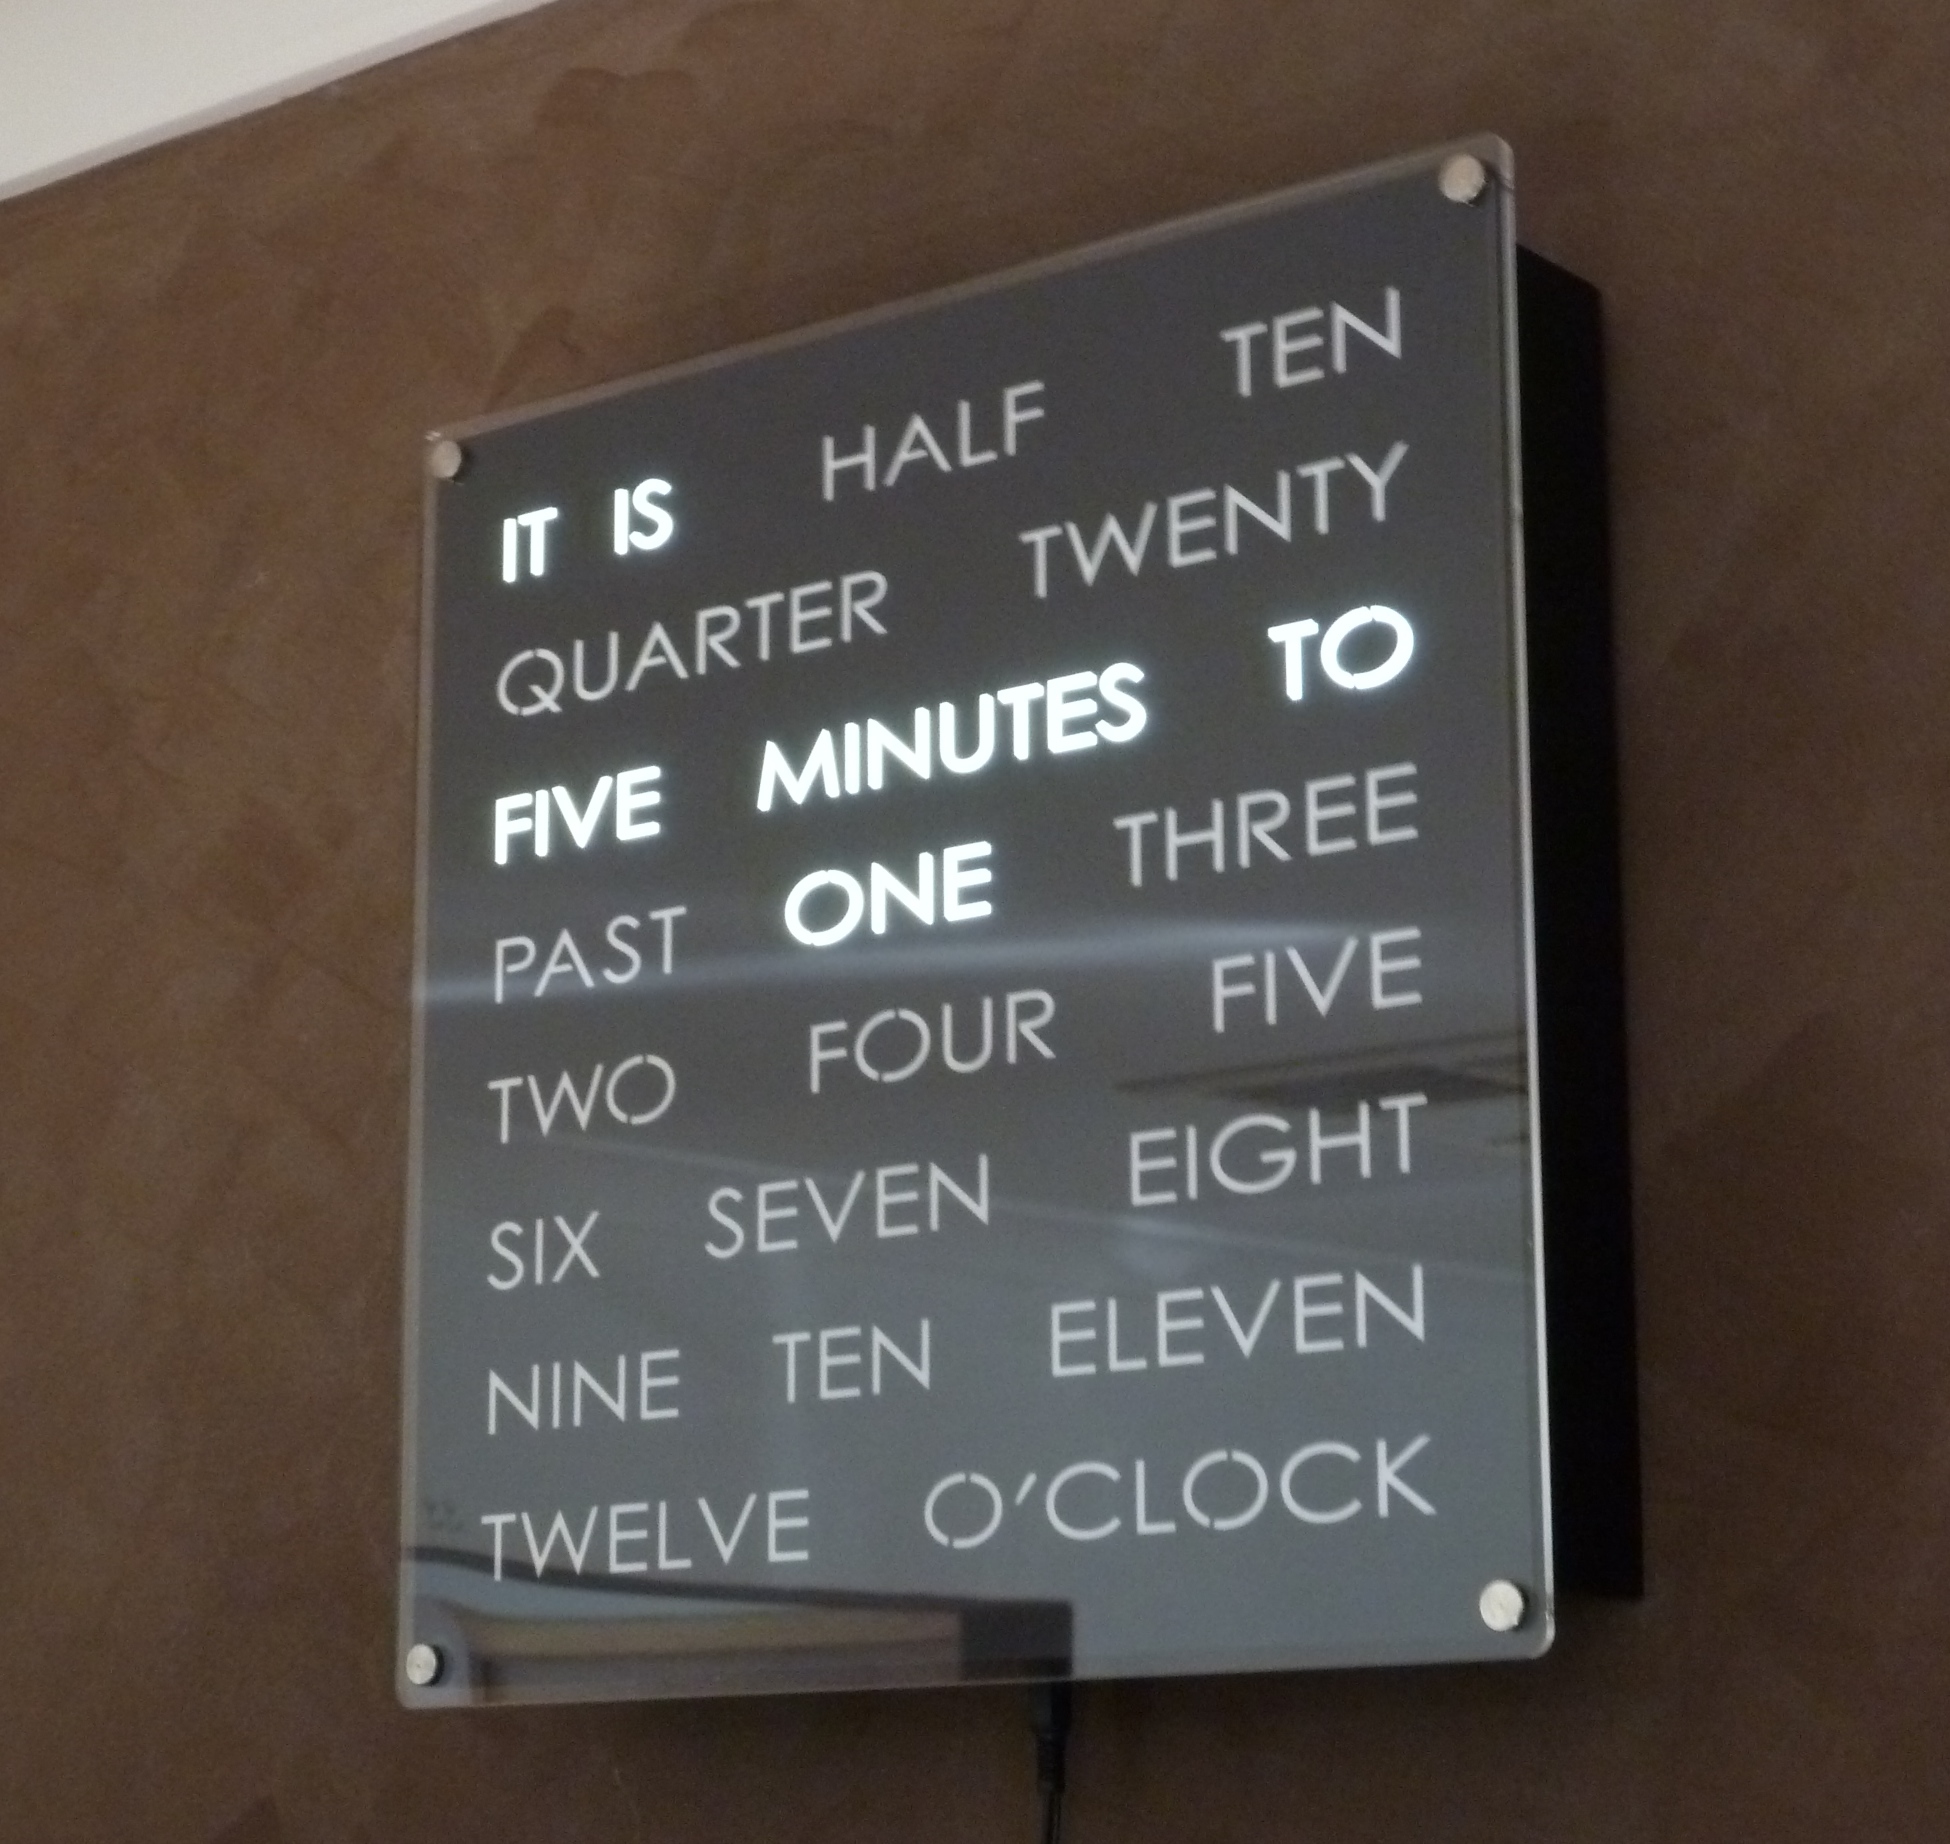
Perhaps you already know what a word clock is, but just in case you don't:
Source: Doug's Word Clocks
It's a clock, but it shows the time as words, not as numbers or using a graphical visualization. And honestly - it is pretty neat, isn't it? We think so!
Why are we telling you about word clocks, though? Well, we have a good friend and trusted advisor who is a mechanical engineer and decided he wanted to build one based on an online tutorial. He did do so, creating a frame milled from MDF board and a fairly prototype-style wire-up of WS2812 LEDs, all connected to a Raspberry Pi.
He then got in touch with us, and we worked together to make his word clock project even cooler. A BluePill board with the CAN wired up is used here. Everything you'll need should be documented in this repo here.
- Our friend's existing prototype
- The BluePill board with CAN wired up
- The following software:
- stm32f1xx-hal, which is a Rust implementation of the core functionality for the STM32F1 series
- The knurling-rs app template developed by the knurling-rs project for bare-metal Rust
- A USB-CAN bridge (
usb-can, which is based on the USBtin) - A Debian laptop that communicates the time to the clock via CAN.
So let's dive in!
The following picture shows an overview of the setup we used, which is fairly simple. The word clock is in German, by the way. If you don't speak German, consider this an opportunity to learn some in preparation for the next Oktoberfest!
Before you say anything: yes, it's true, there's no real reason to use a CAN bus for this project. Nevertheless, we added CAN into the mix as it's just fun to play with CAN bus when given the opportunity.
We know the world of embedded software is still enamored with C. There is, however, a brave new world called Rust, and we've been playing with it a whole bunch over the last two years. Mostly on Linux, as embedded was still pretty young when we first had a look. But it has come a long way recently, so we've decided to go all in and do as much as possible in Rust. Including this project!
There will be much more material from us regarding Rust on embedded. It'll be great! For now though, let's dive into a bit of code.
We have two pretty time critical components in this showcase: the WS2812 LEDs and CAN. But how?, you may ask. Aren't the LEDs just LEDs, an the CAN bus mature enough not to have issues like this with is? Yeah, sort of. The WS2812 are controlled via a one-wire interface and since there is a bunch of information to be pushed through, speed and precision matter.
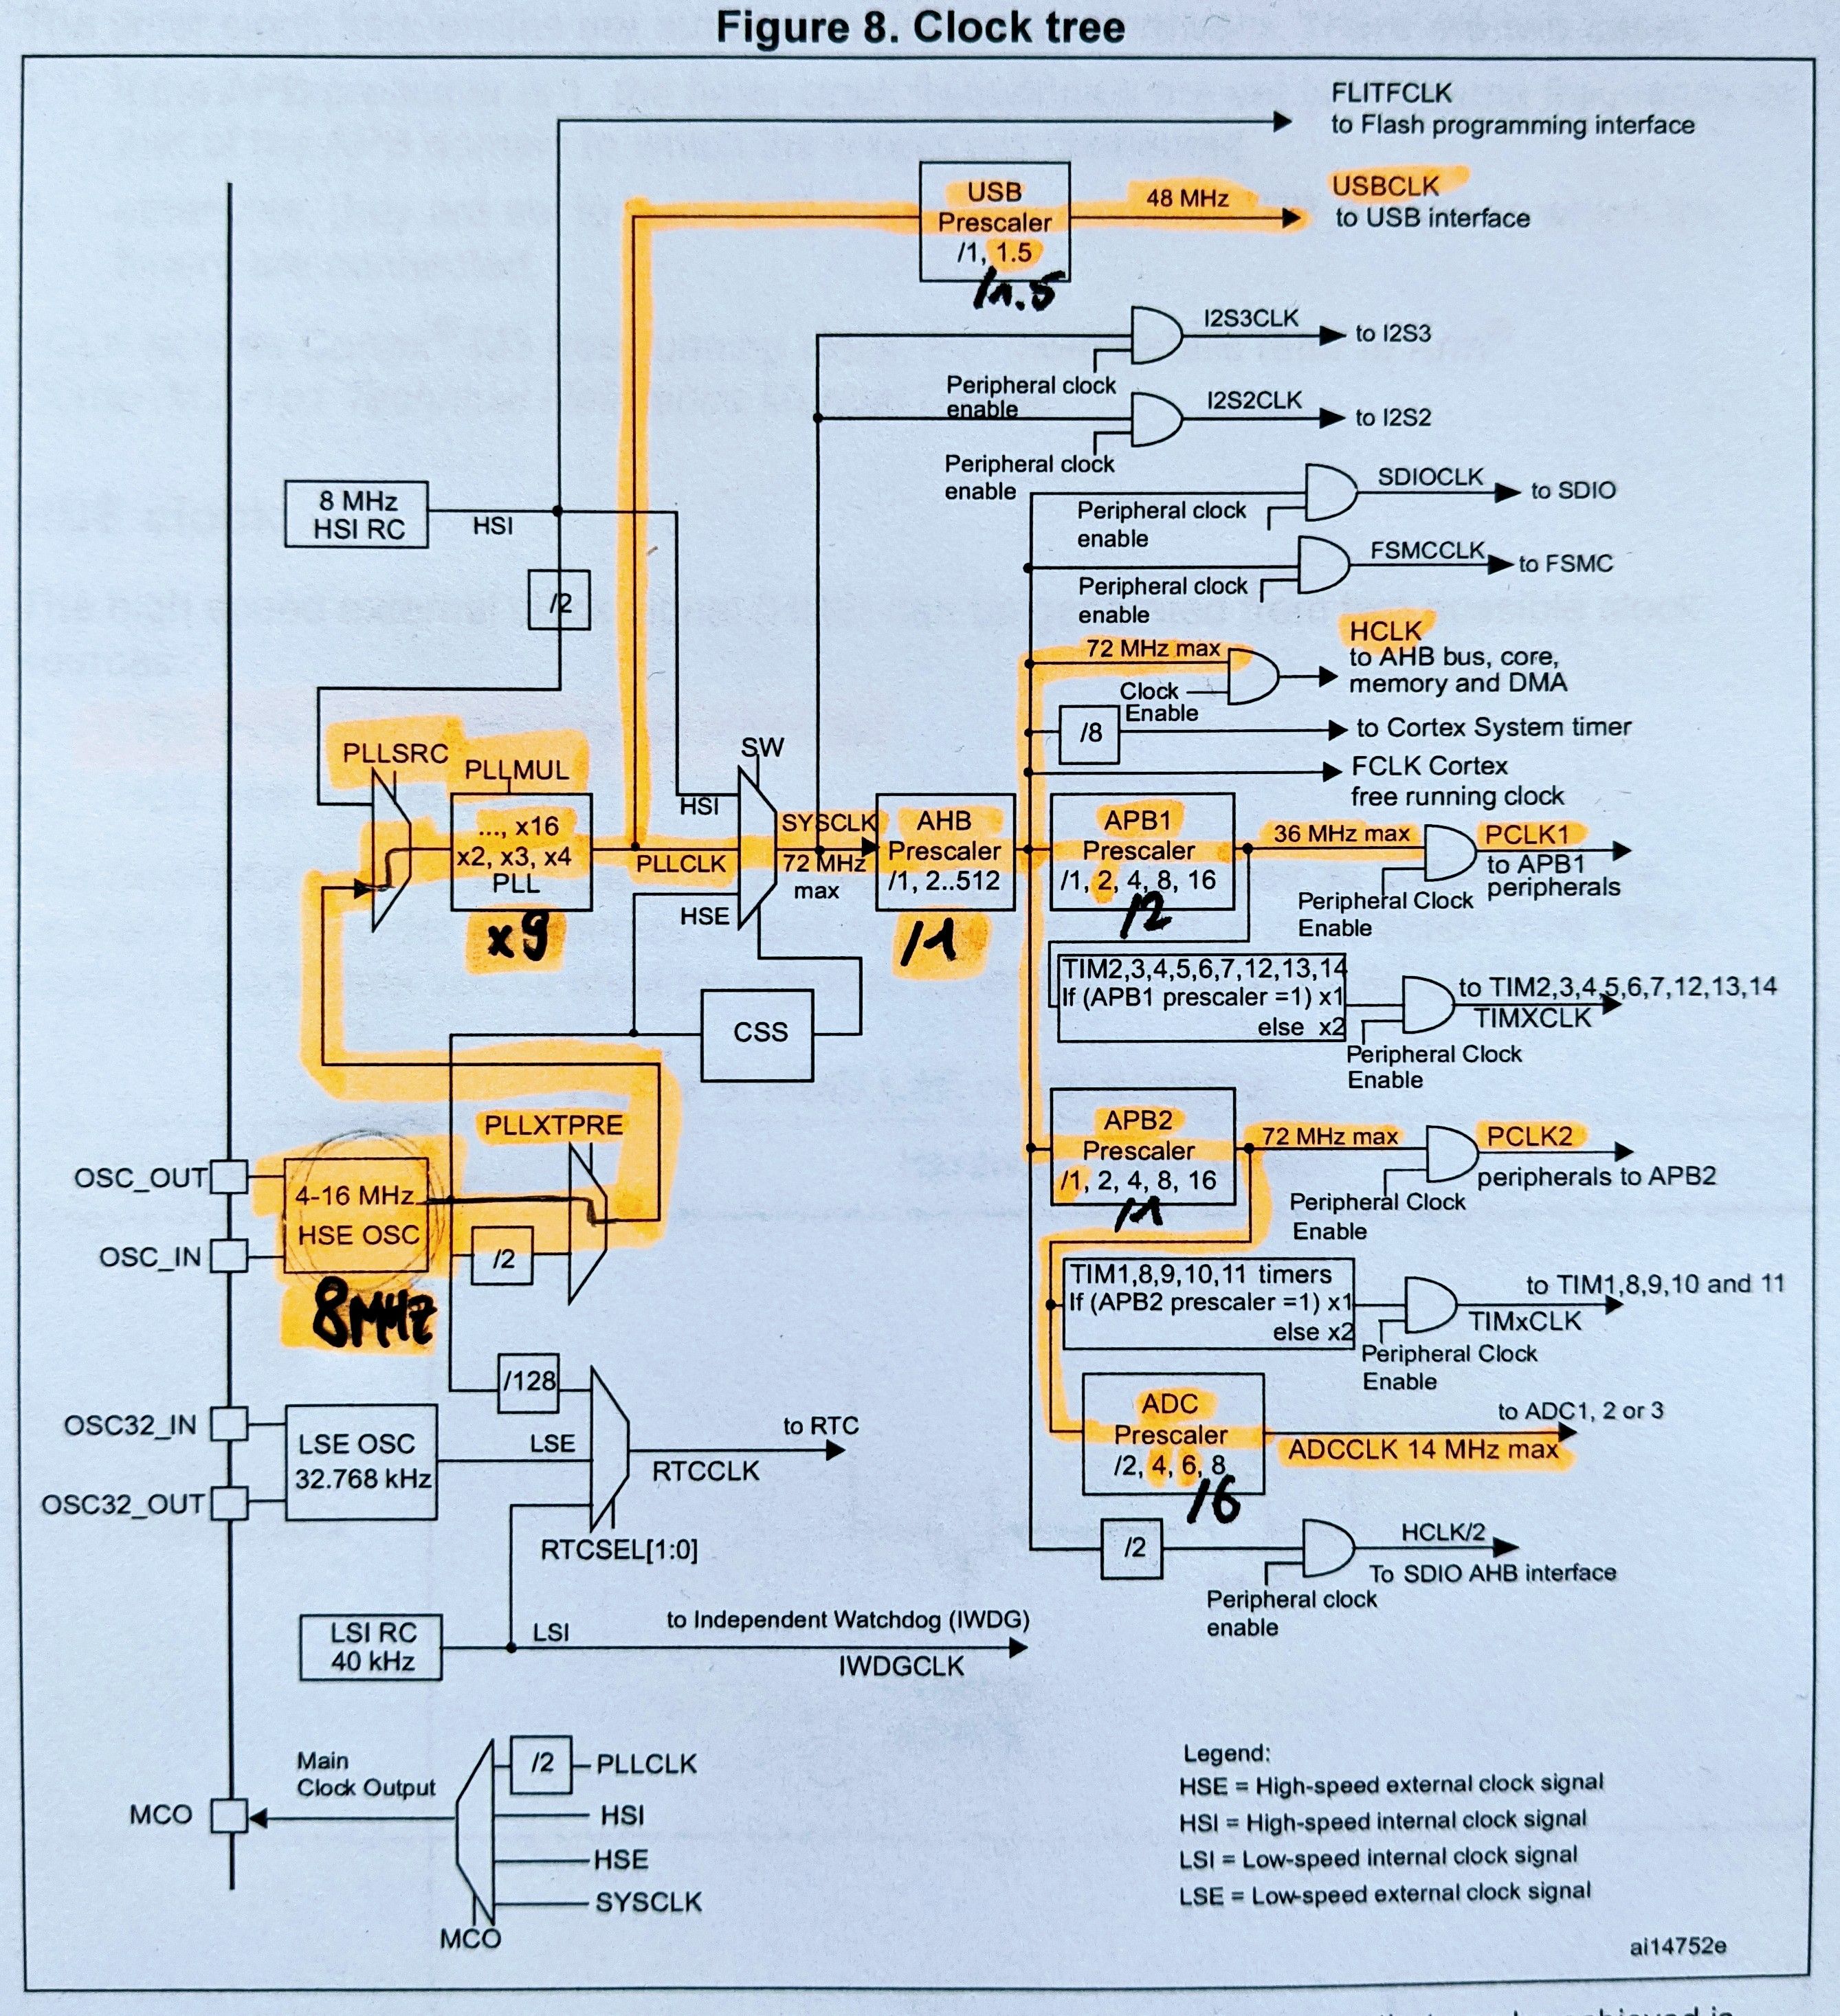
By default, the STM32F103CBT6 is clocked much lower than the advertised 72 MHz, so we'll have to fix that:
  let dp = pac::Peripherals::take().unwrap();
  let mut rcc = dp.RCC.constrain();

  let clocks = rcc.cfgr
                  .use_hse(8.mhz())
                  .sysclk(72.mhz())
                  .hclk(72.mhz())
                  .pclk1(36.mhz())
                  .pclk2(72.mhz())
                  .adcclk(12.mhz())
                  .freeze(&mut flash.acr);
What happened here? First, we acquired the device peripherals to lock them. Then we go ahead and find the Reset and Clock Control (RCC). In the configuration of the RCC, we can now set:
- The high speed external (HSE) crystal to 8 MHz
- The system clock (SYSCLK) to 72 MHz
- The AHB bus clock (HCLK) to 72 MHz
- The APB1 bus clock (PCLK1) to 36 MHz
- The APB2 bus clock (PCLK2) to 72 MHz
- The ADC clock (ADCCLK) to 12 MHz
And finally, we call freeze to "log in" our settings and produce a Clocks
struct containing all necessary information to work with the clocks.
"Back up," you say? No worries. Here's where we got that from:
It's from ST RM0008, the reference manual for the STM32F101 to STM32F107 MCUs (page 93), and it shows the clock tree of the MCUs. From there we, derive what we need to do in terms of frequencies (you are welcome to follow my lovely text-marker annotation), and then we drop those frequencies into the well documented Rust library.
There's one last road block though.
Setting up the CAN involves usually defining bunch of things as well, arguably
the most important of which is the baud rate. CAN is pretty resilient, however
it does also a need a fairly accurate clock - which we've provided via the
use_hse call. So we set the baud rate like so:
  // APB1 (PCLK1): 36MHz, Bit rate: 500kBit/s, Sample Point 88.9%
  // Value was calculated with http:https://www.bittiming.can-wiki.info/
  can1.modify_config().set_bit_timing(0x001e_0003);
And indeed, it works! At lower baud rates the CAN fails with the MCU going at 72 MHz, so below 250 the MCU has to be clocked down - however if you use our upcoming Rust library with the mini series, this will be taken care of!
Good! Now we need the time.
The word clock needs the hour and the minute to do its thing. We need to get it there via CAN; that's the goal we've set for ourselves.
The Linux date command gives us the date and time:
» date
Tue Apr 20 01:08:23 PM CEST 2021
The date command also understands options to output only date / time
components:
» date +"%I"
01  # hour in AM/PM format
» date +"%M"
11  # minute in the hour
Sending this via CAN requires a CAN interface of some sort. We're using the
USBtin, of which we've made our own version,
the usb-can. The README instructions
we publish have all the necessary setup information for a serial CAN link over
which we can speak using socketcan. We end up with the possibility to send
CAN frames to an interface called slcan0 using a utility called cansend.
Plugging our date magic into all of this, we get:
while true
do
  cansend slcan0 7ff#$(printf '%02x%02x' $(date +"%I") $(date +"%M"))
  sleep 5
done
This will send the hour and minute to the serial CAN interface on CAN ID 7ff every five seconds. There are of course more elegant solutions but this one works for us for now, so let's stick with it.
On the board, we now have to make sense of this CAN frame. First, we wait (blocking) for a new frame; then we decode it and finally we translate it to the board LEDs:
    // blocking read - this is the code we loop
    if let Ok(frame) = block!(can.receive()) {
      // decode hour, minute from the CAN frame. there is only the one CAN
      // frame travelling on this bus, otherwise this code is more complex
      let (hour, minute) = match frame.data() {
        Some(data) => (data[0], data[1]),
        None => {
          defmt::error!("FATAL: unable to read time data");
          gridbox::exit();
        }
      };
      defmt::info!("received time: it is {}:{}", hour, minute);

      // reset word clock data
      reset_wclk(&mut wclk_data);

      match minute {
        0..=4 => set_word(&mut wclk_data, UHR, ON),
        5..=9 => {
          set_word(&mut wclk_data, FUENF, ON);
          set_word(&mut wclk_data, NACH, ON);
        }
        10..=14 => {
          set_word(&mut wclk_data, ZEHN, ON);
          set_word(&mut wclk_data, NACH, ON);
        }
        15..=19 => {
          set_word(&mut wclk_data, VIERTEL, ON);
          set_word(&mut wclk_data, NACH, ON);
        }
        20..=24 => {
          set_word(&mut wclk_data, ZWANZIG, ON);
          set_word(&mut wclk_data, NACH, ON);
        }
        25..=29 => {
          set_word(&mut wclk_data, FUENF, ON);
          set_word(&mut wclk_data, VOR, ON);
          set_word(&mut wclk_data, HALB, ON);
        }
        // ... it goes on here
      }
      // some more code
    }
The full code example is in the nerdclock subdirectory for you
to study.
And then, finally, let's see if it works!
(there should be a video shown here; if it isn't, find it here)
It does! Hurray!
With that Fun Thing™, we'll leave you for now. We hope you enjoyed this. And, if you did, please consider posting about it :) More soon!
Cheers!


