自己动手写一个 iOS 网络请求库(五)——设置 SSL 钢钉
代码示例:https://github.com/johnlui/Swift-On-iOS/blob/master/BuildYourHTTPRequestLibrary
开源项目:Pitaya,适合大文件上传的 HTTP 请求库:https://github.com/johnlui/Pitaya
这个系列的文章本已终结,现在续上,就是为了一个未来大家一定会越来越需要的功能:设置 SSL 证书钢钉。
说起来这个功能也很简单,在我们调用 HTTPS 协议的时候,事先把 SSL 证书存到 App 本地,然后在每次请求的时候都进行一次验证,避免中间人攻击(Man-in-the-middle attack)。同时,这个功能也是我们使用自签名证书时候必须的,因为系统默认会拒绝我们自己签名的不受信任的证书,导致连接失败。
废话不多说,我们进入正题。
证书获取
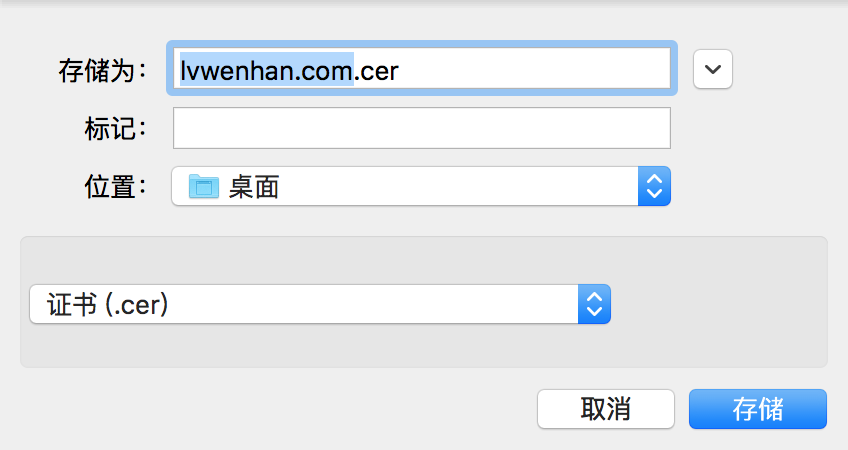
NSURLSession 支持 cer 格式的证书文件,而 Apache 和 Nginx 默认的证书都是 crt 格式,我们需要双击将其安装到系统中,再使用钥匙串 App 将这个证书导出为 cer 格式即可。


开搞
经过查询资料,发现 NSURLSession 提供了 SSL 证书处理的代理方法,我们需要对我们的 NetworkManager 类进行一点点改造。
自定义 session
如果想要调用到我们想要的代理方法,需要我们自定义一下 NSURLSession 对象:
var session: NSURLSession!
... ...

init(... ...) {
    ... ...
    super.init()
    self.session = NSURLSession(configuration: NSURLSession.sharedSession().configuration, delegate: self, delegateQueue: NSURLSession.sharedSession().delegateQueue)
}
实现代理
由于上面我们把 NSURLSession 的代理设置成了 self,所以现在我们要让 NetworkManager 类实现 NSURLSessionDelegate 这个 protocol。又由于 NSURLSessionDelegate 继承自 NSObjectProtocol,所以我们需要让 NetworkManager 继承自 NSObject 类:
class NetworkManager: NSObject, NSURLSessionDelegate {
... ...
实现代理方法
接下来我们就通过实现 SSL 证书检查的代理方法来干预网络请求了。
增加两个成员变量:
var localCertData: NSData!
var sSLValidateErrorCallBack: (() -> Void)?
增加设置他们的函数:
func addSSLPinning(LocalCertData data: NSData, SSLValidateErrorCallBack: (()->Void)? = nil) {
    self.localCertData = data
    self.sSLValidateErrorCallBack = SSLValidateErrorCallBack
}
实现代理方法,介入网络请求:
@objc func URLSession(session: NSURLSession, didReceiveChallenge challenge: NSURLAuthenticationChallenge, completionHandler: (NSURLSessionAuthChallengeDisposition, NSURLCredential?) -> Void) {
    if let localCertificateData = self.localCertData {
        if let serverTrust = challenge.protectionSpace.serverTrust,
            certificate = SecTrustGetCertificateAtIndex(serverTrust, 0),
            remoteCertificateData: NSData = SecCertificateCopyData(certificate) {
                if localCertificateData.isEqualToData(remoteCertificateData) {
                    let credential = NSURLCredential(forTrust: serverTrust)
                    challenge.sender?.useCredential(credential, forAuthenticationChallenge: challenge)
                    completionHandler(NSURLSessionAuthChallengeDisposition.UseCredential, credential)
                } else {
                    challenge.sender?.cancelAuthenticationChallenge(challenge)
                    completionHandler(NSURLSessionAuthChallengeDisposition.CancelAuthenticationChallenge, nil)
                    self.sSLValidateErrorCallBack?()
                }
        } else {
            NSLog("Get RemoteCertificateData or LocalCertificateData error!")
        }
    } else {
        completionHandler(NSURLSessionAuthChallengeDisposition.UseCredential, nil)
    }
}
至此,检测 SSL 证书的功能就做完了。接下来我们检验成果。
检验成果
『Thus, programs must be written for people to read, and only incidentally for machines to execute.』
——《Structure and Interpretation of Computer Programs 》 Harold Abelson
『代码是写给人看的,只是恰好能运行。』这句话出自大名鼎鼎的 SICP,出处:https://mitpress.mit.edu/sicp/front/node3.html
在搞完了这个功能之后,我突然发现我好像被 Alamofire 的 API 设计给带偏了:写起来方便是最不重要的,便于使用者理解才是最重要的。所以我打算杀掉所有疑似假装是奇技淫巧的集合型 API,改由纯粹的 构造对象->修改对象->发起请求 模式,降低使用者的理解成本。
我使用我的网站 lvwenhan.com 的证书来进行此次验证:
let network = NetworkManager(url: "https://lvwenhan.com/", method: "GET") { (data, response, error) -> Void in
    if let _ = error {
        NSLog(error.description)
    } else {
        print("证书正确!")
    }
}
let certData = NSData(contentsOfFile: NSBundle.mainBundle().pathForResource("lvwenhancom", ofType: "cer")!)!
network.addSSLPinning(LocalCertData: certData) { () -> Void in
    print("SSL 证书错误,遭受中间人攻击!")
}
network.fire()
return;
得到如下结果:

接下来把网址改成 https://www.baidu.com/,运行,查看结果:

搞定!
写在后面的话
本文中我只检测了经过第三方签名的受信任的 SSL 证书的检验结果,并没有测试自签名证书,希望有人测试之后把结果告诉我 :) 在文章下面评论或者上 Github 提 issue 都行~
《自己动手写一个 iOS 网络请求库》系列文章可能真的结束了,感谢你的阅读!
评论:


2016-12-12 15:06