Just for fun...
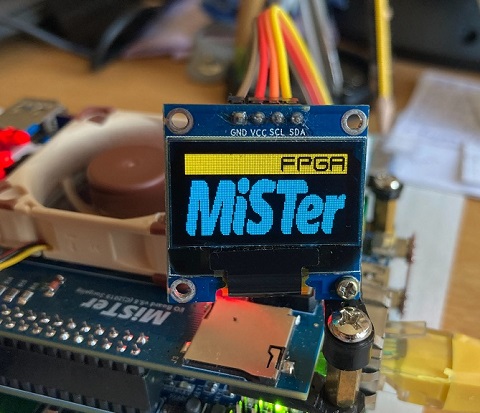
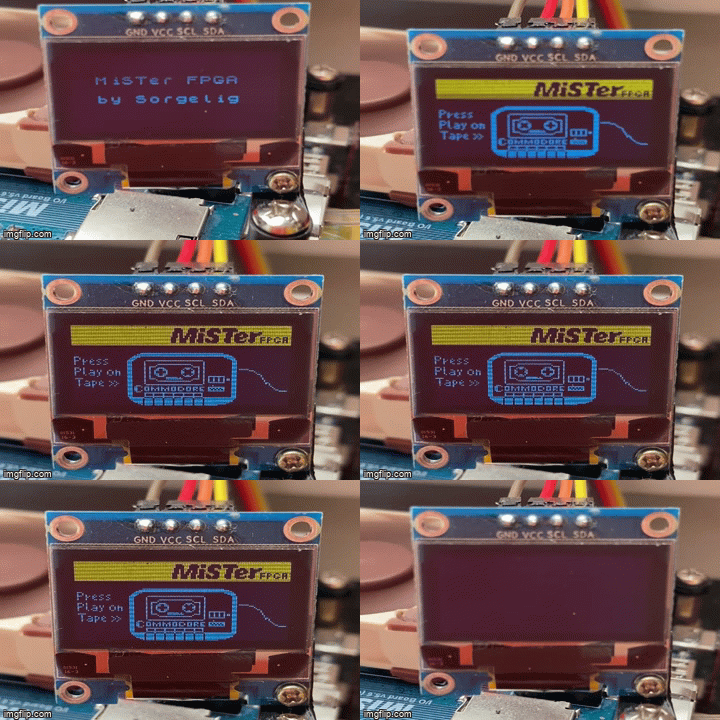
This Bash-Script-MiSTer-Add-On uses the DE10-Nano's i2c Interface to drive a small SSD1306 OLED Display
with 128x64 Pixel showing (currently only) Pictures or Text based on the running core.
Antonio Villena build IOBoards with such small OLED Displays and asked for support, so here we are 🙂
This Add-On uses the MiSTer's i2c Bus. Wrong usage can confuse the MiSTer's i2c Bus or worse!
You need to make sure you use the right i2c Bus as the MiSTer has more than one.
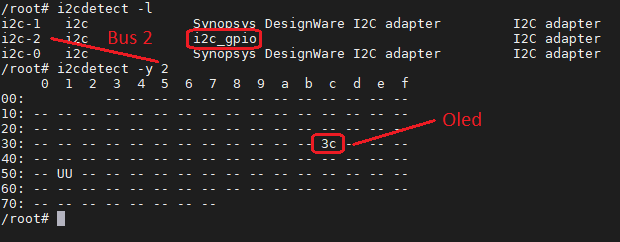
Use the command i2cdetect -l for detecting the correct i2c-Bus
and i2cdetect [I2CBUS] for detecting the correct i2c Address of your Display, normally 0x3C (Hex).
On my new DE10-Nano (LOT#0521) the correct I2CBUS Number is 2,
on my older DE10-Nano (LOT#0519) the correct I2CBUS Number is 1 also 2 (just checked).
Normally you get an error message if you try to run i2cdetect on the wrong Bus.
- The DE10-Nano Board
- An SSD1306 OLED Display with i2c Interface
- An i2c breakout (RTC Boards or IOBoards from Antonio Villena with builtin OLED's)
The i2c/SPI Header of the official RTC 1.3 Board has no Power Pin, only Data and GND if I am right.
Means you have to get the 3.3v Power from another Pin on the Board.
See Connection Scheme RTC v1.3 for some details.
I was sponsored by Antonio Villena with his RTC which has solder Pins for i2c and 3.3v Power.
NEW: Installer/Updater by OJAKSCH
Run the command
wget https://raw.githubusercontent.com/venice1200/MiSTer_i2c2oled/main/update_i2c2oled.sh -O /media/fat/Scripts/update_i2c2oled.sh
from the MiSTer's command line (F9) or from an SSH Session to download the i2c2oled install/update script to the MiSTer's Script Folder.
After the Script was downloaded, start it from the MiSTer's Script Menu, the MiSTer's command line (F9) or an SSH Session running the command /media/fat/Scripts/update_i2c2oled.sh.
All needed Files and Pictures are downloaded to the right places and the correct permissions are set.
Or (manually) check the Files&Folders Table below for which file needs to be placed in which folder on the MiSTer.
For Setting up the MiSTer for the Autostart Script of i2c2oled run once the command /media/fat/i2c2oled/S60i2c2oled setup
from cli or via ssh to enable Auto-Start of i2c2oled.
When the MiSTer boots up the script /media/fat/i2c2oled/S60i2c2oled is called.
This script does nothing more than calling the script /media/fat/i2c2oled/i2c2oled.sh
and sent it to the background, but only if /media/fat/i2c2oled/i2c2oled.sh is found and is executable.
The Script /media/fat/i2c2oled/i2c2oled.sh uses the Linux source command to load the Binary Coded Picture Data from file, if the core has changed.

The Script applies the i2c command i2cset to initialize the Display and send calculated Picture-Data to the Display.
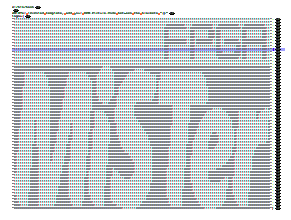
The used Black&White Pictures are slightly modfied X-PixMap (XPM) Pictures with 128x64 Pixel.
You can create X-PixMap Pictures with Gimp.
After you created the Black&White X-PixMap Picture...
🛠️ Use the XPMtoPIX conversion tool by MickGyver (need .NET Core Framework 3.1+). Many thanks 😃
or open it with an Text Editor, I use Notepad++, and do manually...
- Switch to Linux Line Ending (LineFeed only)
- Remove all text lines until the first Data Line which should contain a lot Dot's "." and Spaces like
"... . . . " - Add
#!/bin/bashas the new first line - Add
logo=(before the first " (double quote) so it should look likelogo=(" - Replace all Dot's "." with the Number "0"
- Replace all Spaces " " with the Number "1"
- Replace the ending
};with) - The filename must be the same as the name of the core plus
.pixas extension
Example: Corename = C64, Filename = C64.pix - Upload the File(s) to
/media/fat/i2c2oled_pix/on MiSTer - Have fun 😃
Check your PIX against the files in https://github.com/venice1200/MiSTer_i2c2oled/tree/main/Pictures/Pix for correct modification.
>> Please make your PIX available for others <<
| File/Folder | Description |
|---|---|
| S60i2c2oled [1] | Starter Script, must be placed in folder /media/fat/i2c2oled/ on MiSTer |
| i2c2oled.sh [1] | Communication Script, must be placed in folder /media/fat/i2c2oled/ on MiSTer |
| i2c2oled_slideshow.sh [1] | Slideshow Viewer, can be placed in folder /media/fat/i2c2oled/ on MiSTer |
| Pictures | Just Pictures |
| Pictures/Pix | modded X-PixMap Pictures, must be placed in folder /media/fat/i2c2oled/pix/ on MiSTer |
Notes
[1]
Do not forget to make the three Scripts executable after copying them to the MiSTer.
Use chmod +x [scriptname] for this.
sorgelig for his MiSTer
https://github.com/MiSTer-devel
Antonio Villena for his RTC Board with i2c connector
https://www.antoniovillena.es
MickGyver for his XPMtoPIX conversion Tool
https://github.com/MickGyver
The following website
https://stackoverflow.com/questions/42980922/which-commands-do-i-have-to-use-ssd1306-over-i%C2%B2c
for pointing me into the right direction.
Contributors:
marcelosofth
...and all I forgot.
MiSTer on Github: https://github.com/MiSTer-devel
MiSTer Forum: https://misterfpga.org
Add-On Thread : https://misterfpga.org/viewtopic.php?f=9&t=2476


