This page describes how to set up different security mechanisms in EHRbase and also provides some basic information on how to configure your external security servers.
The EHRbase Spring-Boot application can be configured to use different security mechanisms. They are used to allow access to all resources only to authenticated users to protect stored data from unauthenticated access.
A basic role system also defines permissions on different resources, e.g. the additional admin
endpoints are only accessible by users with the role admin configured.
By default EHRbase is started without security enabled (NONE) which will be reported by a message during
boot.
To enable authentication start the EHRbase application with environment variable AUTH_TYPE set
to the appropriate value or set the necessary data at one of the .yml files inside
{projectRoot}/application/src/main/resources/.
- None
- Basic auth
- Oauth2
The basic auth mechanism uses a predefined set of users and roles that will be configured during start of EHRbase by setting the data inside the environment variables or inside the .yml file as follows:
| ENV | .yml | Value to set | Default |
|---|---|---|---|
| SECURITY_AUTHTYPE | security.authType | BASIC | NONE |
| SECURITY_AUTHUSER | security.authUser | your username | ehrbase-user |
| SECURITY_AUTHPASSWORD | security.authPassword | Your password | SuperSecretPassword |
| SECURITY_AUTHADMINUSER | security.authAdminUser | Your admin username | ehrbase-admin |
| SECURITY_AUTHADMINPASSWORD | security.authAdminPassword | Your admin password | EvenMoreSecretPassword |
To access a resource from a client generate the Base64 encoded string of {username}:{password}
and add it in the Authorization header with Basic {Base64 encoded string}.
OAuth2 uses an external authentication server realm to authenticate a user and provide additional information about the role of each user.
To start EHRbase with OAuth2 support and configure the external server use one of the following configuration methods:
| ENV | .yml | Value to set | Default |
|---|---|---|---|
| SECURITY_AUTHTYPE | security.authType | OAUTH | NONE |
| SPRING_SECURITY_OAUTH2_RESOURCESERVER_JWT_ISSUERURI | spring.security.oauth2.resourceserver.jwt.issuer-uri | Your realm base url | https://localhost:8081/auth/realms/ehrbase |
The realm, client and all other settings must be done inside the corresponding authentication server. A basic example on how to do this with Keycloak from JBoss can be found in the appendix of this page.
The clients must be implemented / configured to use the external authentication server as well. There are multiple libraries for many frameworks available that can be used for this.
An example on how to use Postman with OAuth2 and Keycloak is available in the appendix of this page as well.
Keycloak is an OpenID Connect capable identity and access management server that has been tested with EHRbase. To get more information about this open source project go to https://www.keycloak.org/
In our examples we assume that you configured the Keycloak server at https://localhost:8081 and
a realm named ehrbase.
Change the example data as needed by your configuration.
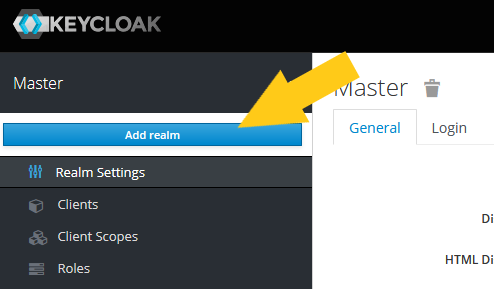
Step 1: Open the Keycloak interface and create a new Realm named ehrbase
Step 2: Enter the realm name
Step 3: Switch to Clients and hit the create button
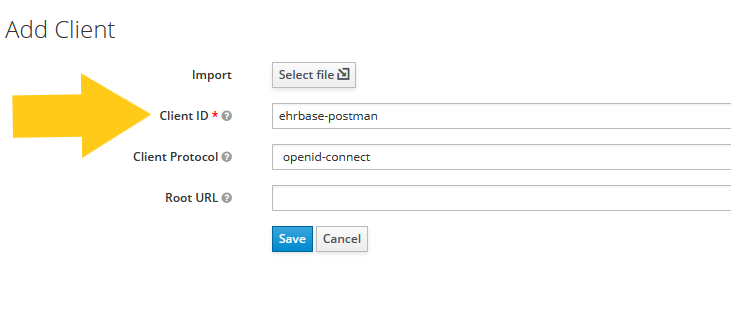
Step 4: Enter the client identifier
In this example we are creating a client for postman. You can add multiple clients for each application that you want to add and share identification information with.
Step 5: Set basic client data
Ensure that you set Access Type to public and add a Valid Redirect URL entry for each
EHRbase host you want to secure with the client. We have only one thus we set it to
https://localhost:8080/*
Step 6: Navigate to Mappers and create new mapper
Mappers are used to map the role information into the JWT that is used on the server to identify the user
Step 7: Enter name for new Mapper
The name is only used inside Keycloak to identify this mapper. You can use a name as you want. Ensure that the other values match the settings in the screenshot.
Step 8: Navigate to Roles and add a new role
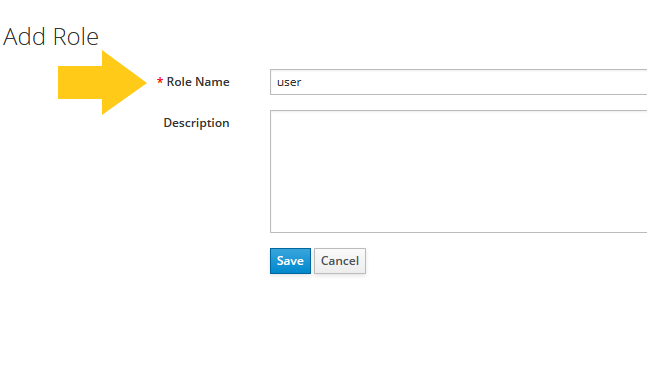
Step 9: Enter the name for user and admin roles
Do not use capital letters in role names since some clients are case-sensitive with the role name
Step 10: Navigate to users and create users as required
Step 11: Enter user name
Step 12: Set credentials for the new user
Ensure the password is entered twice and Temporary is set to Off.
After hitting Set Password an alert will open. Confirm the setting of the password.
Step 13: Assign roles for the user
You can assign multiple roles to each user as you need. Each time you assign or remove a role from a user the settings will be saved immediately.
You can add mutliple users for EHRbase as you need. For development purposes it is also imaginable that you only add a user with an user and an admin role. For production environments it is strictly recommended to use secure passwords and separate users for each role.
To use the EHRbase with the API develeopment tool Post you can use this instruction.
We assume that you set up the Keycloak as in the appendix for this howto.
Step 1: Open Authorization tab of Collection/Folder/Request
Step 2: Enter data of your Keycloak server
You can set a different name of the token to identify it later in Postman.
To get the URLs for Auth URL and Access Token URL you can open the following URL on your system
with the running Keycloak server: {https://localhost:8081}/auth/realms/{ehrbase}/.well-known/openid-configuration.
Adopt the name for your realm and the hostname:port as you configured it on your system.
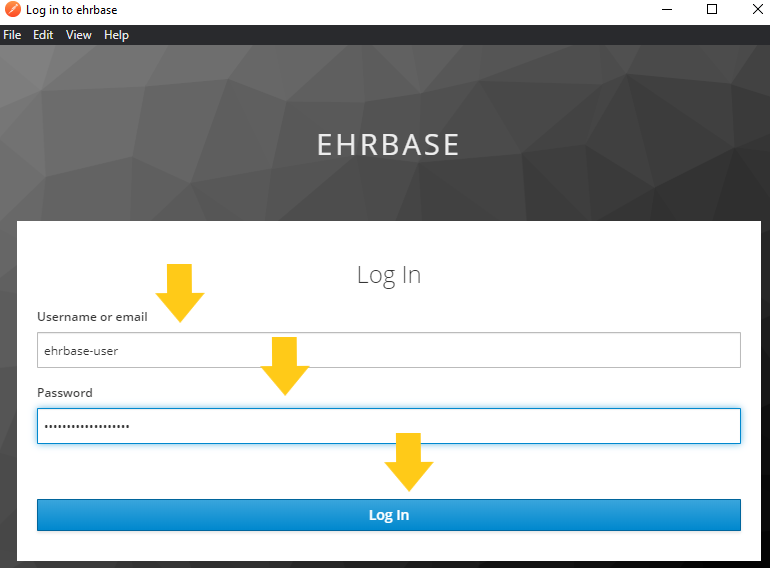
Step 3: Hit Request Token and enter user credentials
Step 4: Hit Use Token
Step 5: Save and use the credentials


