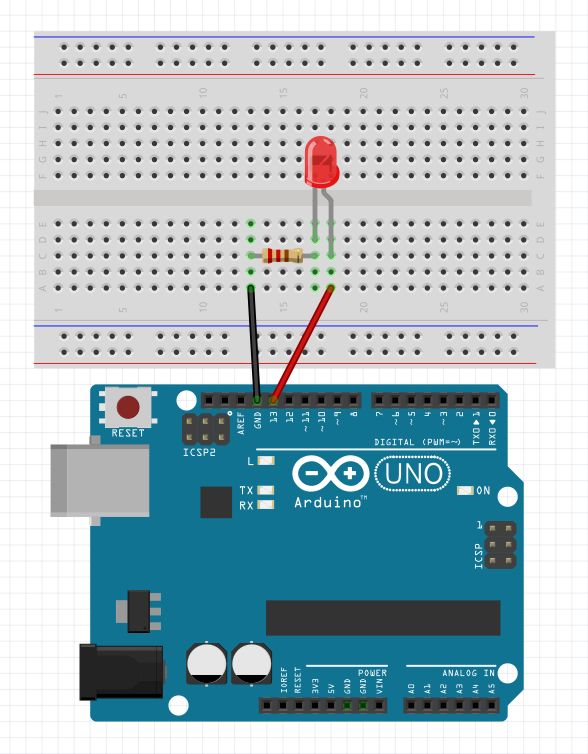
Arduino is a development board utilizing an AVR ATMEGA328 MCU (microcontroller). An MCU can't do much unless it's in a circuit.
The more professional option is to use a separate development board/launchpad for the MCUs. The idea is to plug in the MCU into it, program it, and take it out to be soldered in a circuit, rather than use the whole board like the Arduino.
Other popular microcontrollers: 8051, PIC, AVR, ARM, MSP
Microcontrollers have application specific small processing power while microprocessors have general purpose large processing power.
Microcontrollers have built in RAM, ROM and other peripherals in a single chip. Microprocessors have only the CPU, and other peripherals, RAM, ROM should be connected externally.
Unlike most previous programmable circuit boards, the Arduino does not need a separate piece of hardware (called a programmer) in order to load new code onto the board – you can simply use a USB cable.
The Arduino IDE uses a simplified version of C++.
Arduino basically works by setting something upfront once and then by trapping execution in an infinite loop.
The code will not compile without setup() and loop().
void setup() {
  // Setup code, run once
}

void loop() {
  // Main code, run repeatedly
}We can select the type of board we are working with at tools > board, or add ones with the boards manager.
We define the way we are connecting to the board via a port at tools > port. It changes each time the board is disconnected.
The code is compiled and uploaded into the chip via the USB cable. The built-in small LED light will blink in the frequency of the loop to indicate that it's working.
We can see what Arduino outputs via tools > serial monitor. If we are getting weird characters, we need to set the baud value to the correct one.
Instead of adding resistors manually, we can use the built-in functionality.
pinMode(button, INPUT_PULLUP)digitalWrite will set the specified pin to one of two states - HIGH/LOW, which equate to 5v (3.3v on some boards) and ground respectively.
analogWrite can vary by the type of output used. It will set the pin to a periodic high/low signal, where the percentage of the signal spent high is proportional to the value written. Ex. analogWrite(PIN, 255).
pinMode(buzzerPin, OUTPUT);
int LED = 12;

void setup() {
  pinMode(LED, OUTPUT);
}

void loop() {
  digitalWrite(LED, HIGH);
  delay(100);
  digitalWrite(LED, LOW);
  delay(100);
}int LED_RED = 12;
int LED_BLUE = 13;
int BUZZER = 10;
void setup() {
pinMode(LED_RED, OUTPUT);
pinMode(LED_BLUE, OUTPUT);
pinMode(BUZZER, OUTPUT);
}
void loop() {
tone(BUZZER, 200, 250);
digitalWrite(LED_RED, HIGH);
delay(500);
digitalWrite(LED_RED, LOW);
tone(BUZZER, 400, 250);
digitalWrite(LED_BLUE, HIGH);
delay(500);
digitalWrite(LED_BLUE, LOW);
}