USB MIDI is great but a real pain in the ass when you're away from a computer. This project aims to fix that by providing a cheap and simple way to DIY yourself out of the connection problem.
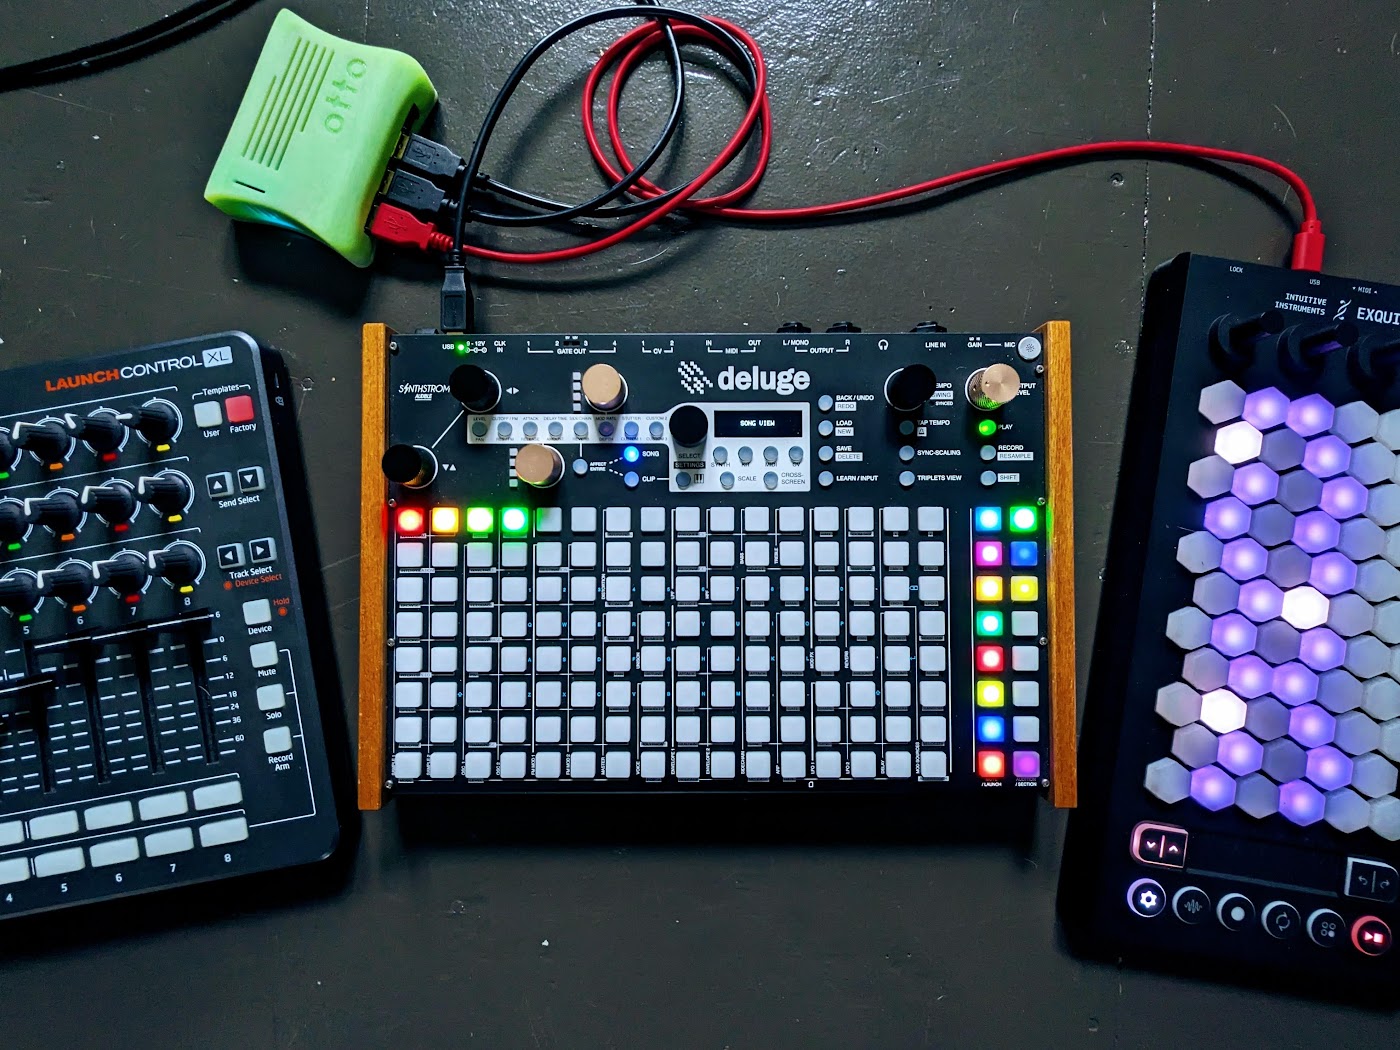
Otto automatically connects USB MIDI devices to each other while providing its own power. Use it to connect your MIDI controller and groovebox (OP1, Deluge, M8), your grooveboxes to each other (M8 and OP1, anyone?), or as the host to a larger setup. As Otto brings his own battery all you need is the devices and the same cables you'd use to connect them to your computer. Easy peasy.
The preconfigured image provided below should work on any Raspberry Pi capable of running the 32 bit/legacy Raspberry Pi OS.
I have been notified that the Geekworm X306 board has been updated to remove the USB ports and is no longer an option for this project. This will work with any USB/battery hat (or combination thereof) that can be used with a Raspberry Pi so if you find another battery and another USB hub or some combination of those you can still make something like this - just not with the housing I designed.
- Geekworm X306 USB Hub/UPS Expansion board for Raspberry Pi Zero W/2W
- Raspberry Pi Zero 2W or W
- 8GB or larger microSD card for preconfigured image (4GB required for manual setup)
- 18650 battery
- 3D printed housing (not required for functionality but maybe for the real world)
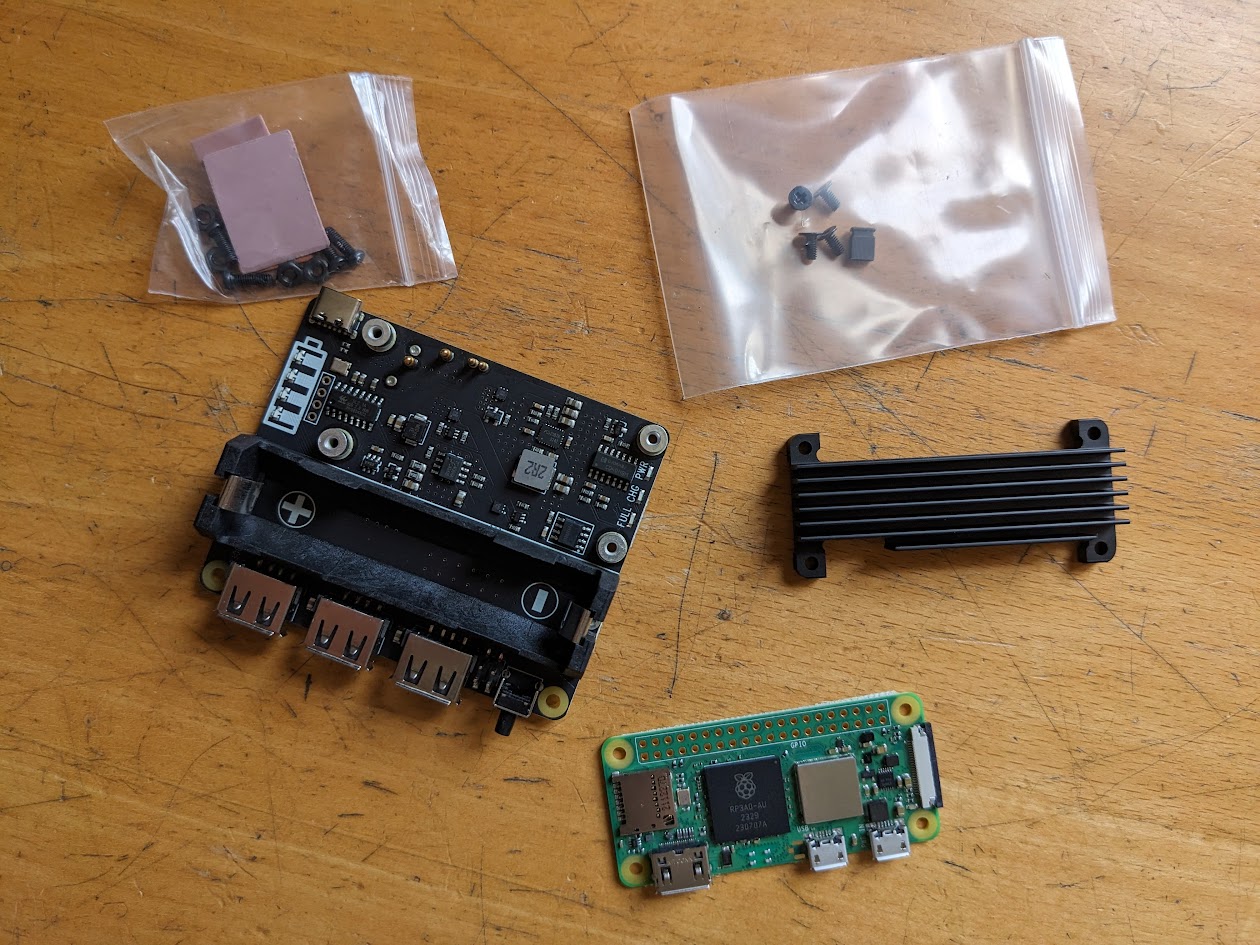
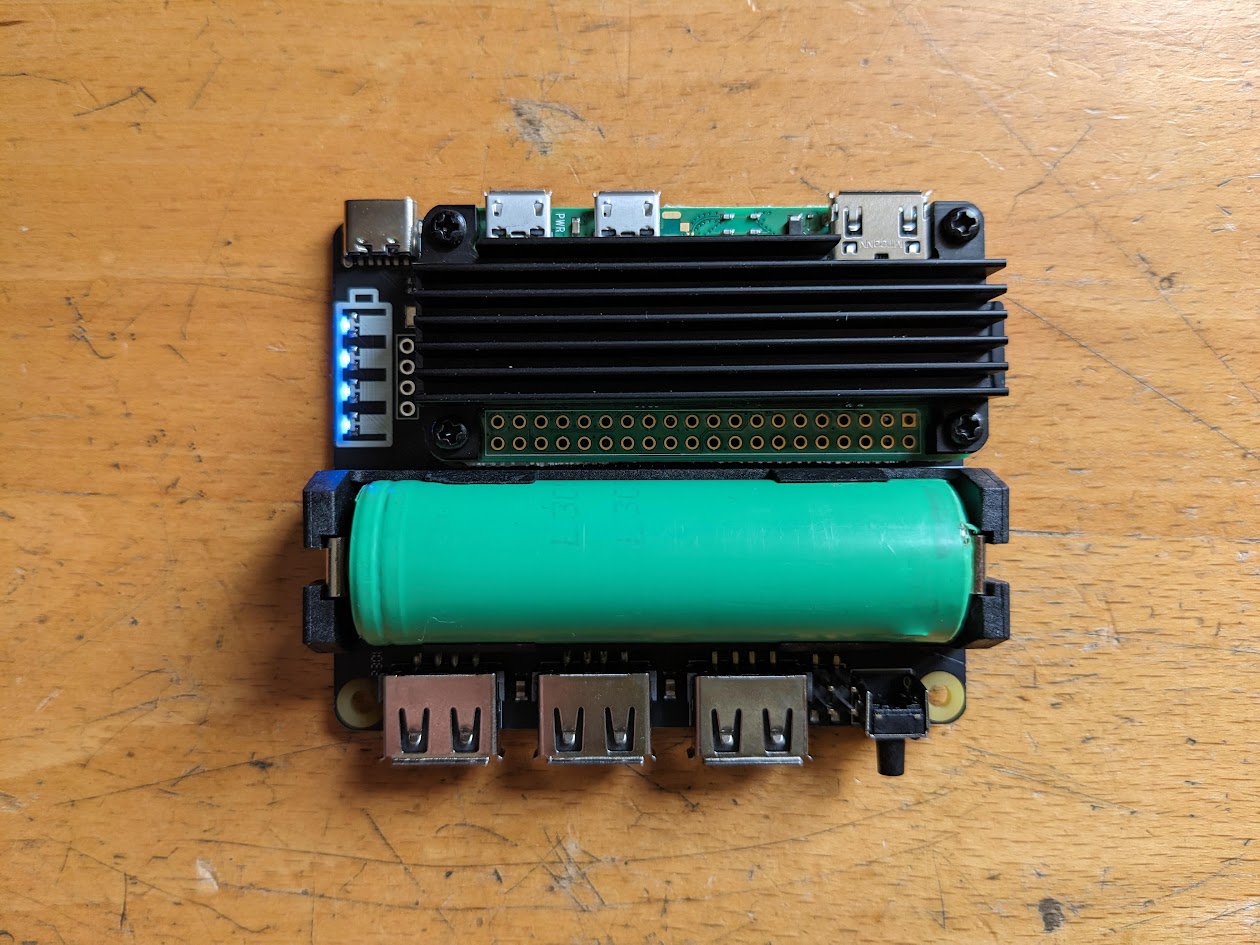
- Mount the heatsink to the Pi by cutting the thermal tape to the size of the SOC and using it to hold the heatsink in place.
- Mount the Pi to the X306 board (USB and HDMI ports pointed away from the battery) with the provided screws.
- Mount the battery.
- Install the X306 board in the housing, if you have decided to give Otto a home.
- Prepare the SD card, see card setup below.
You will need an 8GB or larger microSD card to use the preconfigured image, or 4GB or larger to manually set it up yourself. - Insert the microSD card into your completed Otto and power it on using the button on the front. You're ready to go!

Usage is straight forward. Turn the power on, wait ~10-30 seconds (depending on speed of SD card), plug in USB devices you'd like to connect and voila! Turn the device off when done, as you've set the SD to read only there's no need to do a full shut down.
Download the latest preconfigured image at this link.
This should work on any Raspberry Pi that can run a 32 Bit Raspberry Pi OS.
It has been tested on a Raspberry Pi Zero 2W as well as a Raspberry Pi 2B.
Extract the .img file from the zip and write it to an 8GB or larger microSD using Rufus or Win32 Disk Imager for Windows, or dd on linux/mac.
If you don't want to use the preconfigured image above you can set this up manually.
Steps are taken from this guide for Orange Pi and this guide for Raspberry Pi 3/4:
- Download the Raspberry Pi Imager and set up the SD card. Choose the 32bit Bookworm lite image (no desktop is needed). You will need to enter in a username/password, set up wifi, and enable SSH access (on the second tab) in order to finish the setup. Setting the hostname can also be helpful.
- Insert the SD in your assembled Otto and boot it up. It will take some time to connect to your WIFI, you can watch your router's DHCP logs to see what IP it pulls or try to ping the hostname you set until you see a response.
- Connect to the Pi using SSH
- Perform
sudo apt updateandsudo apt upgradeto update all current packages - Perform
sudo apt install git rubyto install required packages - Create and edit the connection script
sudo nano /usr/local/bin/connectall.rb
Paste the following code as the contents:
#!/usr/bin/ruby
#

t = `aconnect -i -l`
ports = []
t.lines.each do |l|
  /client (\d*)\:/=~l
  port = $1
  # we skip empty lines and the "Through" port
  unless $1.nil? || $1 == '0' || /Through/=~l
    ports << port
    #names << name
  end
end

ports.each do |p1|
  ports.each do |p2|
    unless p1 == p2 # probably not a good idea to connect a port to itself
      system  "aconnect #{p1}:0 #{p2}:0"
    end
  end
end
- Save and exit the file (Ctrl+X, then Y, then enter)
- Set permissions on the file
sudo chmod +x /usr/local/bin/connectall.rb - Connect one or more USB devices to otto and issue
connectall.rbto perform a test connection
Check the results withaconnect -l, it should show connected devices - Create a udev rule to run the script when USB devices are connected
sudo nano /etc/udev/rules.d/33-midiusb.rules
Paste the following as contents:
ACTION=="add|remove", SUBSYSTEM=="usb", DRIVER=="usb", RUN+="/usr/local/bin/connectall.rb"
- Restart the udev service to enable
sudo udevadm control --reloadandsudo service udev restart - Create a systemd service to configure any attached devices at boot
sudo nano /lib/systemd/system/midi.servicePaste the following as contents:
[Unit]
Description=Initial USB MIDI connect

[Service]
ExecStart=/usr/local/bin/connectall.rb

[Install]
WantedBy=multi-user.target
- Reload the systemctl daemon
sudo systemctl daemon-reload - Enable
sudo systemctl enable midi.servicethe service. - Reboot the device
sudo reboot
At this point USB MIDI routing should be working as expected, you can plug and unplug devices as desired and they should be automatically connected to each other.
In order to prevent SD card corruption you will want to set it up as read-only.
- Reconnect to the device via SSH
- Clone the rpi-readonly git
git clone https://gitlab.com/larsfp/rpi-readonly - Enter the directory
cd rpi-readonlyand run the setupsudo ./setup.sh
When setup is complete your install will be set to read only mode. You are now ready to make music!
If you want to make changes in the future you can turn read/write mode on with the command rw
When done making changes you can turn read-only mode back on using the command ro