A guide for using CNDI to deploy a GitOps enabled Airflow cluster on Kubernetes in Local DEV enviroment
This walkthough uses cndi to customize and deploy our dev/airflow Template.
In just a few minutes we will be able to deploy a new Kubernetes cluster to DEV
that has been optimally configured for Airflow, including GitOps with Secrets
management, right out-of-the-box. This framework will enable quick iteration of
infrastructure, applications and manifests in a GitHub workflow you are already
comfortable with.

You will need the following things to get up and running with cndi successfully:
-
Multipass: Download Multipass for Windows, Linux or Mac
-
A GitHub account: cndi helps you manage the state of your infrastructure using a GitOps workflow, so you'll need a GitHub account with a valid GitHub Personal Access Token.
Installing for macOS and Linux is the way to go if you have that option. Simply run the following:
curl -fsSL https://raw.githubusercontent.com/polyseam/cndi/main/install.sh | shInstalling for Windows should be just as easy. Here is the command to install CNDI on Windows:
irm https://raw.githubusercontent.com/polyseam/cndi/main/install.ps1 | iexCNDI is designed around a GitOps workflow, so all of your cluster configuration and infrastructure will be stored as code within a git repo, let's create that now!
gh repo create my-cndi-cluster --private --clone && cd my-cndi-clusterNow that we have a repo, let's use cndi to generate all of our Infrastructure
as Code and Cluster Configuration:
cndi init --interactiveYou will get an interactive prompt where you'll name your project, then one to specify the CNDI template you want.
For this project select the dev/airflow Template.
? Pick a template
   dev/basic
   gce/basic
   avm/basic
 ❯ dev/airflow
   avm/airflow
   gce/airflow
Below is the list of all of the interactive prompt values that should be supplied for this project:
- Cndi Project Name: name of project
- Template: list of templates to choose from
- GitHub Username: a user's handle on GitHub.
- GitHub Repository URL: the url for the GitHub repository that will hold all cluster configuration
- GitHub Personal Access Token: the access token CNDI will use to access your repo for cluster creation and synchronization
- Git Username for Airflow DAG Storage: a user's handle on GitHub used to synchronize Airflow DAGs
- Git Password for Airflow DAG Storage: a personal access token used to synchronize Airflow DAGs
- Git Repo for Airflow DAG Storage: url for repo where your Airflow DAGs will be stored
- Username you want to use for airflow cnpg database: username you want to use for airflow database
- Password you want to use for airflow cnpg database: password you want to use for airflow database
- Name of the postgresql database you want to use for airflow cnpg database: name of the postgresql database you want to use for airflow cnpg database
This process will generate a cndi_config.yaml file, and cndi directory at
the root of your repository containing all the necessary files for the
configuration. It will also store all the values in a file called .env at the
root of your repository.
The structure of the generated CNDI project will be as follows:
├── 📁 cndi
│   ├── 📁 cluster_manifests
│   │   ├── 📁 applications
│   │   │   └── airflow.application.json
│   │   ├── argo-ingress.json
│   │   ├── cert-manager-cluster-issuer.json
│   │   └── git-credentials-secret.json
│   └── 📁 terraform
│       ├── airflow-dev-node.cndi-node.tf.json
│       └── etc
├── cndi_config.yaml
├── .env
├── .gitignore
├── .github
└── README.md
For a breakdown of all of these files, checkout the outputs section of the repo's main README.
Once all the config is created and environment variables are uploaded to GitHub, add, commit and push the config to your GitHub repository:
git add .
git status # take a quick look and make sure these are all files you want to push
git commit -m "initial commit"
git push --set-upstream origin main
cndi run
Two actions will take place
-
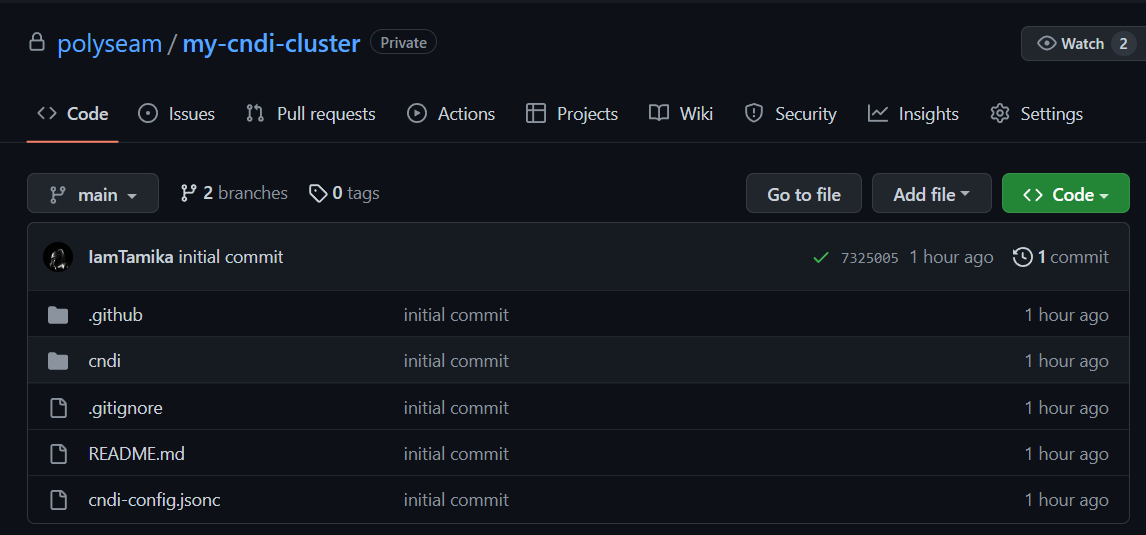
You should now see the cluster configuration has been uploaded to GitHub:
-
The terminal will show the clsuter being created and it will also output the instructions on how to access the argocd ui
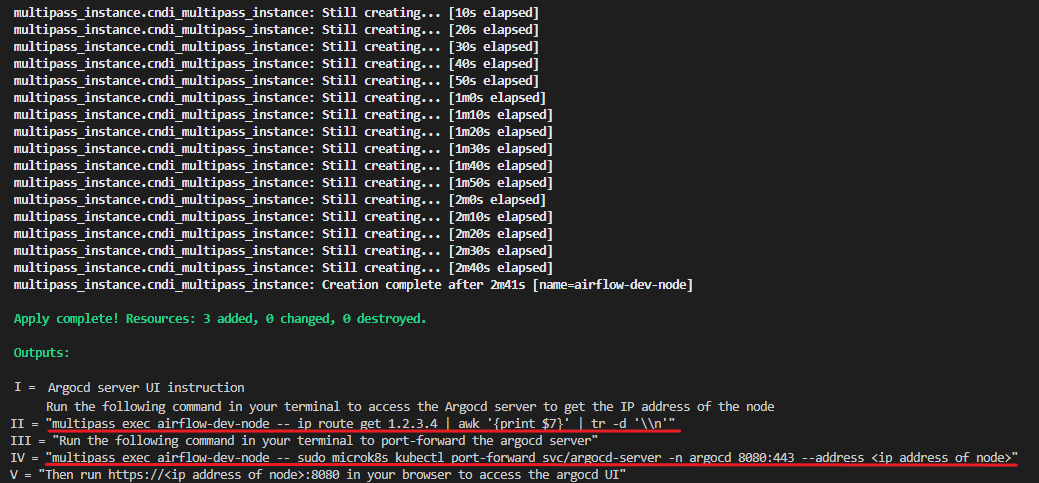


Now, you need to set up port forwarding to access the argocd and airflow web server from your local machine. Open a new terminal on your local machine (not within the Multipass instance) and run the following command to display the IP address of the dev Multipass instance.
multipass exec ${node.name} -- ip route get 1.2.3.4 | awk '{print $7}' | tr -d '\\n'
In the terminal on your local machine, run the port forward command using the IP address obtained from the previous step:
multipass exec ${node.name} -- sudo microk8s kubectl port-forward
svc/argocd-server -n argocd 8080:443 --address <ip address of node>
Using the web browser on your local machine, now access Argocd by navigating to http:https://:8080

To log in, use the username admin and the password which is the value of the
ARGOCD_ADMIN_PASSWORD in the .env located in your CNDI project folder


Notice once inside the Argocd UI that the cluster_manifests in the GitHub
repository matches config in the ArgoCD UI
└── 📁 cndi
   └── 📁 cluster_manifests
       ├── 📁 applications
       │   └── airflow.application.json
       └────── git-credentials-secret.json
Verify all applications and manifests in the GitHub repository are present and their status is healthy in the ArgoCD UI

To do this, the user can simply go to the go to the argocd UI and check Airflow status or they can can try to port forward the Airflow webserver and see if they can see Airflow's login page. The command to port forward the airflow ui is:
multipass exec ${node.name} -- sudo microk8s kubectl port-forward
svc/airflow-webserver -n airflow 8081:8080 --address <ip address of node>
Using the web browser on your local machine, now access Airflow by navigating to http:https://:8081
The default username is admin and the password is admin. If the page is
accessible, then the user can log in and begin using Airflow. If not, the user
wait, should go back and make sure the previous steps were was done correctly.

Verify that Airflow is connected to the private DAG repository. If correct, the private DAGs should be visible on the Airflow UI. If not,you should go back and make sure that the private DAG repository is properly connected to Airflow with the correct credentials:

You now have a fully-configured single node Kubernetes cluster with Airflow and Argocd
If you just want to take down any of your individual applications:
- Delete that application or manifest from your
cndi_config.yaml - Run
cndi ow - Commit changes
- Push your code changes to the repository
If you want to take down the entire cluster run:
cndi destroy