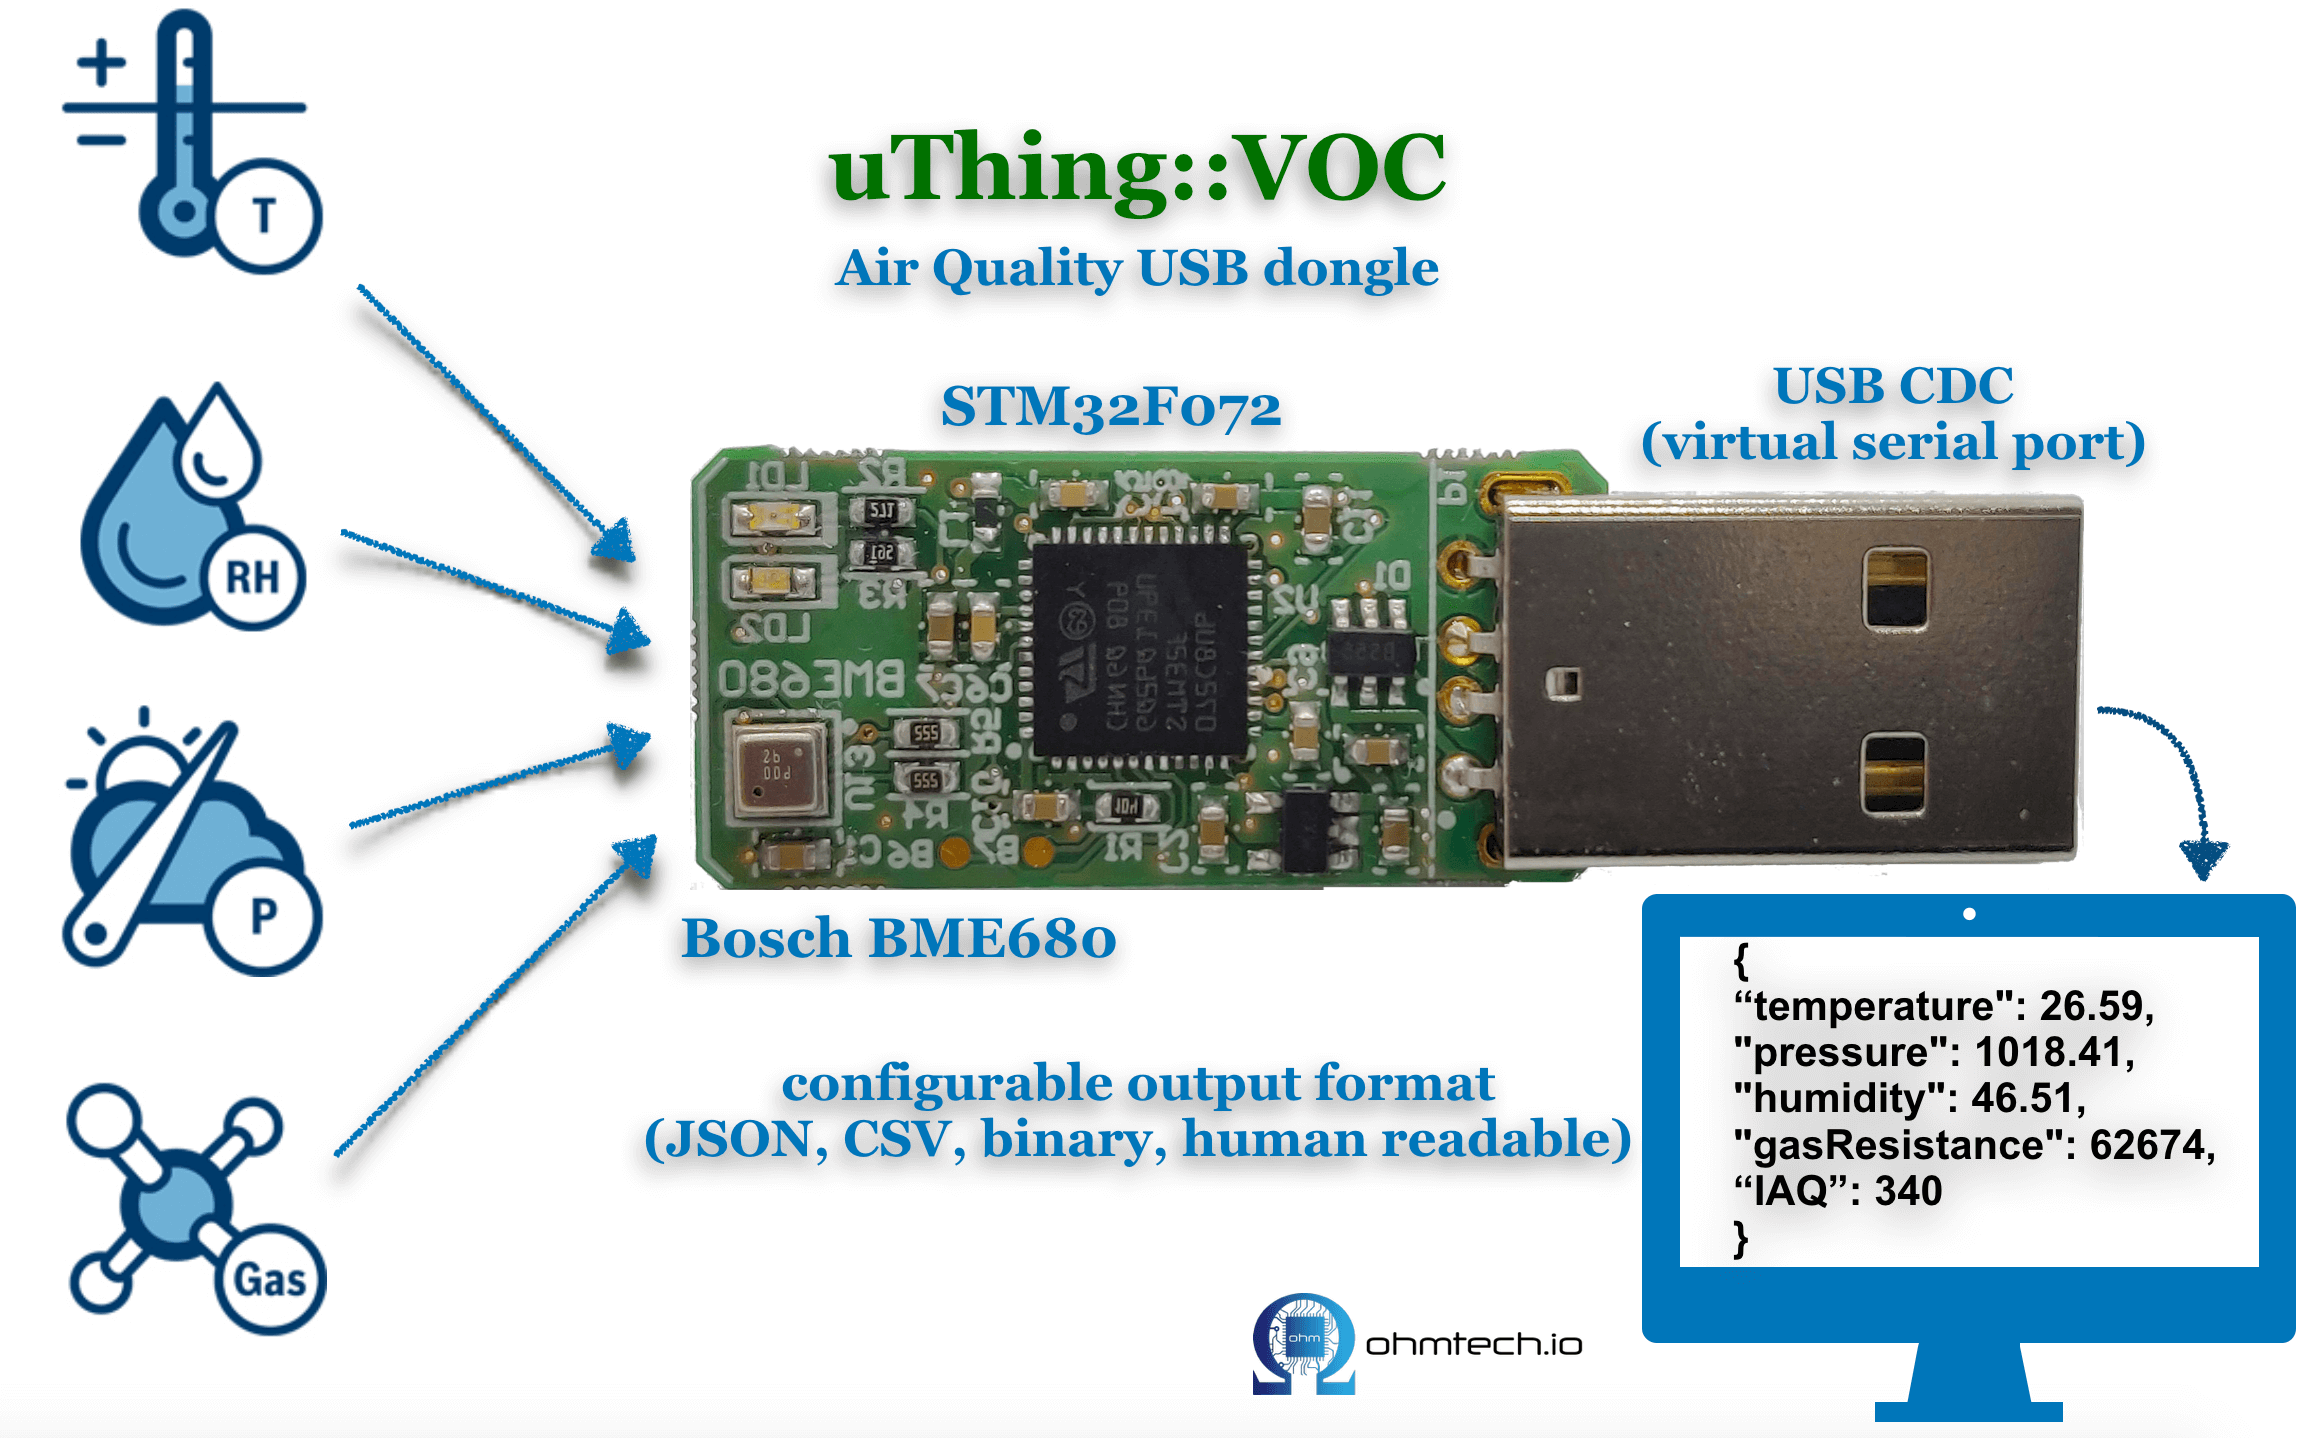
Notes:
- The hardware Schematics and design files can be found here: https://github.com/ohmtech-io/uThingVOC-PCB.git
- The assembled boards can be obtained at the Tindie store: https://www.tindie.com/products/damancuso/uthingvoc/
-
Get the ARM-GCC compiler for your platform.
Although different versions of the ARM-GCC compiler may work correctly, the prototype was developed and tested using the gcc-arm-none-eabi-8-2018-q4-mayor version, available in the ARM website: https://developer.arm.com/open-source/gnu-toolchain/gnu-rm/downloads.
-
Change the GCC_PATH path on the Makefile with your toolchain's location.Alternatively, compile adding the GCC_PATH to the make command (
make GCC_PATH="/gcc-arm-path") or add it as environment variable.
The Bosch Sensortec BSEC library is provided as a closed source binary file upon acceptance of a license agreement.
Therefore the user needs to read the license and download the library here: https://www.bosch-sensortec.com/bst/products/all_products/bsec
The initial revision of uThing::VOC uses the BSEC version v1.4.7.1 | Sept. 18th, 2018.
After download, locate the appropriate version of the binary file for the Lite version.
The file can be found under the following path:
DownloadedPackage/algo/bin/Lite_version/Cortex_M0/libalgobsec.a
Then copy the library into the project source as:
uThingVOC/Middlewares/Bosch/libalgobsec.a
make clean && make
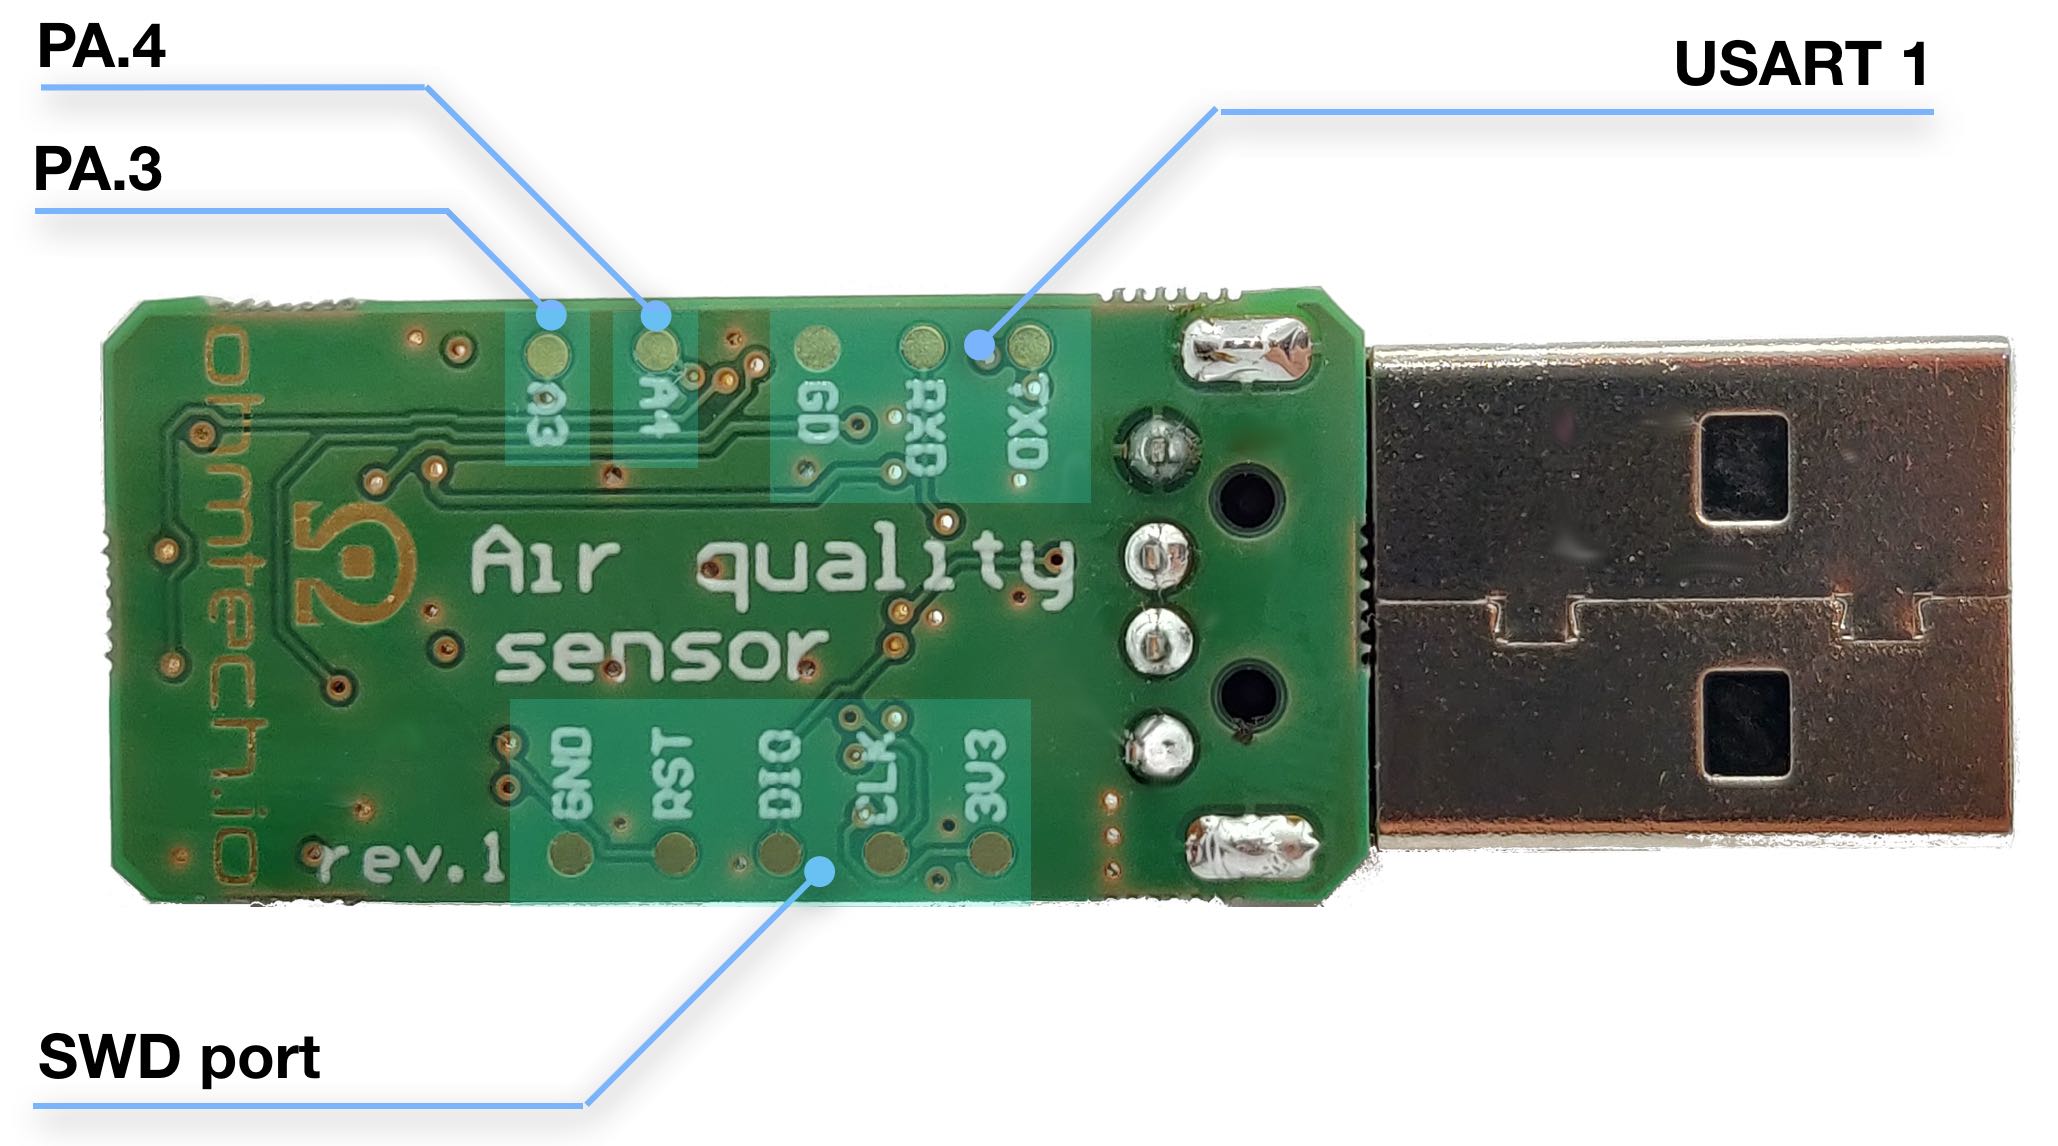
Note: There is a macro which enable/disable printing debug information (using it as UartLog()) often useful for development while monitoring the USART1 TX pad on the board bottom side. To enable it, compile with:
make DEBUG=1
In this case, it's necessary to solder the correspondent signals to the SWD port on the board bottom (do not forget to connect the 3V3 power signal or JLink won't detect the target).
make flash
Note: Different debug probes could be used (as the ones based on FT2232/OpenOcd or ST-Link).
If the intention is to simply update the firmware, or just program a slightly modified version without the need for extensive debugging / testing, the MCU can be re-flashed via the USB port by using the on-board USB-DFU capability.
The programming process via USB requires two steps:
-
Booting the dongle into USB-DFU mode:
The MCU has a special Bootloader in ROM memory, which provides the functionality of DFU. In order to start this process, the MCU has to be reset into this DFU-Bootloader mode. This is accomplished by powering-up the device while holding the BOOT0 line (pin #44) into logic-high level (3.3V / VCC).
To do this, unplug the dongle, hold a jumper (conductive material, like a piece of wire, screwdriver, paper-clip, etc.) between the VCC and BOOT0 pins with the precaution of not short-circuit any other pin, and plug the device into the USB while shorting these 2 pins. In this case, both status LEDs should stay OFF. The jumper can be then released.
To verify if the Bootloader enumerated the MCU this time as a USB-DFU capable device, use the command
lsusb.This is the displayed information in MacOS:
Bus 020 Device 008: ID 0483:df11 STMicroelectronics STM32 BOOTLOADER Serial: FFFFFFFEFFFFIn a Debian distribution:
Bus 001 Device 004: ID 0483:df11 STMicroelectronics STM Device in DFU ModeIn Windows, the Device Manager shows a “STM Device in DFU Mode” under USB devices.
-
The DFU-UTIL command:
DFU-UTIL is a CLI application available for MacOS, Linux and Windows. In the Unix-based systems it’s available in the usual packet managers (Homebrew, apt-get, etc.). The version v0.9 is the latest one at the moment of writing and it’s been tested successfully on Debian16 and MacOS.
To perform the firmware programming, issue the following command, where “USBthingVOC.bin” is the application to flash in .bin format (no HEX or ELF supported):
dfu-util -a 0 -D USBthingVOC.bin --dfuse-address 0x0800C000 -d 0483:df11Note: In Linux, the dfu-util may need to be run as root, or a udev rule and permissions should be added.
Finished board. Note the extra exposed GPIO pads: some expose ADC channels, UARTs or PWM outputs. Check the uThing::VOC or STM32F072CB datasheets for more info.
Please let us know if you find this project interesting, you would like to see more features or just tell us for what you'll use it at [email protected]. For bug reports just open a new issue.
If you like the project please share and follow us on Tweeter :)
MIT License
Copyright (c) 2019 Daniel Mancuso - OhmTech.io
Permission is hereby granted, free of charge, to any person obtaining a copy of this software and associated documentation files (the "Software"), to deal in the Software without restriction, including without limitation the rights to use, copy, modify, merge, publish, distribute, sublicense, and/or sell copies of the Software, and to permit persons to whom the Software is furnished to do so, subject to the following conditions:
The above copyright notice and this permission notice shall be included in all copies or substantial portions of the Software.
THE SOFTWARE IS PROVIDED "AS IS", WITHOUT WARRANTY OF ANY KIND, EXPRESS OR IMPLIED, INCLUDING BUT NOT LIMITED TO THE WARRANTIES OF MERCHANTABILITY, FITNESS FOR A PARTICULAR PURPOSE AND NONINFRINGEMENT. IN NO EVENT SHALL THE AUTHORS OR COPYRIGHT HOLDERS BE LIABLE FOR ANY CLAIM, DAMAGES OR OTHER LIABILITY, WHETHER IN AN ACTION OF CONTRACT, TORT OR OTHERWISE, ARISING FROM, OUT OF OR IN CONNECTION WITH THE SOFTWARE OR THE USE OR OTHER DEALINGS IN THE SOFTWARE.


