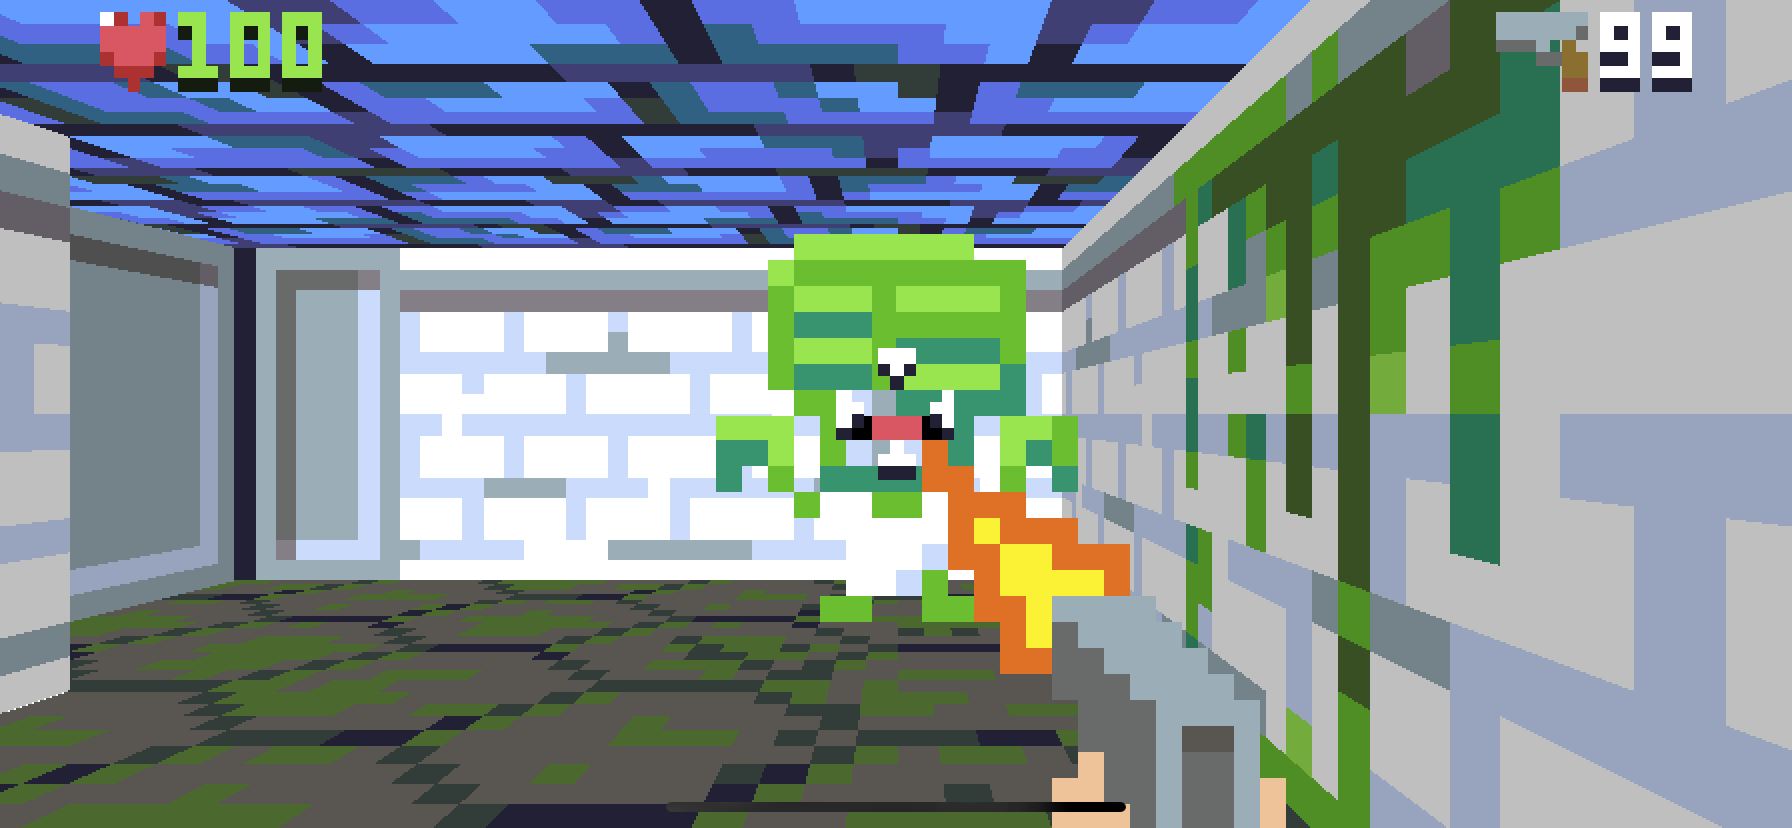
In Part 16 we added a heads-up display showing the user health and ammo. You can find the complete source code for Part 16 here.
Now that we have some in-game UI, what about pre-game UI? It's time for us to turn our attention to the title screen.
So far, all of the logic in the game has been managed by the game's World object. The world is a model of everything that happens inside the environment of a level. We've even extended the world with some objects that arguably fall slightly outside of that scope - such as the effects array that models transitions between levels. But incorporating the title screen into the World object seems like a step too far.
Let's introduce a new object called Game. The Game object will manage the higher-level interactions with the game that exist outside of the game world, such as the title screen and menus, leaving World to focus on managing what happens in the virtual universe of the game itself.
Add a new file to the Engine module called Game.swift, with the following contents:
public struct Game {
    public let levels: [Tilemap]
    public private(set) var world: World

    public init(levels: [Tilemap]) {
        self.levels = levels
        self.world = World(map: levels[0])
    }
}
We've made a lot of use of state machines in the game so far, for managing things like monster AI or animations. But we can think of the entire game as a sort of state machine, which is either playing (when the game is running, and the player is interacting with the world) or not (such as when we are looking at the title screen, and the world doesn't really exist yet).
Add the following enum to the top of the Game.swift file:
public enum GameState {
    case title
    case playing
}
Then add a state property to the game object itself:
public struct Game {
    public let levels: [Tilemap]
    public private(set) var world: World
    public private(set) var state: GameState = .title
}
Since World is now wrapped inside Game, we will need to proxy the communications between ViewController and World. This is an opportunity to bring some of the increasingly complex logic inside ViewController.update() out of the platform layer and into the game engine itself.
In Part 12, we added the WorldAction enum as a way to pass messages back from World to the platform layer. If you recall, we couldn't use the traditional delegation pattern because of the overlapping access problem, but that issue doesn't apply to communications between ViewController and Game, as it doesn't have the same mutation constraints.
Add the following protocol declaration to the top of the Game.swift file:
public protocol GameDelegate: AnyObject {
    func playSound(_ sound: Sound)
    func clearSounds()
}
Next, add a new property to the top of the Game struct:
public weak var delegate: GameDelegate?Then add the following code at the bottom of the Game.swift file:
public extension Game {
    mutating func update(timeStep: Double, input: Input) {
        guard let delegate = delegate else {
            return
        }

        // Update state
        switch state {
        case .title:

        case .playing:

        }
    }
}
To keep things simple, when Game is in the title state we'll just wait until the player presses fire to begin. Add the following code inside case .title::
if input.isFiring {
    state = .playing
}
Once the game enters the playing state, the World object will take over. But since World is now wrapped inside Game, we will need to proxy its communications with ViewController. This is an opportunity to bring some of the increasingly complex logic inside ViewController.update() out of the platform layer and into the game engine itself.
Add the following lines inside case .playing::
if let action = world.update(timeStep: timeStep, input: input) {
    switch action {
    case .loadLevel(let index):
        let index = index % levels.count
        world.setLevel(levels[index])
        delegate.clearSounds()
    case .playSounds(let sounds):
        sounds.forEach(delegate.playSound)
    }
}
Now we'll need to make some changes in ViewController.swift to actually make use of the Game object. Start by adding the following code to the bottom of the file:
extension ViewController: GameDelegate {
    func playSound(_ sound: Sound) {
        DispatchQueue.main.asyncAfter(deadline: .now() + sound.delay) {
            guard let url = sound.name?.url else {
                if let channel = sound.channel {
                    SoundManager.shared.clearChannel(channel)
                }
                return
            }
            try? SoundManager.shared.play(
                url,
                channel: sound.channel,
                volume: sound.volume,
                pan: sound.pan
            )
        }
    }

    func clearSounds() {
        SoundManager.shared.clearAll()
    }
}
This conforms ViewController to the GameDelegate protocol. Next, replace the following line in ViewController:
private let levels = loadLevels()
private lazy var world = World(map: levels[0])
with:
private var game = Game(levels: loadLevels())We'll need to set self as the game delegate, but we can't do it here because self isn't available yet. Instead, add the following line to the end of the viewDidLoad() method:
game.delegate = selfWe've moved the sound playback logic into the delegate methods, and the level management into Game.update(), so now we can replace the following, complicated block of code in ViewController.update():
if let action = world.update(timeStep: timeStep / worldSteps, input: input) {
    switch action {
    case .loadLevel(let index):
        SoundManager.shared.clearAll()
        let index = index % levels.count
        world.setLevel(levels[index])
    case .playSounds(let sounds):
        for sound in sounds {
            DispatchQueue.main.asyncAfter(deadline: .now() + sound.delay) {
                guard let url = sound.name?.url else {
                    if let channel = sound.channel {
                        SoundManager.shared.clearChannel(channel)
                    }
                    return
                }
                try? SoundManager.shared.play(
                    url,
                    channel: sound.channel,
                    volume: sound.volume,
                    pan: sound.pan
                )
            }
        }
    }
}
with just:
game.update(timeStep: timeStep / worldSteps, input: input)You'll also need to replace any remaining references to world with game.world.
Now try running the game. You should see the same starting room as always, but with one small difference: The monster doesn't attack - and won't - until you tap the screen[1].
The title state logic is working, it's just behaving more like a pause function than a title screen right now. To actually implement a separate screen, we'll need to update Renderer. But first, we'll need to add some new image assets.
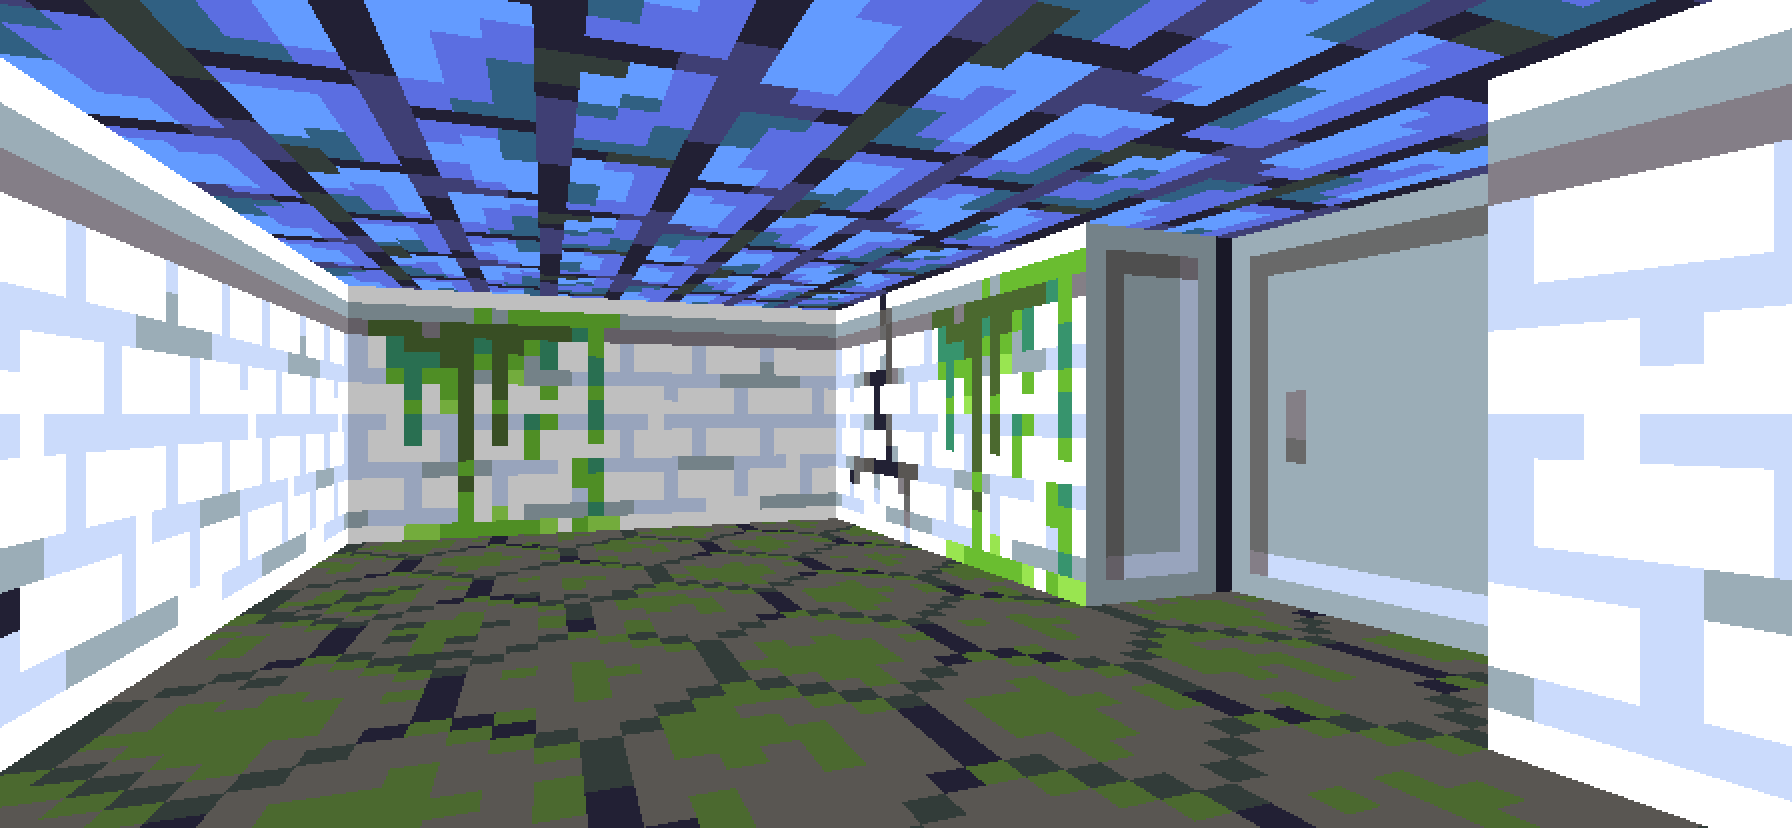
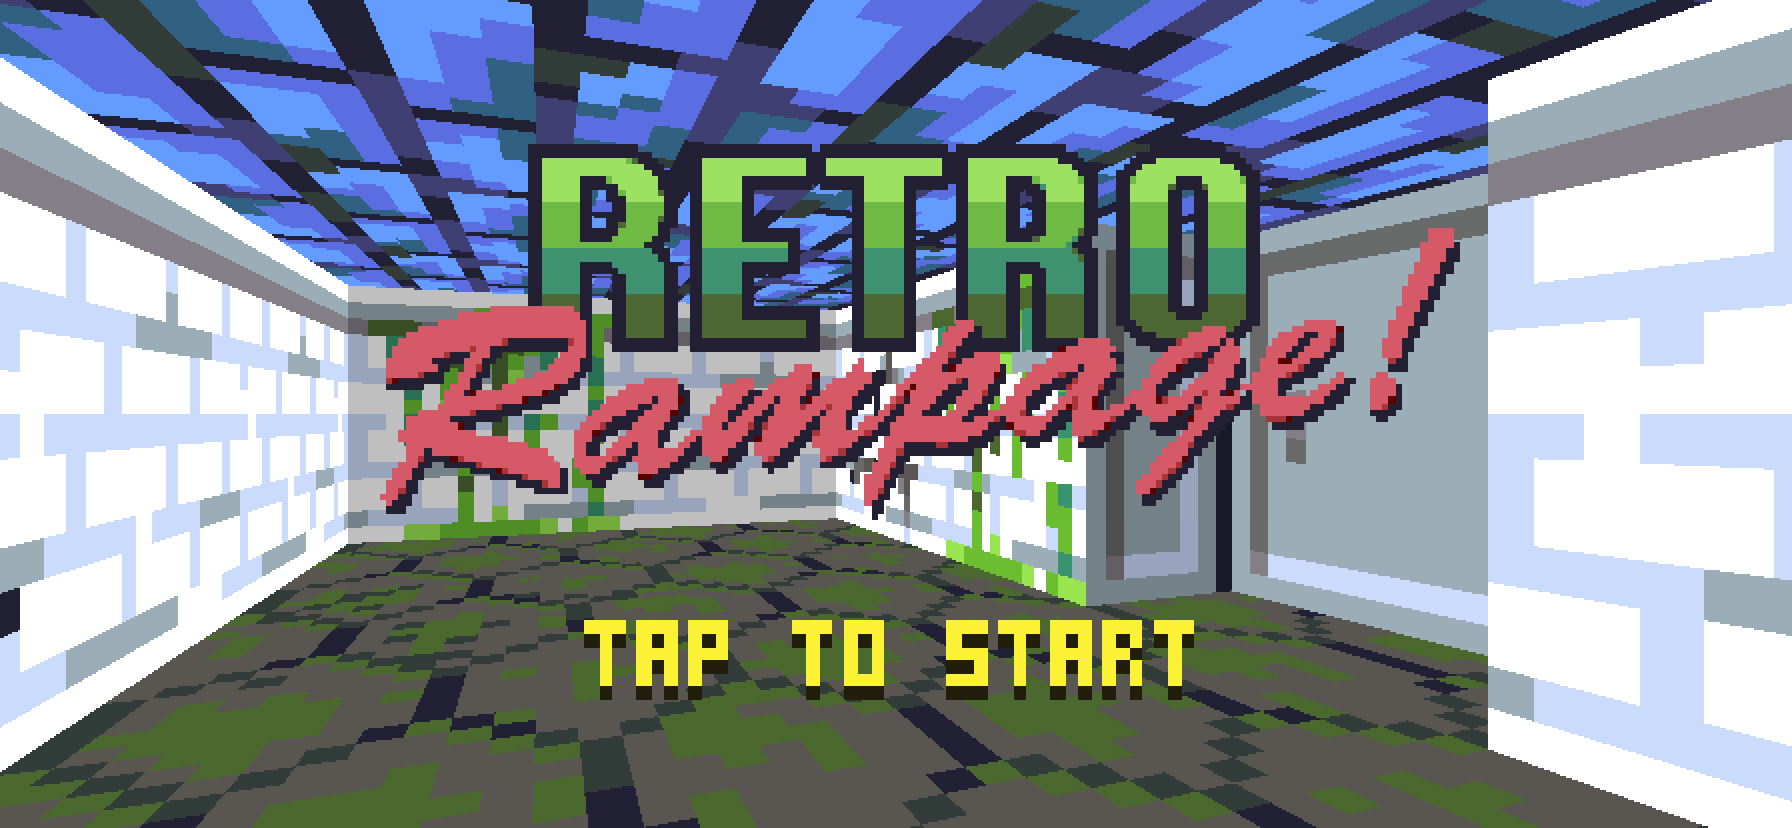
In the DOS era, when the relatime graphical capabilities of the hardware could not yet match up to the aspirations of game artists, it was common to use a lavish, hand-painted backdrop for the title screen to establish atmosphere and fire the imagination of the player. For the background of the Retro Rampage title screen, I decided to use a screenshot of the game instead[2].
You can draw your own background image, or just use the one from the tutorial project here, but the way I created it was as follows:
First, comment out the // Player weapon section in Renderer.draw() and then wander around the level to find a suitable angle to capture[3]. I used the iPhone 11 Pro Max simulator to generate the widest, highest-resolution image possible[4], and also increased the bitmap resolution by 3x to match the native device resolution by replacing this line in ViewController.swift:
let width = Int(imageView.bounds.width), height = Int(imageView.bounds.height)with:
let width = Int(imageView.bounds.width) * 3, height = Int(imageView.bounds.height) * 3To avoid a pill-shaped overlay on the screenshot from the home bar, add the following to ViewController:
override var prefersHomeIndicatorAutoHidden: Bool {
    return true
}
Once you have a suitable image for the background, add it to XCAssets (remember to revert any code changes made for screen capture purposes) then add a new case for it to the Texture enum in Texture.swift:
public enum Texture: String, CaseIterable {
    ...
    case titleBackground
}
We currently have a draw() method that accepts an instance of World, but since the title screen is not part of the world, we'll need a new method that accepts a Game object instead. In ViewController.swift replace the following line:
renderer.draw(game.world)with:
renderer.draw(game)Then in Renderer.swift add this new method right before the current draw(_ world:) method:
mutating func draw(_ game: Game) {
    switch game.state {
    case .title:

    case .playing:
        draw(game.world)
    }
}
We only have one title background image to use for all devices, which is why we've used the highest resolution image we can, so that it can be cropped or scaled down as needed.
To draw the title screen, we'll need to draw the background image centered in the display, and scaled to match the height of the output bitmap. We actually already have code to do this - the player weapon is drawn using the same logic - so we'll reuse that.
Add the following code to case .title: block in Renderer.draw(_ game:):
// Background
let background = textures[.titleBackground]
let backgroundScale = bitmap.size.y / background.size.y
let backgroundSize = background.size * backgroundScale
let backgroundPosition = (bitmap.size - backgroundSize) / 2
bitmap.drawImage(background, at: backgroundPosition, size: backgroundSize)
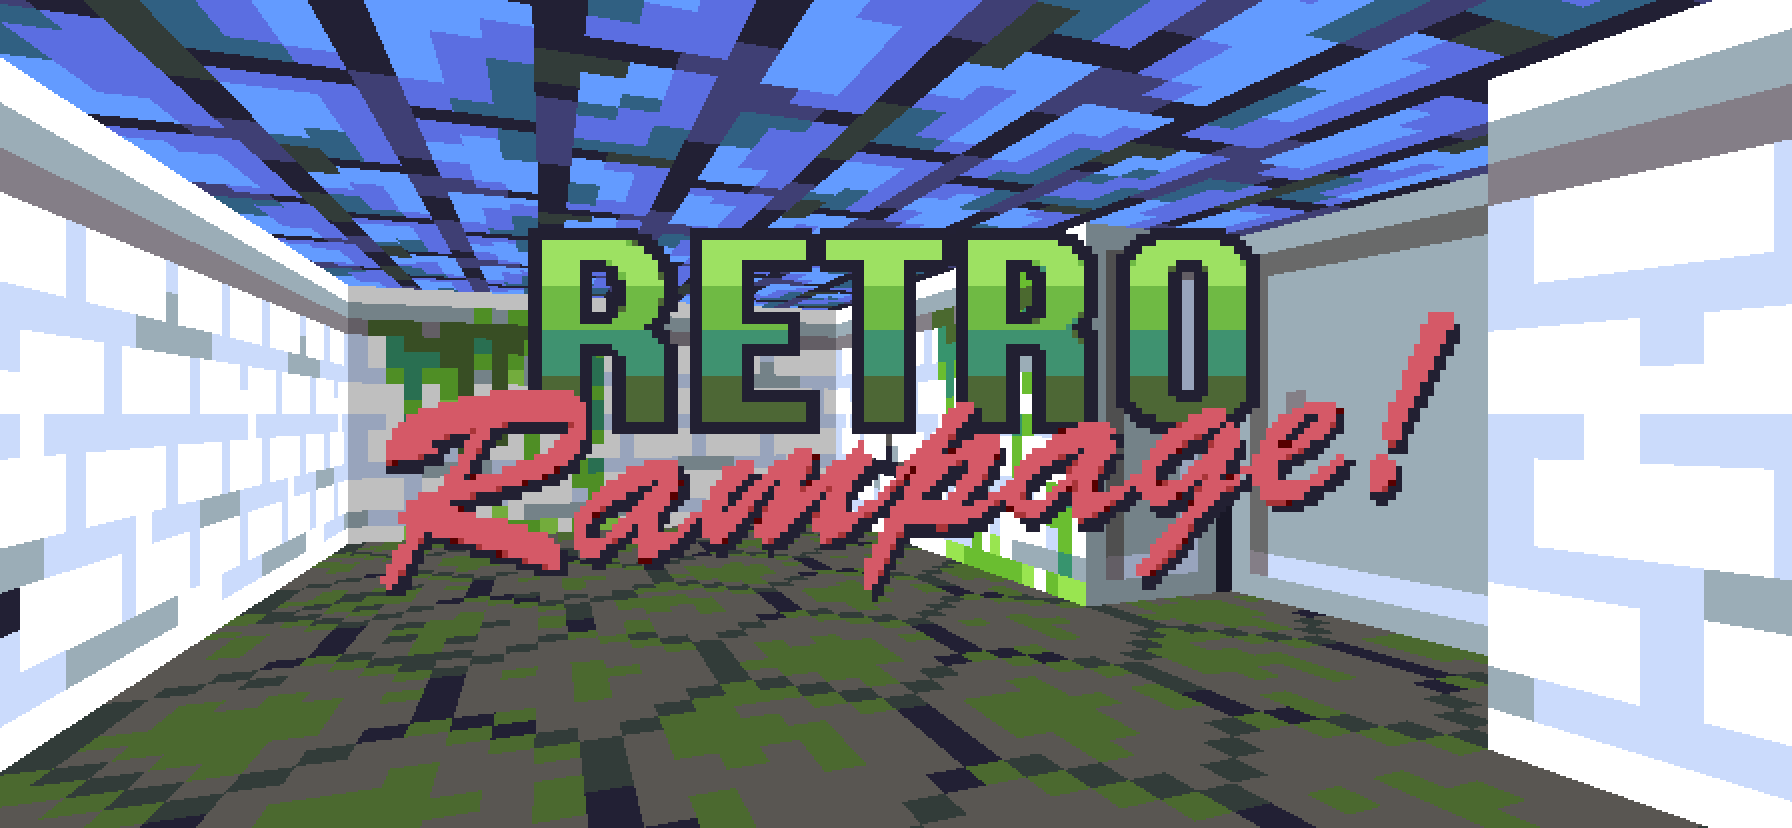
Run the game again and you should now see the title screen instead of the game world.
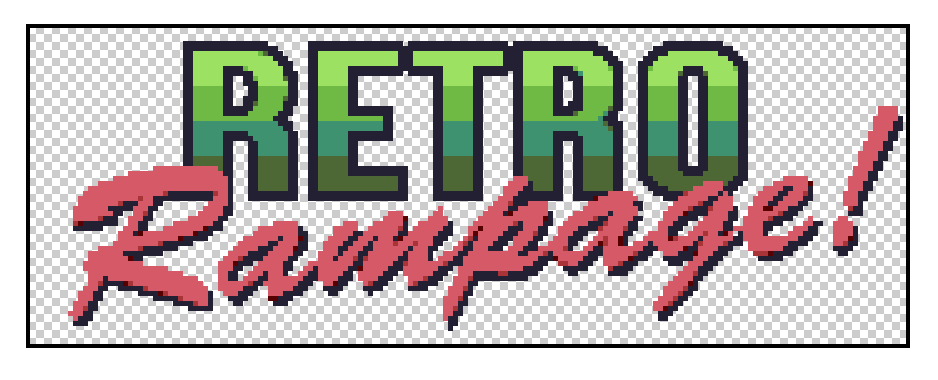
The title screen is a bit boring without some sort of text or logo. We could paste the logo directly into the title background image itself, but that would limit our ability to scale it independently of the background for different devices, or to move it around to make way for other content. Instead, we'll draw the logo at runtime in a separate layer.
Add a suitable logo image to XCAssets and replace the following line in Texture.swift:
case titleBackgroundwith:
case titleBackground, titleLogoThe logo image used in the tutorial can be found here, but as always you are free to create your own.
The logo we've used in the tutorial has dimensions of 176x64. Unlike the weapon or title background images, the logo is not intended to fit either the height or width of the screen, but it also doesn't match the HUD scale. Instead, we will scale the logo to fill approximately half the screen height (if you have used a different size or aspect ratio for your own logo image, you may need to tweak this scale factor).
Add the following code to the Renderer.draw(_ game:) method, just below the // Background block:
// Logo
let logo = textures[.titleLogo]
let logoScale = bitmap.size.y / logo.size.y / 2
let logoSize = logo.size * logoScale
let logoPosition = (bitmap.size - logoSize) / 2
bitmap.drawImage(logo, at: logoPosition, size: logoSize)
Run the game again to see the title screen in all its glory!
There's a small bug in the title state logic. When we tap fire to start the game, we also immediately fire in the game.
This problem with the player's gun firing prematurely is caused by a combination of factors. As you may recall, in Part 2 we added code to decouple the simulation time step from the rendering frame rate, with the result that the engine actually performs multiple updates for each frame displayed.
Take at the look at the latest iteration of this logic inside ViewController.update():
let input = Input(
    speed: -inputVector.y,
    rotation: Rotation(sine: sin(rotation), cosine: cos(rotation)),
    isFiring: lastFiredTime > lastFrameTime
)
let worldSteps = (timeStep / worldTimeStep).rounded(.up)
for _ in 0 ..< Int(worldSteps) {
    game.update(timeStep: timeStep / worldSteps, input: input)
}
lastFrameTime = displayLink.timestamp
Note that although game.update() is being called multiple times, the input is only sampled once per frame. That makes sense, since touch input on iOS is processed synchronously on the main thread, so it isn't going to change between loop iterations. But it does mean that isFiring will remain true for a minimum of four game updates after the user taps.
That explains why the player's weapon fires as soon as the game begins. When the user taps, the input is initially routed to the title case, which interprets the tap as a request to start the game. But once the state shifts to playing, the same input is then routed to the game world on the next update, which interprets it as a request to fire.
Since that shift can happen mid-frame, there's no opportunity for the isFiring flag to be reset. We can fix that by resetting it manually after the first update. In ViewController.update(), change the line:
let input = Input(to:
var input = Input(Then at the end of the for loop, before the closing brace, insert the following line:
input.isFiring = falseThis will reset the isFiring state after the first iteration, so that it doesn't continue to be set for every subsequent update within the frame.
This should solve the problem, but when I tried it on the simulator I found that the weapon still fired sometimes when the game starts, and this turned out to be due to a mismatch between displayLink.timestamp and CACurrentMediaTime(). It seems that these are not always in sync, and so the lastFiredTime is sometimes ahead of the timestamp by more than the frame duration, causing a single tap to register on two successive frames.
To mitigate this, move the line:
lastFrameTime = displayLink.timestampfrom below the for loop to just before the line let worldSteps = (timeStep / worldTimeStep).rounded(.up). Then add the following line just beneath it:
lastFiredTime = min(lastFiredTime, displayLink.timestamp)The result should look like this:
var input = Input(
    speed: -inputVector.y,
    rotation: Rotation(sine: sin(rotation), cosine: cos(rotation)),
    isFiring: lastFiredTime > lastFrameTime
)
lastFrameTime = displayLink.timestamp
lastFiredTime = min(lastFiredTime, lastFrameTime)

let worldSteps = (timeStep / worldTimeStep).rounded(.up)
for _ in 0 ..< Int(worldSteps) {
    game.update(timeStep: timeStep / worldSteps, input: input)
    input.isFiring = false
}The transition from title screen to game is rather sudden. It would be nice if we could cover this with a gentle crossfade, as we do with level transitions.
The logic for crossfading is managed using the effects array inside World, but this isn't accessible externally. In any case, it doesn't really make sense for World to manage a transition that starts before the game even begins.
Instead we'll put the code for managing crossfades in the Game object. In Game.swift, add a new case called starting to GameState:
public enum GameState {
    case title
    case starting
    case playing
}
Then add the following property to the Game struct:
public private(set) var transition: Effect?Next, in the update() method, replace the lines:
case .title:
    if input.isFiring {
        state = .playing
    }
with:
case .title:
    if input.isFiring {
        transition = Effect(type: .fadeOut, color: .black, duration: 0.5)
        state = .starting
    }
case .starting:
    if transition?.isCompleted == true {
        transition = Effect(type: .fadeIn, color: .black, duration: 0.5)
        state = .playing
    }
In the same method, insert the following code between the guard self = self ... statement and the // Update state block:
// Update transition
if var effect = transition {
    effect.time += timeStep
    transition = effect
}
Now we need to actually draw the transition effect. We have the logic to do that already, but it's currently inlined inside the draw(_ world:) method, and we now need to use it in draw(_ game:) instead, so let's extract it.
In Renderer.swift, add the following new method below draw(_ world:):
mutating func draw(_ effect: Effect) {

}
Cut (copy and delete) the following block of code from inside the for loop in the // Effects block at the bottom of the draw(_ world:) method, and paste it into the draw(_ effect:) method you just added:
switch effect.type {
case .fadeIn:
    bitmap.tint(with: effect.color, opacity: 1 - effect.progress)
case .fadeOut:
    bitmap.tint(with: effect.color, opacity: effect.progress)
case .fizzleOut:
    let threshold = Int(effect.progress * Double(fizzle.count))
    for x in 0 ..< bitmap.width {
        for y in 0 ..< bitmap.height {
            let granularity = 4
            let index = y / granularity * bitmap.width + x / granularity
            let fizzledIndex = fizzle[index % fizzle.count]
            if fizzledIndex <= threshold {
                bitmap[x, y] = effect.color
            }
        }
    }
}
Put the following inside the now-empty for loop:
draw(effect)Still in Renderer.swift, at the top of the extension block, replace the following line inside the draw(_ game:) method:
case .title:with:
case .title, .starting:Then, after the switch statement, add the following:
// Transition
if let effect = game.transition {
    draw(effect)
}
Try running the game again. You should see a smooth fade to black and back again after tapping to start, before the game begins.
It's not very satisfactory that so much of the HUD logic resides in the Renderer module. The Renderer should only be concerned with view logic (i.e. drawing), and things like switching the indicator color based on a damage threshold should really be done in the model.
Let's move that code into the Engine module instead by introducing a new type. Add a new file to the Engine module called HUD.swift with the following contents:
public struct HUD {
    public let healthString: String
    public let healthTint: Color
    public let ammoString: String
    public let playerWeapon: Texture
    public let weaponIcon: Texture

    public init(player: Player) {
        let health = Int(max(0, player.health))
        switch health {
        case ...10:
            self.healthTint = .red
        case 10 ... 30:
            self.healthTint = .yellow
        default:
            self.healthTint = .green
        }
        self.healthString = String(health)
        self.ammoString = String(Int(max(0, min(99, player.ammo))))
        self.playerWeapon = player.animation.texture
        self.weaponIcon = player.weapon.attributes.hudIcon
    }
}
The HUD type is a simple struct that encapsulates all of the information that the Renderer needs in order to draw the HUD. You can think of it as a view model. In Game.swift, add the following computed property to the top of the extension block, just before the update() method:
var hud: HUD {
    return HUD(player: world.player)
}
In Renderer.swift add the following empty method just before the draw(_ effect:) definition:
mutating func draw(_ hud: HUD) {

}
Now cut (copy and delete) everything in the draw(_ world:) method from the start of the // Player weapon block up until // Effects, and paste it inside the draw(_ hud:) method you just added.
And what of the // Effects block? We can't move it to draw(_ hud:) because it's not part of the HUD, but we also can't leave it inside draw(_ world:) since the effects need to be drawn in front of the HUD. So just delete the entire // Effects block for now.
Inside draw(_ hud:) we now have several broken references to world. We'll fix those as follows:
In the // Player weapon block, replace the line:
let weaponTexture = textures[world.player.animation.texture]with:
let weaponTexture = textures[hud.playerWeapon]Then in the // Health block, replace the following lines:
let health = Int(max(0, world.player.health))
let healthTint: Color
switch health {
case ...10:
    healthTint = .red
case 10 ... 30:
    healthTint = .yellow
default:
    healthTint = .green
}
for char in String(health) {
with:
let healthTint = hud.healthTint
for char in hud.healthString {
Next, in the // Ammunition block, replace:
let ammo = Int(max(0, min(99, world.player.ammo)))
for char in String(ammo).reversed() {
with:
for char in hud.ammoString.reversed() {Then in the // Weapon icon block, replace:
let weaponIcon = textures[world.player.weapon.attributes.hudIcon]with:
let weaponIcon = textures[hud.weaponIcon]Finally, at the top of the file, in the draw(_ game:) method, add the following lines just after draw(game.world):
draw(game.hud)

// Effects
for effect in game.world.effects {
    draw(effect)
}
That's a bit neater, but what does this have to do with the title screen? Well, it puts us in a better position to implement the next step:
We've set up the title screen so that pressing fire starts the game. Players will probably figure this out, since it's natural to tap when you aren't sure what else to do, but it would be even better if we actually told them.
Let's add the text "Tap to start" to the title screen. We could cheat and just do this by creating a new image containing the entire phrase, but since we already added a rudimentary text engine in Part 16, let's extend that to handle letters as well as numbers.
First, we'll need a more complete character set. Replace the existing font asset in XCAssets with this new one.
You can create your own font image instead if you prefer, but if so ensure that it has at least the full uppercase alphabet and a space character in addition to the digits 0 - 9.
Because the characters in the bitmap font no longer represent a contiguous range of ASCII code points, the trick we used in Part 16 for mapping characters to sprite sheet ranges will no longer work. Instead, let's add a more explicit mapping in the form of a JSON file that defines the characters in the font.
Add a new file to the main app called Font.json with the following contents:
{
    "texture": "font",
    "characters": [
        "0", "1", "2", "3", "4", "5", "6", "7", "8", "9",
        "A", "B", "C", "D", "E", "F", "G", "H", "I", "J",
        "K", "L", "M", "N", "O", "P", "Q", "R", "S", "T",
        "U", "V", "W", "X", "Y", "Z", " "
    ]
}
We'll need an object to represent this data in the game, so add a new file to the Engine module called Font.swift with the following contents:
public struct Font: Decodable {
    public let texture: Texture
    public let characters: [String]
}
The Font struct contains the name of the font texture, along with an ordered list of characters[5] that appear in the font.
We've included the font Texture name in the same file because it makes sense to keep the image and character list together, but that means we'll need to make Texture decodable, so in Texture.swift replace the following line:
public enum Texture: String, CaseIterable {with:
public enum Texture: String, CaseIterable, Decodable {In HUD.swift, add a font property to the HUD struct and its initializer:
public struct HUD {
    ...
    public let font: Font

    public init(player: Player, font: Font) {
        ...
        self.font = font
    }
}
Then do the same in Game.swift:
public struct Game {
    ...
    public let font: Font

    public init(levels: [Tilemap], font: Font) {
        ...
        self.font = font
    }
}
And while we're here, add the following additional property just below public let font: Font:
public var titleText = "TAP TO START"Still in Games.swift, in the computed hud property, replace the line:
return HUD(player: world.player)with:
return HUD(player: world.player, font: font)Then, in ViewController.swift, add the following just below the loadLevels() function declaration:
public func loadFont() -> Font {
    let jsonURL = Bundle.main.url(forResource: "Font", withExtension: "json")!
    let jsonData = try! Data(contentsOf: jsonURL)
    return try! JSONDecoder().decode(Font.self, from: jsonData)
}
And replace the line:
private var game = Game(levels: loadLevels())with:
private var game = Game(levels: loadLevels(), font: loadFont())In Renderer.swift, in the draw(_ hud:) method, we now have access to the font, and so we can replace the hard-coded (and now-broken) character bitmap range calculations. In the // Health block, replace the lines:
let font = textures[.font]
let charSize = Vector(x: font.size.x / 10, y: font.size.y)
with:
let font = textures[hud.font.texture]
let charSize = Vector(x: Double(font.width / hud.font.characters.count), y: font.size.y)
Then, inside the for loop, replace the line:
let index = Int(char.asciiValue!) - 48with:
let index = hud.font.characters.firstIndex(of: String(char)) ?? 0Do the same for the equivalent line in the // Ammunition block, and if you run the game (and you've done everything right), the HUD text should look exactly the same as before.
So now we just need to actually draw the text on the title screen, and here we run into a slight problem. We avoided pre-calculating the text width in the HUD by just drawing from the left or right edges respectively. But for the title screen we want the text to be centered, so we'll need to know its width.
Since we're using a monospaced font, the width of the text is equal to the size of any character multiplied by the number of characters in the string. In draw(_ game:), add the following code just below the // Logo block:
// Text
let textScale = bitmap.size.y / 64
let font = textures[game.font.texture]
let charSize = Vector(x: Double(font.width / game.font.characters.count), y: font.size.y)
let textWidth = charSize.x * Double(game.titleText.count) * textScale
This calculates the total width of the title screen text, based on the character size and count.
From that we can derive the starting horizontal offset as the width of the screen minus the textWidth, divided by two. For the vertical offset, we'll use three quarters of the screen height. Add the following line:
var offset = Vector(x: (bitmap.size.x - textWidth) / 2, y: bitmap.size.y * 0.75)Next we need to actually draw the text. The logic for this is the same as the code we already used to draw the player health indicator in the HUD. Add the following lines:
for char in game.titleText {
    let index = game.font.characters.firstIndex(of: String(char)) ?? 0
    let step = Int(charSize.x)
    let xRange = index * step ..< (index + 1) * step
    bitmap.drawImage(
        font,
        xRange: xRange,
        at: offset,
        size: charSize * textScale,
        tint: .yellow
    )
    offset.x += charSize.x * textScale
}
We'll also need to move the logo up a bit to allow room. Currently the logo is centered in the screen by this line in the // Logo block:
let logoPosition = (bitmap.size - logoSize) / 2Replace this with:
let logoPosition = Vector(x: (bitmap.size.x - logoSize.x) / 2, y: bitmap.size.y * 0.15)Run the game again and you can see the title screen text in all its glory.
And that brings us to the end of Part 17. It's amazing how much more finished a game feels with the addition of even the most basic title screen. To recap, in this this part we:
- Added a new
Gameobject to manage higher-level interaction - Added a title screen with a background and logo
- Moved logic out of Renderer and ViewController into Engine
- Upgraded the font system to support text as well as numbers
In Part 18 we'll take a first step into the world of procedural generation.
-
How would you go about localizing the "TAP TO START" text on the title screen? You should be able to use the standard Apple mechanism for localized strings, but not from inside the Engine module - you'll need to find a way to inject the text from the platform layer.
-
Building on the solution for the first exercise, how would you go about supporting languages that don't use the Roman alphabet? Hint: Apple's localized resources system works for images and JSON files, not just strings.
-
We've used a monospaced font for the title screen text, but could you make it work with a proportional (aka variable-width) font as well? Besides the changes to the font image, you'll need some extra metadata in the
Fontobject, and some changes to theRendereritself.
[1] If nothing happens when you tap, you probably forgot to set game.delegate = self.
[2] Mostly because I'm a terrible artist, and this was an easy option.
[3] You might also want to disable the monsters if they interfere with your sightseeing tour. A simple way to do this is to edit the Levels.json and remove all the monsters. Alternatively, you can lure them into the first room and kill them (which is what I did).
[4] If you're reading this in the future on your iPhone Ultra Max Pro Extreme with 360 wraparound 16K VR display, just take my word for it that in 2020 the Pro Max screen seemed like a lot of pixels.
[5] If you're wondering why the characters are stored as an array of String, instead of the more-obvious Character type, it's because Character does not conform to the Decodable protocol. We could write a custom decoding implementation that mapped from strings to characters, but defining font characters using strings potentially gives us more flexibility anyway - for example we could potentially implement multi-character ligatures.
