GitHub hosts over 100 million repositories containing applications of all shapes and sizes. But GitHub is just a start—those applications still need to get built, released, and managed to reach their full potential. Azure Pipelines enables you to continuously build, test, and deploy to any platform or cloud. It has cloud-hosted agents for Linux, macOS, and Windows; powerful workflows with native container support; and flexible deployments to Kubernetes, VMs, and serverless environments. Azure Pipelines provides unlimited CI/CD minutes and 10 parallel jobs to every GitHub open source project for free. All open source projects run on the same infrastructure that our paying customers use. That means you'll have the same fast performance and high quality of service. Many of the top open source projects are already using Azure Pipelines for CI/CD, such as Atom, CPython, Pipenv, Tox, Visual Studio Code, and TypeScript with the list that is growing every day.
In addition to Azure Pipelines, GitHub users can also benefit from Azure Boards, a set of features that enable you to plan, track, and discuss work across your teams using Kanban boards, backlogs, team dashboards, and custom reporting. You can link GitHub activities from Azure Boards by mentioning them in commits and pull requests, and even automate the state transition of linked work items when pull requests are approved. In this demo, you'll see how easy it is to set up Azure DevOps features with your GitHub projects, collaborate with Microsoft Teams and how you can start seeing benefits immediately.
The key takeaways of the demo are:
- Microsoft provides the only comprehensive DevOps solution that spans from development to project management to deployment to operations.
- Azure offers a practical approach to automation at every step of the DevOps lifecycle that enables companies to focus their efforts on creating business value.
- Microsoft Teams, a collaborative platform in Office 365, enables the use for ChatOps. Since its formal release, Microsoft Teams has added more integration features and a command line-like approach to application control. Teams allows multiple users to participate in a single chat channel, query and drive services such as build automation and application performance management from within the group chat window.
-
You will need a GitHub account.
-
You will need an Azure subscription.
-
An Azure DevOps account.
-
Provision the Tailwind Traders project to your Azure DevOps organization with the Azure DevOps Demo Generator. Select the checkbox -Yes, I want to fork this repository to fork the repository in your GitHub account. Follow the simple walkthrough to create the project on your Azure DevOps organization.
-
You will need the Tailwind Traders Website source code forked to your GitHub account.
-
Git installed from https://git-scm.com/downloads.
-
Visual Studio Code installed from https://code.visualstudio.com.
-
Azure Pipelines extension for Visual Studio Code installed from https://marketplace.visualstudio.com/items?itemName=ms-azure-devops.azure-pipelines.
-
GitHub Pull Requests extension for Visual Studio Code installed from https://marketplace.visualstudio.com/items?itemName=GitHub.vscode-pull-request-github.
Microsoft Teams is the chat-centered workspace that provides instant access to everything needed for DevOps teamwork. It is that dedicated hub that brings your teams, conversations, content, and tools from across Azure DevOps, GitHub, and Office together into one place.
-
Launch Microsoft Teams - you can either open the web app or download the app to your desktop from here.
-
Click Join or create a team to create a team - Tailwind Traders and privacy set as Private - Only team owners can add members. Finally, add users to the team so that they get notified of the events that occur and can start discussion with other team members.
-
Azure DevOps Services integration with Microsoft Teams provides a comprehensive chat and collaborative experience across the development cycle. Follow the instructions here to integrate Teams with your Tailwind Traders Azure DevOps project.
-
View your teams Kanban board or favorite dashboard directly from Microsoft Teams. Configure the Azure DevOps Kanban board and Dashboard in Teams by following the instructions here.
-
Install and configure the Azure Pipelines app with Teams to monitor the events for your pipelines. Follow the instructions here to set up and manage subscriptions for releases, pending approvals, completed builds etc. and get notifications right into your Teams channel.
-
Install GitHub for Microsoft Teams application from the Teams' Apps option.

-
Setup a tab for GitHub Pull requests in your Teams channel. While configuring the tab, select the repository for which you would like to pin the issues or pull requests view. Once the tab is pinned, everyone in the team can view the tab but only those who’ve access to the repository would be able to see the issues/pull requests content.


In this demo, we'll be illustrating the integration and automation benefits of Azure DevOps. Tailwind Traders is a fictitious retail company showcasing the future of intelligent application experiences. These reference apps are all are powered by the Azure cloud, built with best-in-class tools, and made smarter through data and AI. Let us implement continuous integration and continuous delivery pipelines so that you can quickly update their public services and take advantage of the full benefits of DevOps and the cloud.
To interact with Azure, you'll need to create a Service Endpoint in Azure DevOps. This endpoint includes the authentication information required to deploy to Azure.
-
Install the Azure CLI 2.0 if it is not already installed by following the steps [here] https://docs.microsoft.com/en-us/cli/azure/install-azure-cli?view=azure-cli-latest based on your environment.
-
Once Azure CLI 2.0 is installed, open PowerShell and log into Azure by running the below command and following the prompts
az login
-
Create a Service Principal by running the command, the output should be like the screenshot below.
az ad sp create-for-rbac --name TTapp --password Pa$$w0rd01

-
You will need the below three values from the Service Principal account to be able to successfully create the Service Endpoint in Azure DevOps, you should note them now for use later.
- Tenant
- Service Principal Key (also referred to as Password)
- Service Principal Client ID (referred to as appid)
-
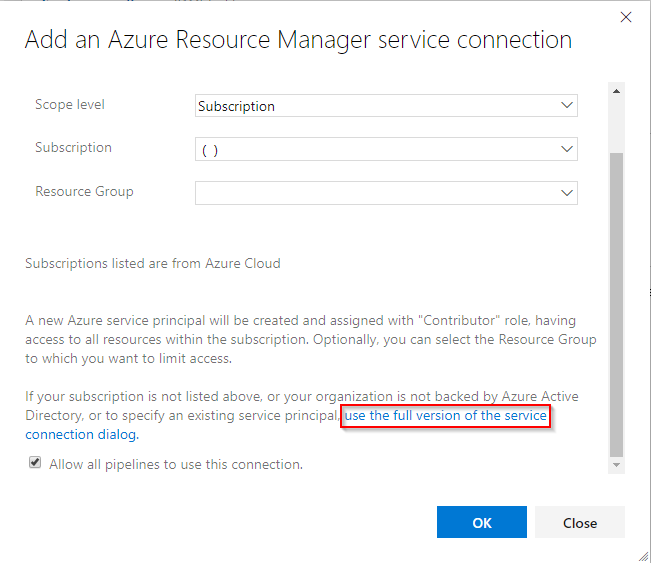
Create an Azure Service Endpoint by clicking on the Project Settings icon in the Azure DevOps Portal, select Service connections and then New Service connection and selecting Azure Resource Manager from the drop-down list.

-
In the Add an Azure Resource Manager Service connection dialog, click the use the full version of the service connection dialog link. Provide the required details and copy the values from the above created Service Principal.
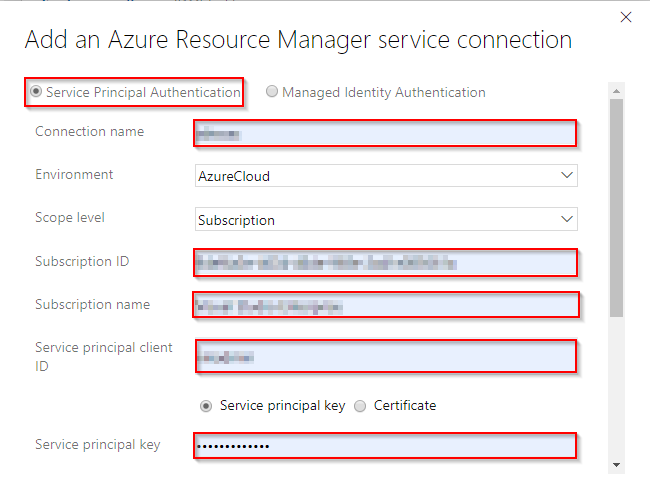
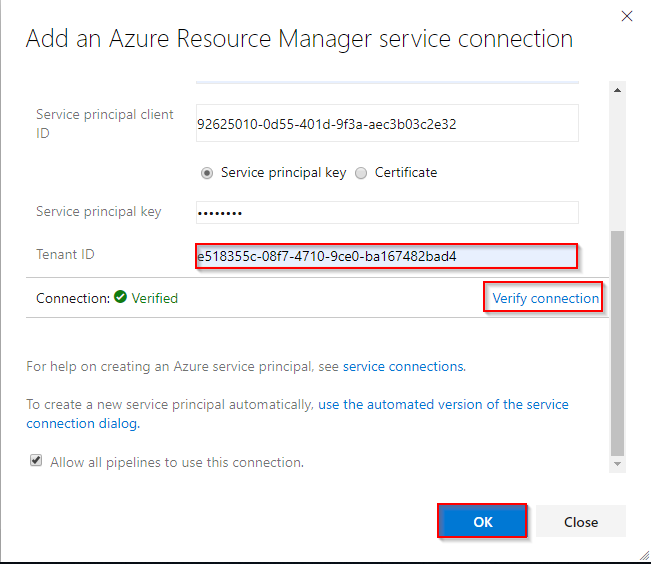
-
Fill in the fields required as per the information you obtained earlier when creating your SP, click Verify connection and ensure you can successfully verify the connection to Azure. Finally, click OK.


Now that Azure Pipelines has been installed and configured, we can start building the pipelines, but we will need to select a project where the pipeline will be saved. You may select an existing or create a new Azure DevOps project to run the pipelines we need for continuous integration and continuous delivery. The first thing we'll do is to create a CI pipeline.
-
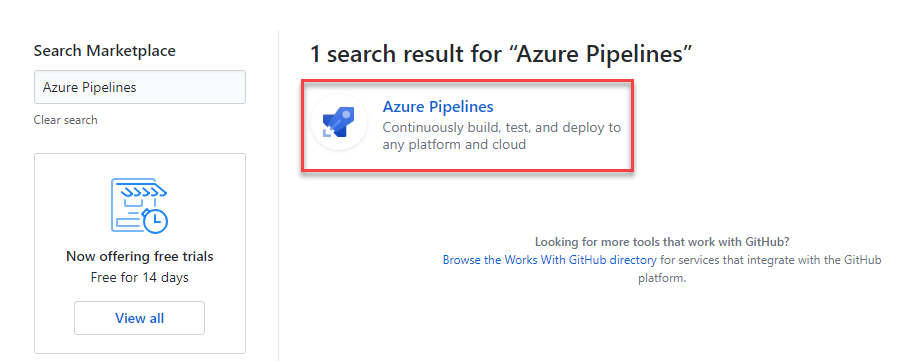
Navigate to the GitHub Marketplace. The GitHub Marketplace provides a variety of tools from Microsoft and 3rd parties that help you extend your project workflows. Click Marketplace from the top navigation to visit it.

-
Search for pipelines and select Azure Pipelines.
-
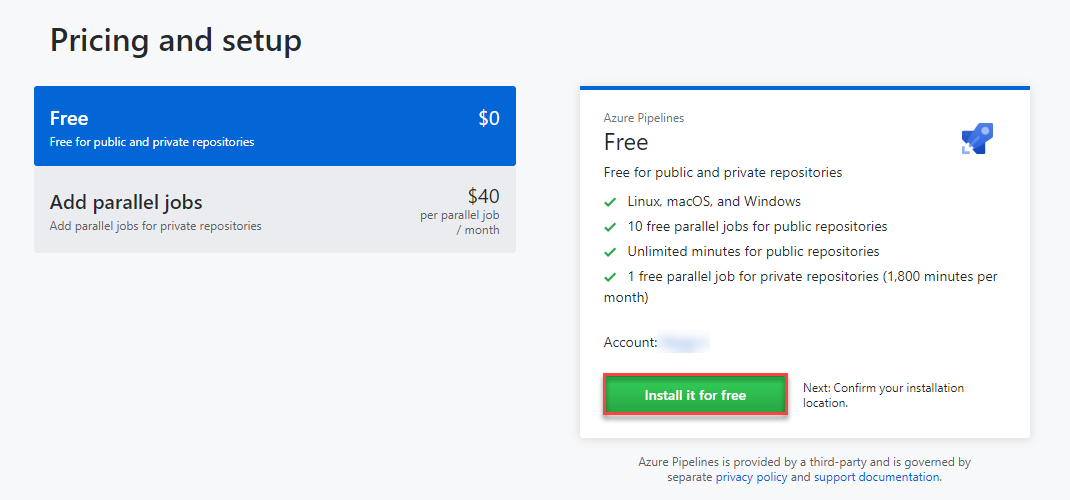
The Azure Pipelines offers unlimited build minutes with 10 free parallel jobs for public repositories, and 1800 build minutes per month with 1 parallel job if you’re using a private repository. Click Install it for free under Pricing and Setup towards the bottom of the page.
-
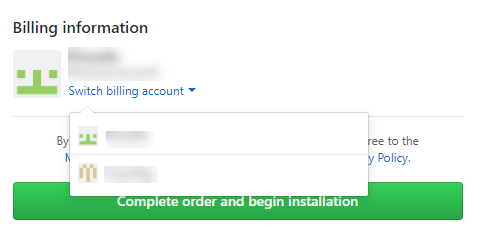
If you have multiple GitHub accounts, select the one you forked the Website from the Switch billing account dropdown.
-
Click Complete order and begin installation.

-
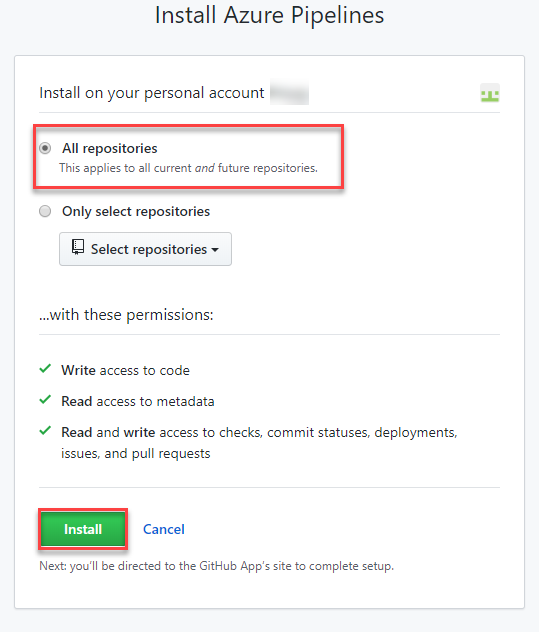
You have the option to specify repositories to include, but for the purposes of this demo, just include all of them. Note that Azure DevOps requires the listed set of permissions to fulfill its services. Click Install.
-
You may be prompted to confirm your GitHub password to continue and be prompted to log in to your Microsoft account. Make sure you’re logged into the one associated with your Azure DevOps account. Next, you may need to choose the Azure DevOps account and project for which Azure Pipelines need access.

-
Select the organization and Azure DevOps project that you created using the Azure DevOps Demo Generator. You will first create an Azure connection which will be used in the Pipelines.
-
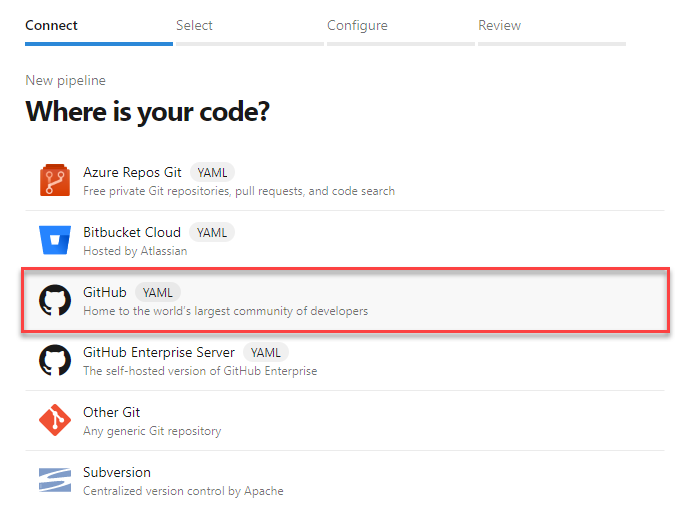
Click Create a new pipeline under Builds. Choose GitHub(YAML) as the code repository and follow the next steps for authorization.
-
Select the forked repo.

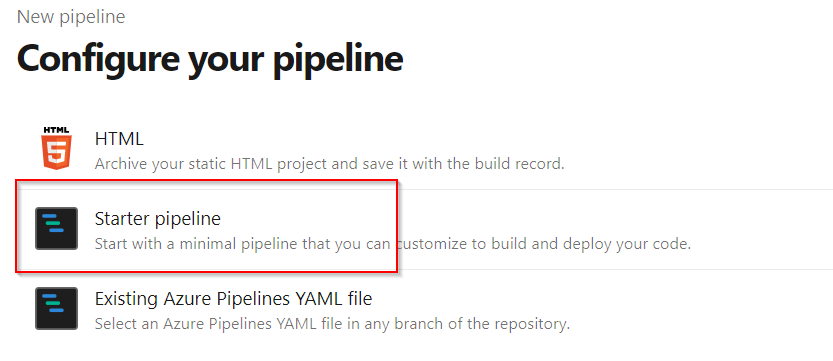
Every build pipeline is simply a set of tasks. Whether it's copying files, compiling code, or publishing artifacts, the existing library of tasks covers the clear majority of scenarios. You can even create your own if you have specialized needs not already covered. We're going to use YAML, a markup syntax that lends itself well to describing the build pipeline. Select Starter pipeline as a starting point based on an analysis of our source project. We'll replace the contents with the final YAML required for our project.
-
Select the Starter pipeline template.
-
Replace the default template with the below YAML snippet and substitute the below variables with relevant values.
variables:
  azureSubscription: <<Connection-name-of your-ARM endpoint>>
  resourcegroup: <<name-of-your-resource-group>>
  location: <<location of your resources>>
  ImageName: website

steps:
- task: AzureResourceGroupDeployment@2
  displayName: Azure Deployment
  inputs:
    azureSubscription: $(azureSubscription)
    resourceGroupName: $(resourcegroup)
    location: $(location)
    csmFile: Deploy/deployment.json

- task: keesschollaart.arm-outputs.arm-outputs.ARM Outputs@5
  displayName: ARM Outputs
  inputs:
    ConnectedServiceNameARM: $(azureSubscription)
    resourceGroupName: $(resourcegroup)

- task: Docker@1
  displayName: 'Build an image'
  inputs:
    azureSubscriptionEndpoint: $(azureSubscription)
    azureContainerRegistry: $(acr).azurecr.io
    dockerFile: Source/Tailwind.Traders.Web/Dockerfile
    arguments: '-t $(acr).azurecr.io/$(ImageName):$(Build.BuildId)'
    imageName: '$(ImageName):$(Build.BuildId)'
    includeLatestTag: true

- task: Docker@1
  displayName: 'Push Image'
  inputs:
    azureSubscriptionEndpoint: $(azureSubscription)
    azureContainerRegistry: '$(acr).azurecr.io'
    command: 'Push an image'
    imageName: '$(ImageName):$(Build.BuildId)'
Note: YAML is very strict with indentation. If you are new to YAML, it is recommended that you use tools to format and validate the code. There are several free tools available on the web.
-
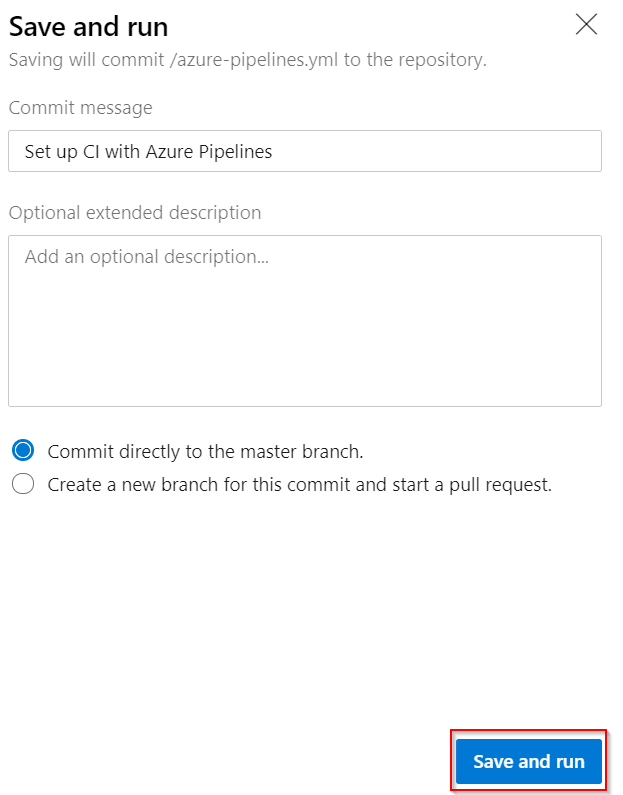
Click Save and run.

-
Confirm the Save and run to commit the YAML definition directly to the master branch of the repo.
-
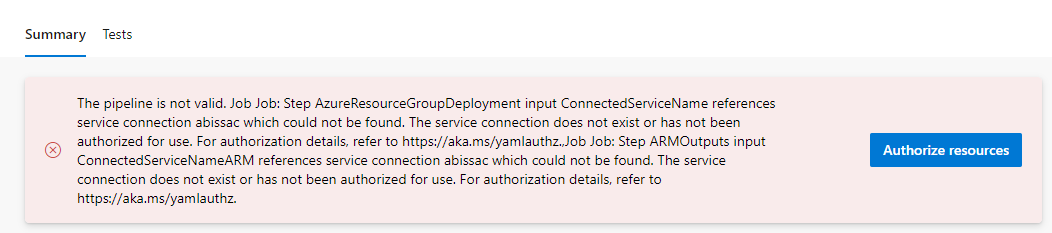
You might see an error - Authorization failed. Click the Authorize resources button to authorize the endpoint connection.
-
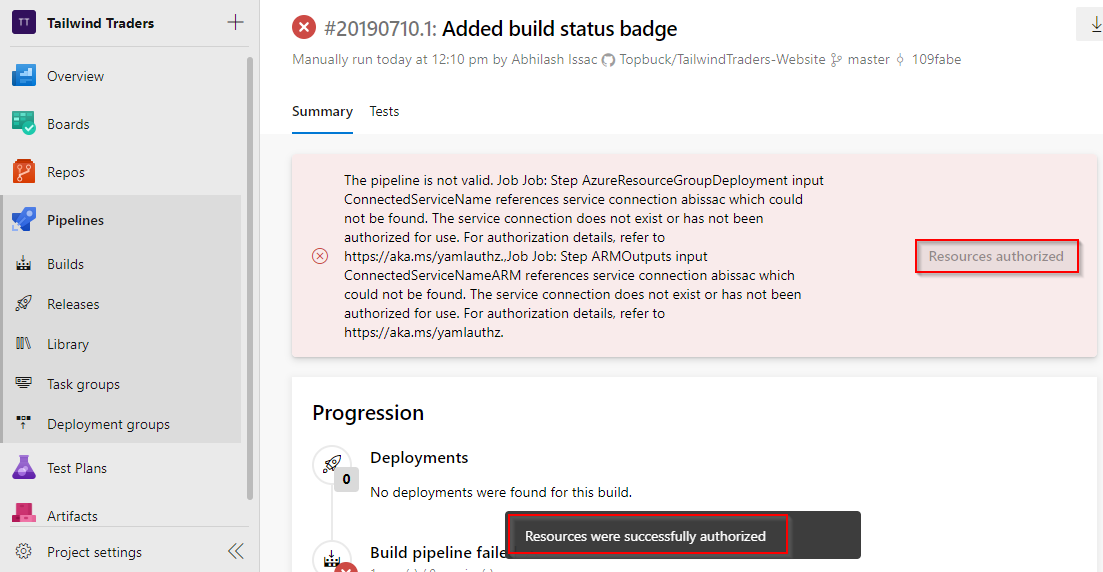
Once the authorization succeeds, you will see a message as in the screenshot.
-
Queue the build in the same window to start the build process. Follow the build through completion.
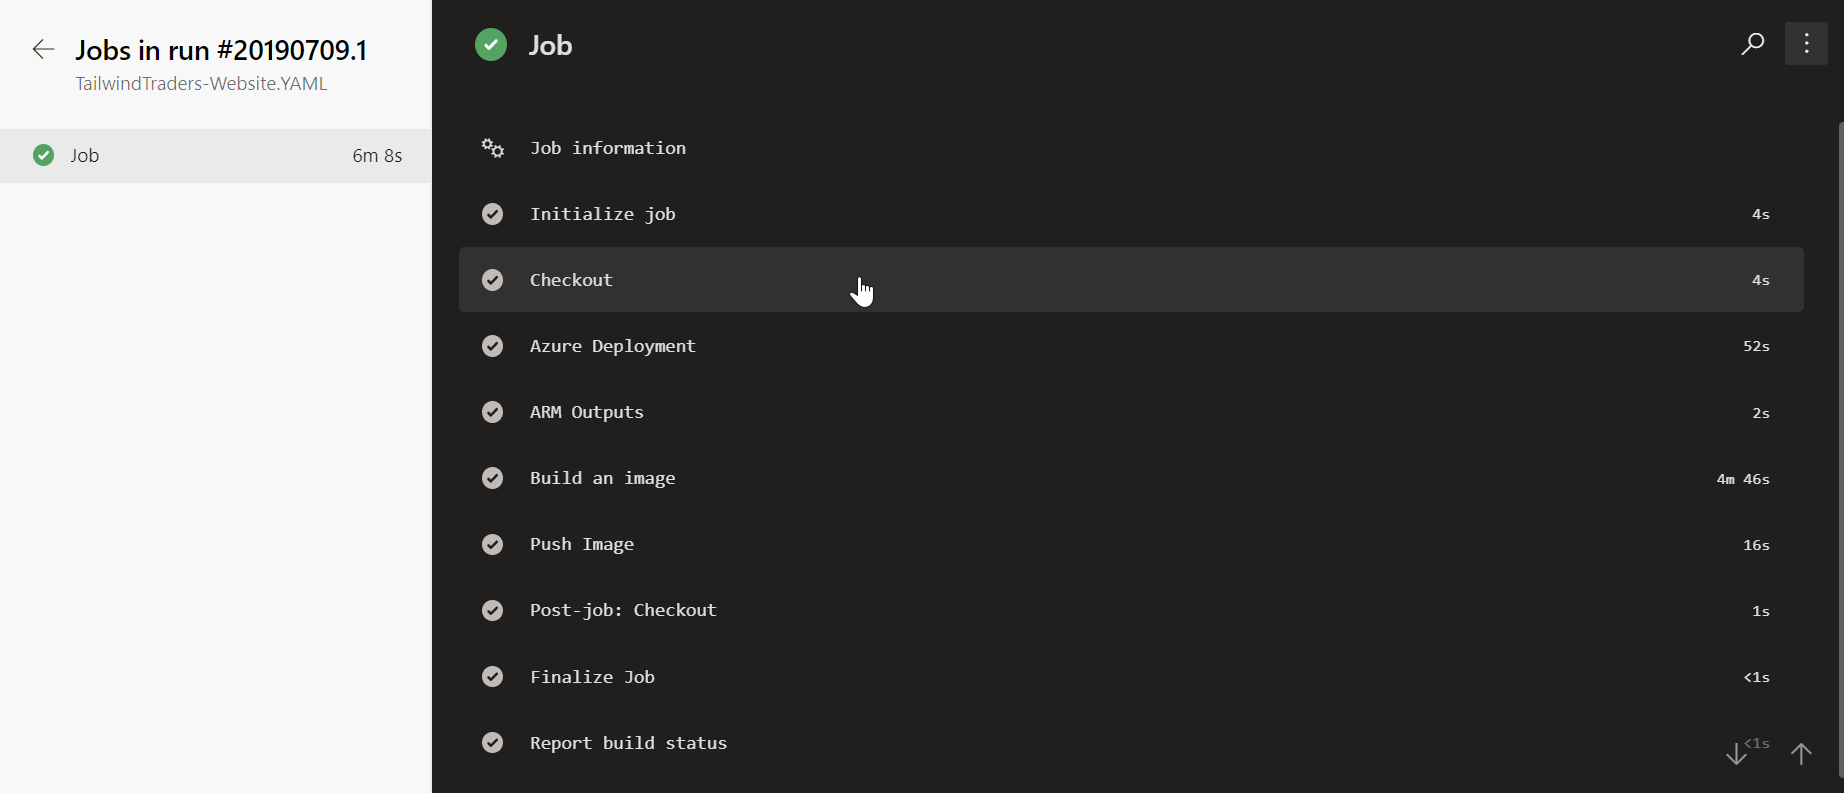


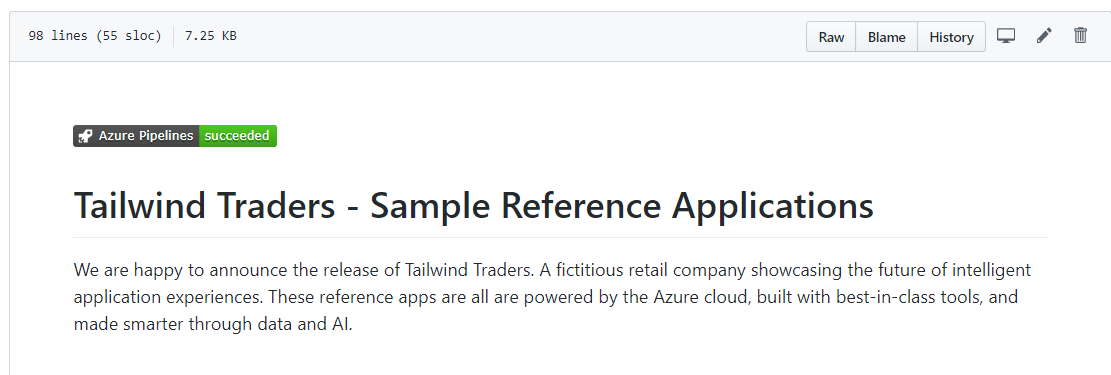
An important sign for a quality project is its build status badge. When someone finds a project that has a badge indicating that the project is currently in a successful build state, it's a sign that the project is maintained effectively.
-
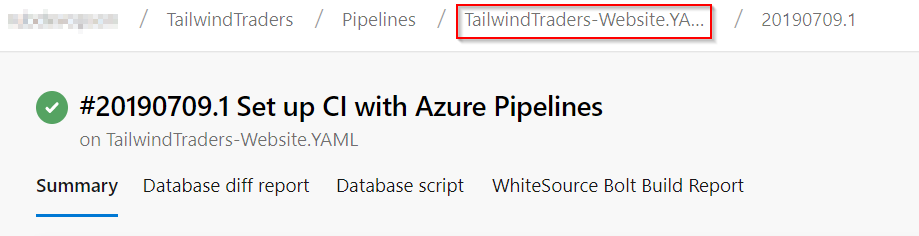
Click the build pipeline to navigate to its overview page.
-
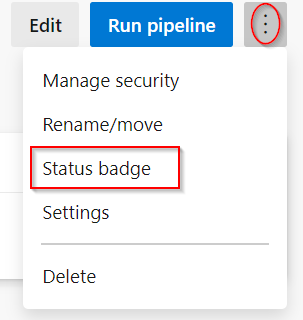
From the ellipses dropdown, select Status badge.
-
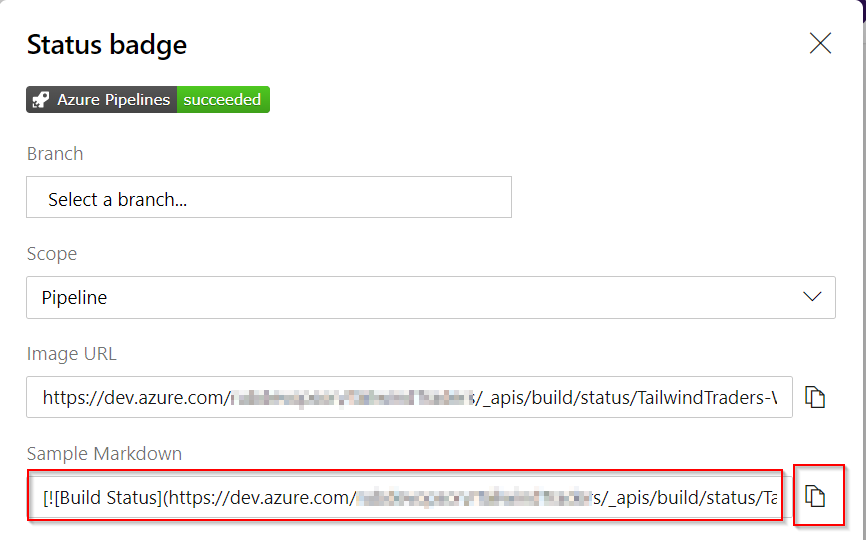
The Status badge UI provides a quick and easy way to integrate the build status wherever you want. Often, you'll want to use the provided URLs in your own dashboards, or you can use the Markdown snippet to add the status badge to locations such as Wiki pages. Click the Copy to clipboard button for Sample Markdown.
-
Return to Visual Studio Code and open the README.md file.
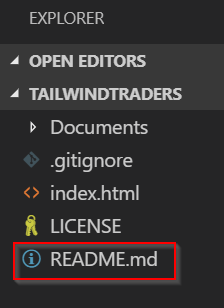
-
Paste in the clipboard contents at the beginning of the file.

-
Press Ctrl+S to save the file.
-
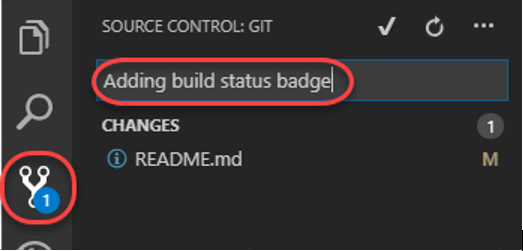
From the Source Control tab, enter a commit message like Added build status badge and press Ctrl+Enter to commit. Confirm if prompted.
-
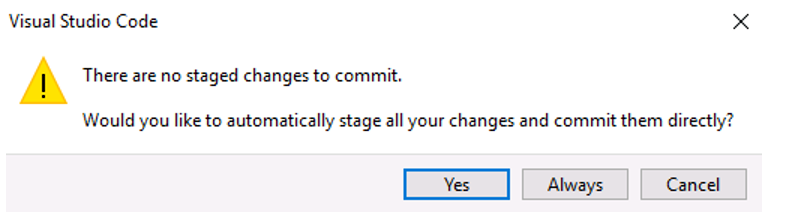
In Git, only changes need to be staged first to be included in the commit. If you are prompted to choose whether you want VS Code automatically to stage all changes and commit them directly, choose Always.
-
If you receive an error prompting you to configure user .name and user.email in git, open a command prompt and enter the following command to set your user name and email address:
git config --global user.name "Your Name" git config --global user.email "Your Email Address" -
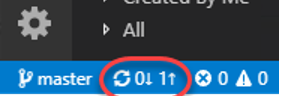
Press the Synchronize Changes button at the bottom of the window to push the commit to the server. Confirm if prompted.
-
You will need to sign in to GitHub, if you have not already signed in.
-
Go to the readme file on the browser and you will see the status. It's that easy :)


Now that the build pipeline is completed we can turn our attention to creating a release pipeline.
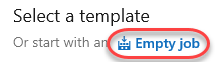
Like the build templates, there are many packaged options available that cover common deployment scenarios, such as publishing to Azure. But to illustrate how flexible and productive the experience is, we will build this pipeline from an empty template.
-
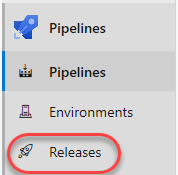
Select Releases. You will see 2 release pipelines already created by the Demo Generator. But, let's go ahead and define our own pipeline.
-
Click New pipeline and click Empty job.
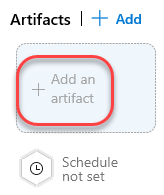
The first item to define in a release pipeline is exactly what will be released and when. In our case, it’s the output generated from the build pipeline. Note that we could also assign a schedule, such as if we wanted to release the latest build every night.
-
Select the associated artifact.
-
Set Source to the build pipeline created earlier and Default version to Latest. Change the Source alias, if you want, to something like "_Website-CI" and click Add. Note that this is an identifier (typically a short name) that uniquely identifies an artifact linked to the release pipeline. It cannot contain the characters: \ / : * ? < > | or double quotes.

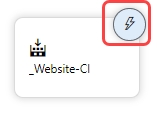
As we did with continuous integration starting on a source commit, we also want to have this pipeline automatically start when the build pipeline completes. It’s just as easy.
-
Click the Triggers button on the artifact.
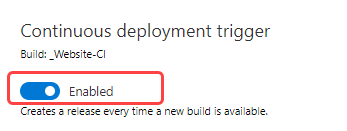
-
Enable continuous integration.
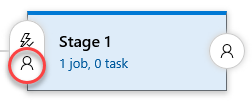
We also have the option of adding quality gates to the release process. For example, we could require that a specific user or group approve a release before it continues, or that they approve it after it’s been deployed. These gates provide notifications to the necessary groups, as well as polling support if you’re automating the gates using something dynamic, such as an Azure function, REST API, work item query, and more. We won’t add any of that here, but we could easily come back and do it later.
-
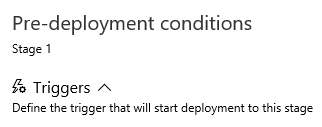
Click the pre-deployment conditions button.
-
Review pre-deployment condition options.
In this pipeline, we’re going to need to specify the same resource group in multiple tasks, so it’s a good practice to use a pipeline variable. We’ll add one here for the new Azure resource group we want to provision our resources to. Note that there are also a variety of deployment options we can configure, as well as a retention policy.
-
Select the Variables tab and add the following variables as detailed below.
Name Value ACR_LoginServer Your ACR Login Server ACR_PASSWORD Your ACR password ACR_USERNAME Your ACR username appservice-name Your appservice-name ImageName Your Image Name resourcegroup Your resourcegroup name 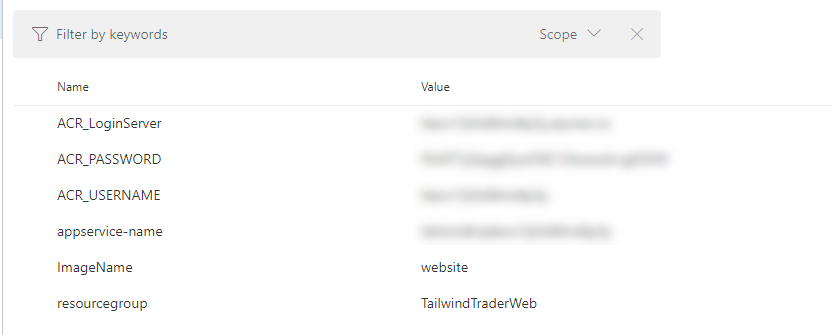
Also, just like the build pipeline, the release pipeline is just a set of tasks. There are many out-of-the-box tasks available, and you can build your own if needed. The first task our release requires is to set up the Azure deployment environment if it doesn’t yet exist. After we add the task, I can authorize access to the Azure account I want to deploy to and instruct it to use the variable name we just specified for the resource group name.
-
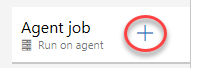
Select the Tasks tab.

-
Click the Add task button.
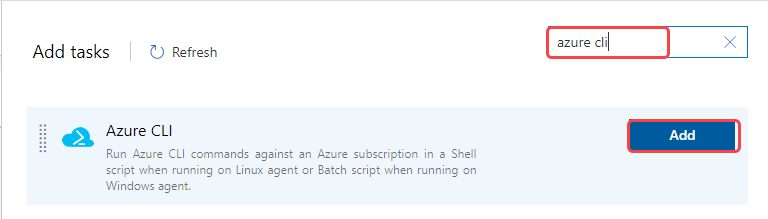
-
Search for azure cli and add the Azure CLI task.
-
Select the newly created task and authorize your Azure subscription. Note you will need to disable popup-blockers to sign in to Azure for authorization. If the pop-up window hangs, please close and try it again.

-
Configure the task as shown below-
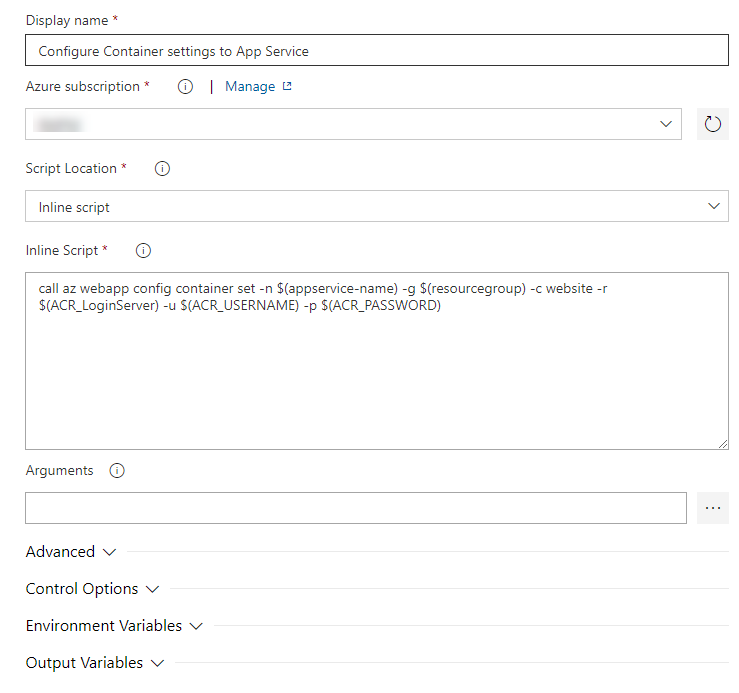
Copy the below script and paste it in the Inline Script section.
call az webapp config container set -n $(appservice-name) -g $(resourcegroup) -c website -r $(ACR_LoginServer) -u $(ACR_USERNAME) -p $(ACR_PASSWORD) -
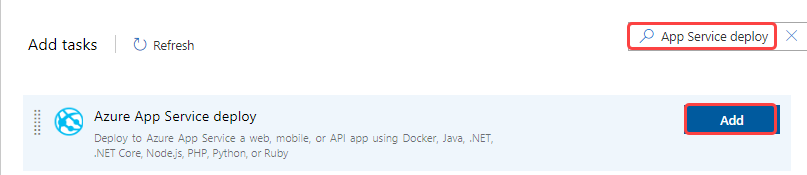
Click the Add task button.
-
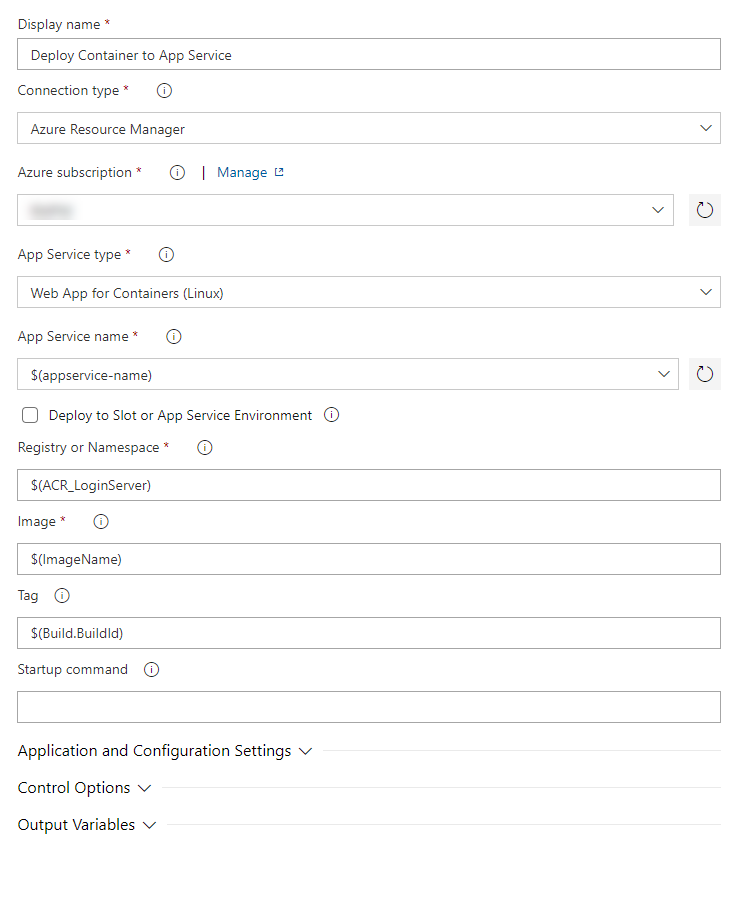
Search for Azure App Service deploy and add the task.
-
Configure the task as detailed below.
-
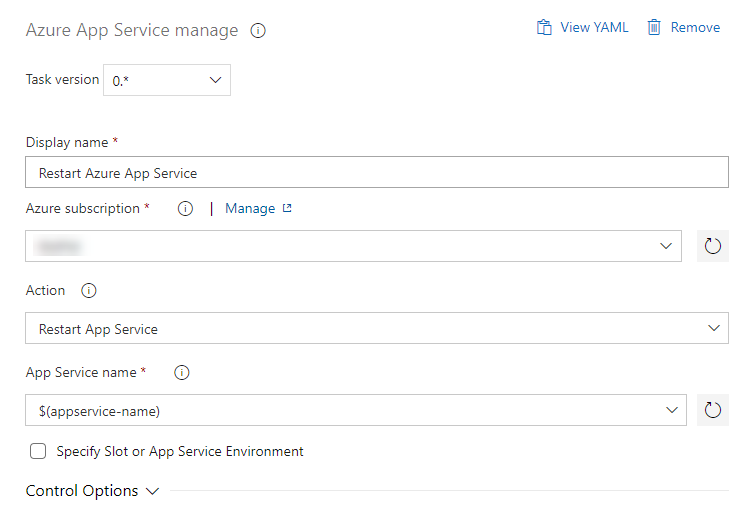
Search for Azure App Service manage and add the task.
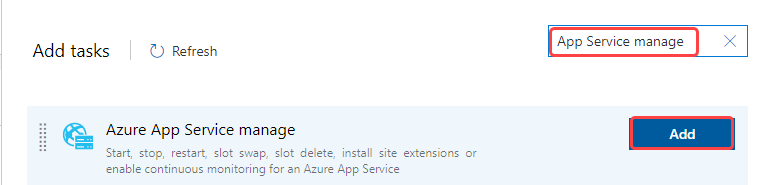
-
Configure the task as detailed below.
-
Save the pipeline.

-
Click Create release.

-
Click Create to start a new release.
-
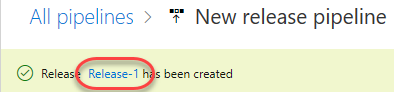
Click Release-1 to follow the new release.
-
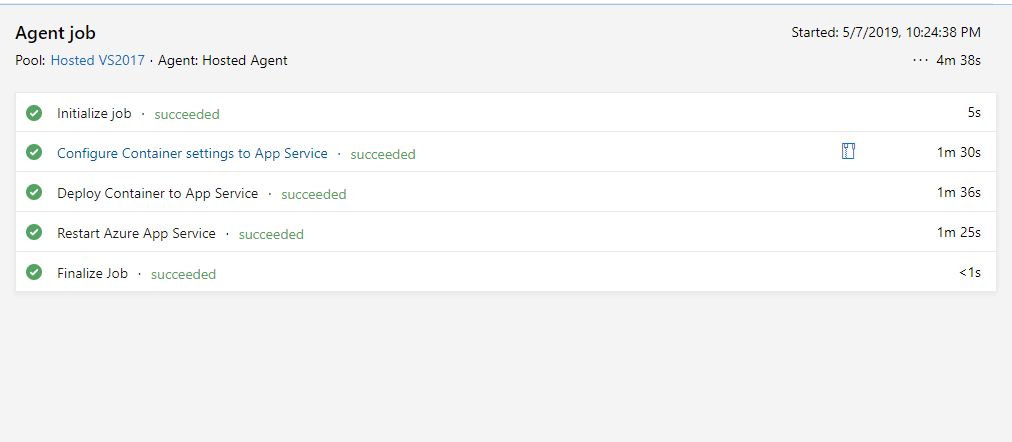
Click In progress to follow the release process.
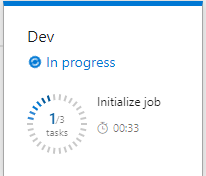
-
Note that it will take a few minutes for the app to finish deploying due to heavy first-time operations. Move ahead to the next step while it works in the background.
-
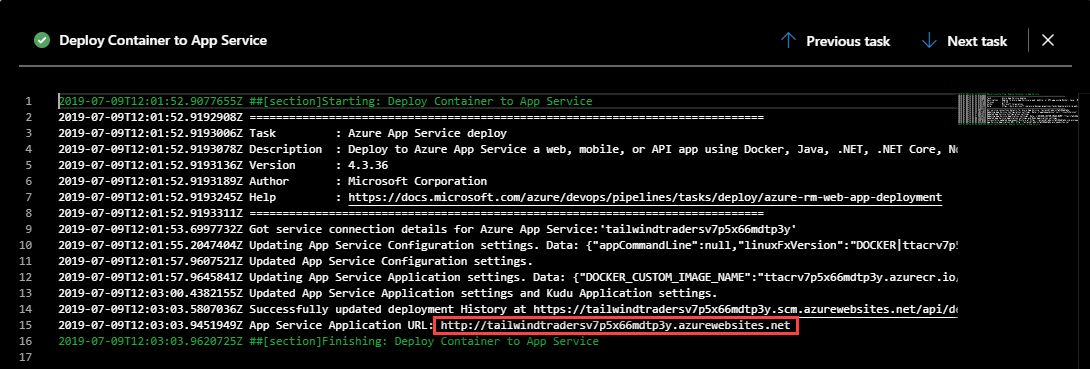
Select the App Service Deploy task to view the detailed log. You should find the URL to the published website here. Ctrl+Click the link to open it in a separate tab.
-
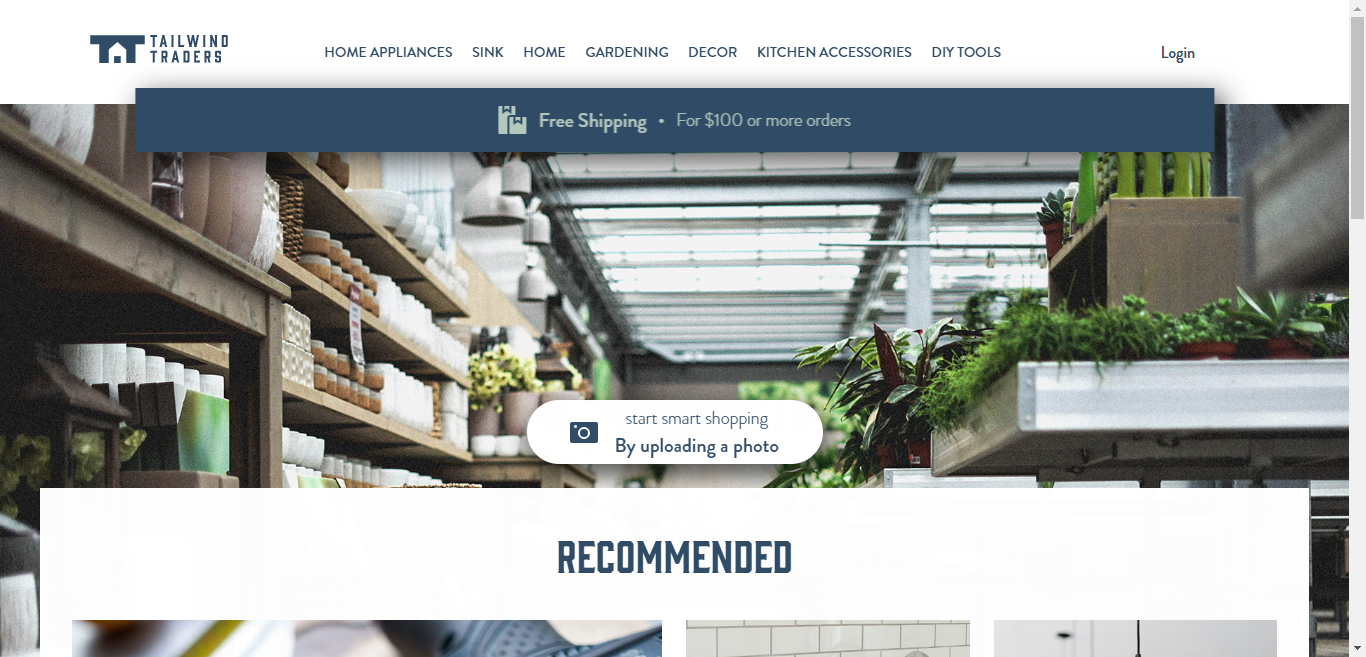
This will open the web page of Tailwind Traders.


Teams using Azure Pipelines to continuously build and deploy their code already have a deep integration between their code and their CI/CD pipelines. Adding Azure Boards to the mix deepens the integration, providing links from the build summary to the related code and work items for end-to-end traceability.
By connecting Azure Boards with GitHub repositories, you enable linking between GitHub commits and pull requests to work items. You can use GitHub for software development while using Azure Boards to plan and track your work. Azure Boards provides the scalability to grow as your organization and business needs grow.
-
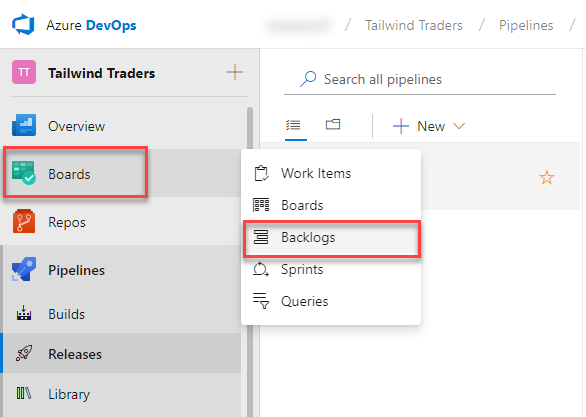
Navigate to Boards --> Backlogs --> Tailwind Traders Team in your Azure DevOps project.
-
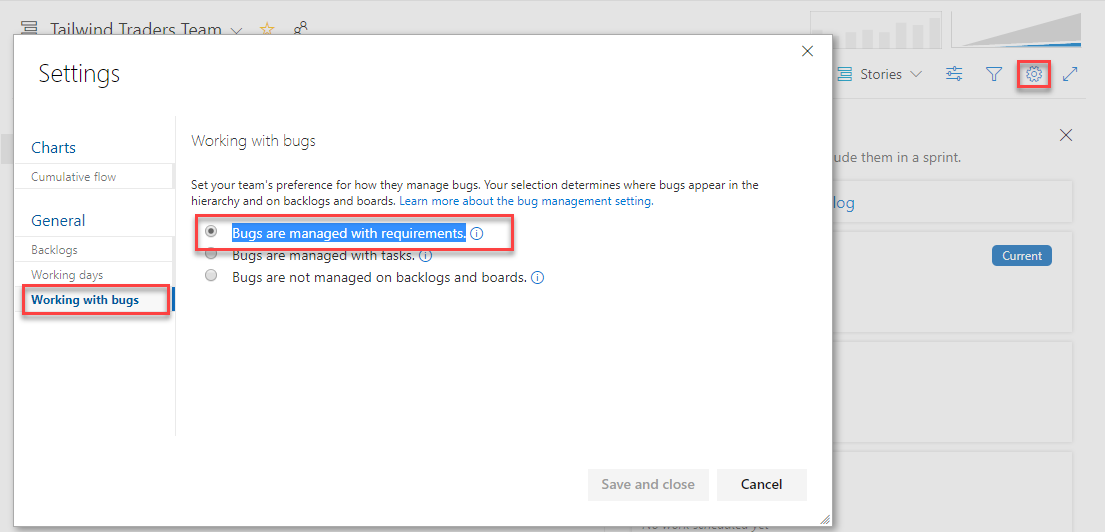
Click the Settings gear icon and choose Working with bugs. For this scenario, choose Bugs are managed with requirements.
-
Click New Work Item and select the Bug from drop-down and add the title Rephrase the description-For $100 or more orders. Click Add to top to create the bug.

-
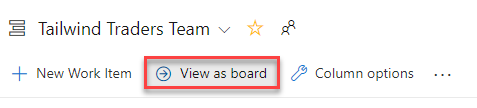
Click View as board.
-
Drag the bug to the Active column. This will set the status of the bug to Active state. Make note of the ID which will be used later for a commit and pull request.

-
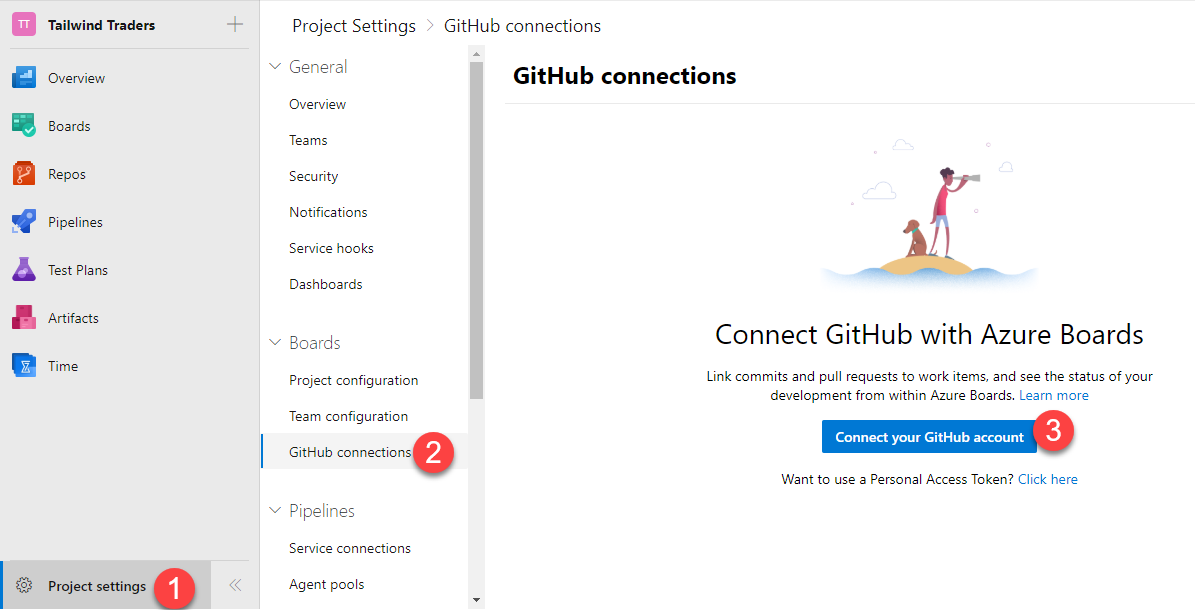
Now, let's connect this project to use the GitHub repository. Choose Project Settings --> GitHub connections --> Connect your GitHub Account.
-
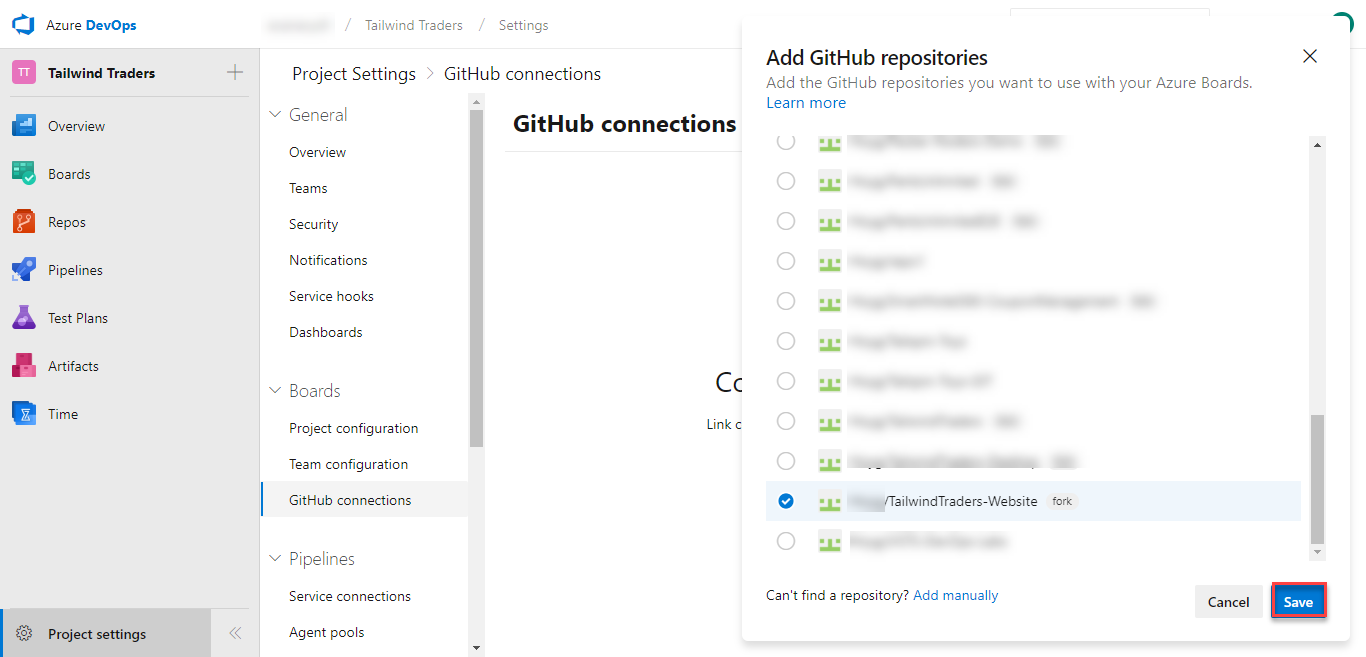
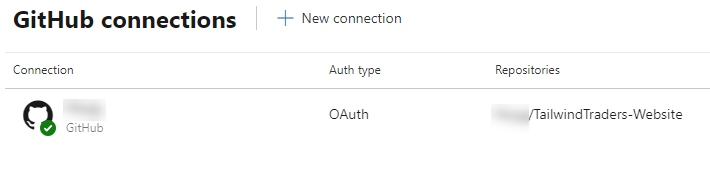
After the authorization is complete, the page returns to your Azure DevOps portal. In the Add GitHub repositories dialog, you'll see the list of repositories for which you are an administrator.
-
Check the ones that you want to add and then choose Save. When done, you should see the new connection with the selected repository listed.
-
Return to the web app and notice the description For $100 or more orders.

-
Open an instance of Visual Studio Code.
-
Click the master branch at the bottom of the window.

-
From the top of the screen, click Create new branch.

-
Create a branch Rephrase-Title in your GitHub account.

-
In the Explorer tab of Code, open the file ClientApp\src\assets\locales\translation.json.
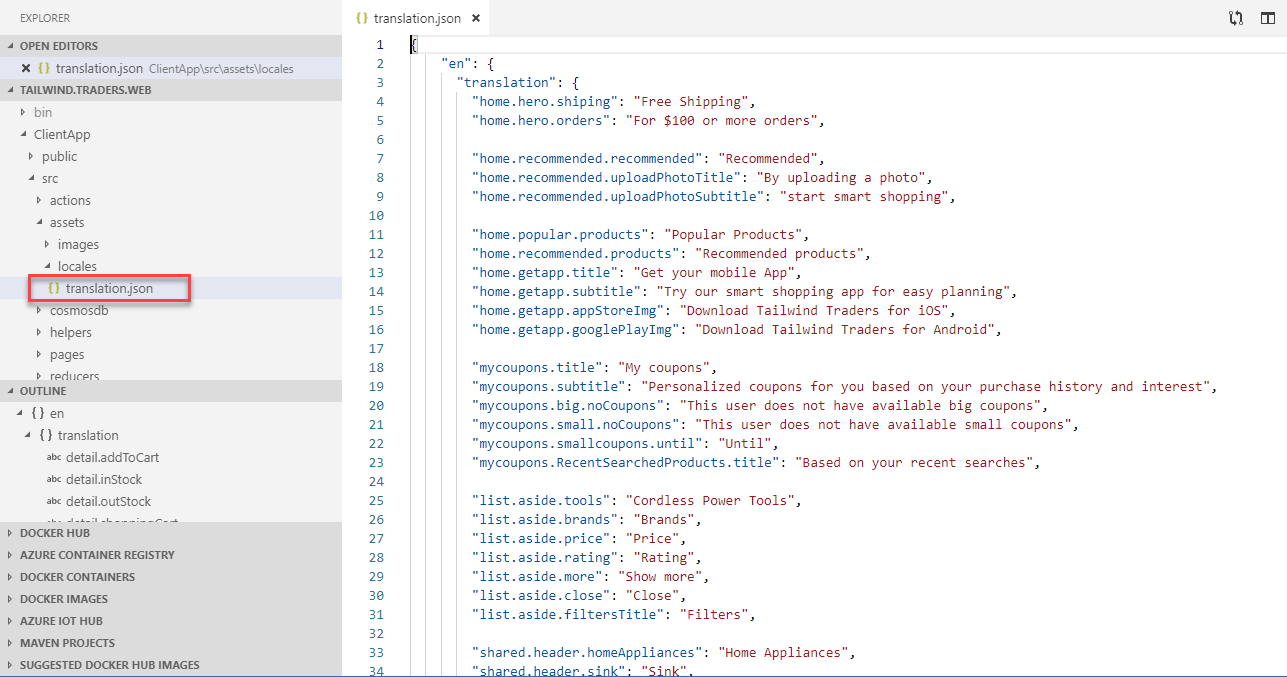
-
Search for home.hero.orders and rephrase the sentence For $100 or more orders with For orders worth $100 or more. Save the file.

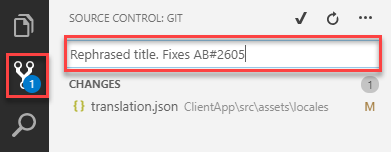
We'll commit it using a comment that includes special syntax to link it to the Azure Boards task we saw earlier. Now this commit will become trackable from project management, if we include the phrase "Fixes AB#ID".
-
Switch to the Source Control tab and enter a commit message of “Rephrased title. Fixes AB#2605.” but replace 2605 with the actual ID of the Azure Boards task. Press Ctrl+Enter and confirm the commit if prompted.
In this case, we're inheriting the title from the commit, but having the pull request mention "Fixes ##ID" will link and complete the target work item when the pull request is merged. The syntax used is Fixes AB#[Work Item ID] to create a link and update the state automatically when the changes reach the master branch.
-
Click the Publish Changes button at the bottom of the screen.

-
When the push has completed, return to the GitHub browser tab. With the commit pushed, we'll create a pull request to drive those changes back into the master branch.
-
Click Compare & pull request, which should appear on its own. If not, refresh.

-
Change the base fork to point at your project. By default, it points at the original Microsoft repo, so be sure to change it.

-
The title should initialize to the commit message entered earlier. Click Create pull request.
-
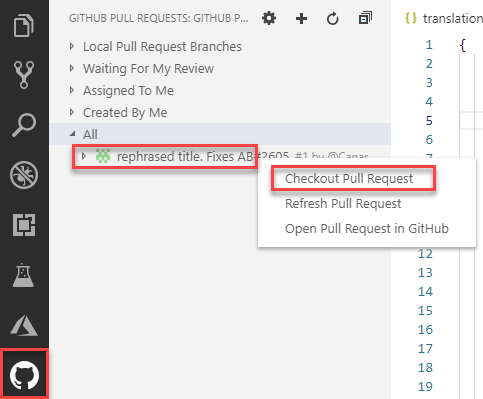
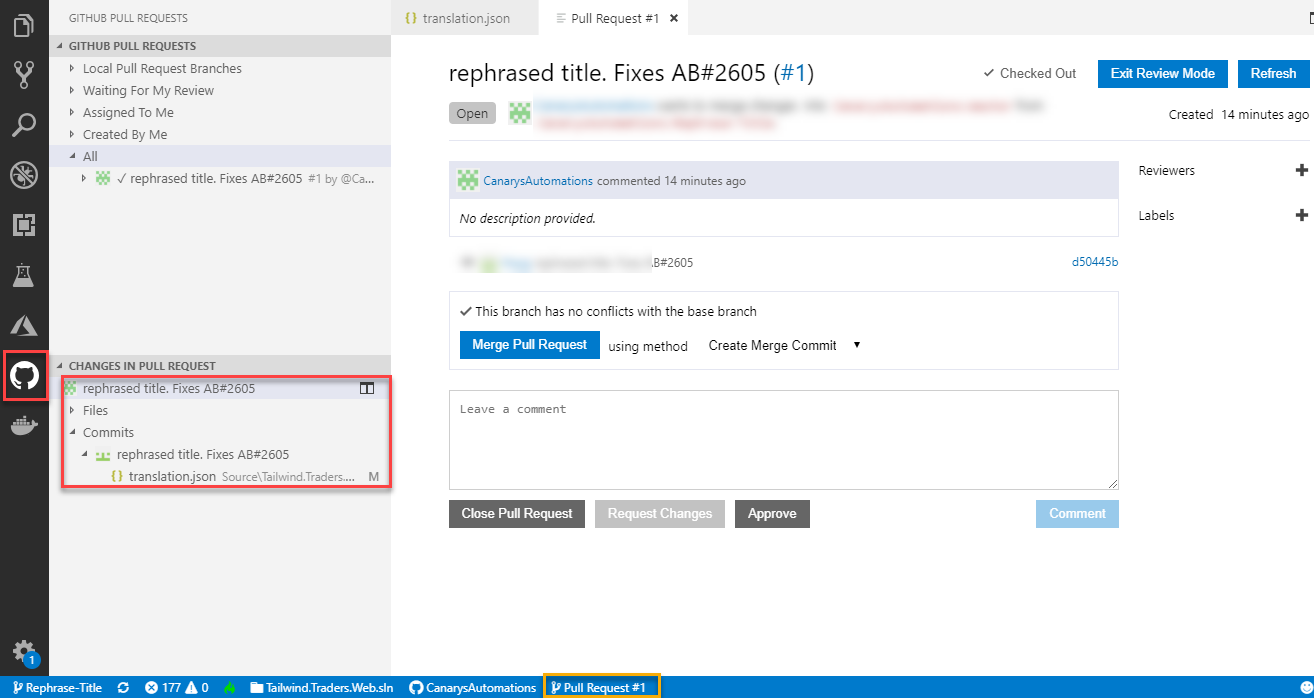
Return to Visual Studio Code. Now we’ll switch to the other side of the pull request and take on the role of reviewer in Visual Studio Code. We can use Visual Studio Code to check out the pull request, analyze changes, and comment. Assuming we trust the fix, we can merge the pull request to update master and kick off the CI/CD.
-
Under GitHub Pull Requests | All, right-click the pull request and select Checkout Pull Request.
-
Expand the Changes in Pull Request tree. Select the Description from under the original pull request. If you don't see the Description option, click the Pull Request # at the bottom of the screen and review the details of the PR.
-
Click Merge Pull Request and confirm the merge.

-
Once the deployment works its way through build and release, we can confirm the new functionality. Follow the CI/CD pipeline through to completion. Refresh the web app site to view the changes.
-
To confirm if the change shows up correctly, trigger the CI and then CD pipeline configured earlier. Once it completes, refresh the web app and confirm if you can see the changes.

-
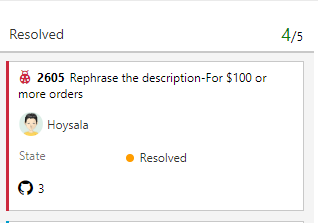
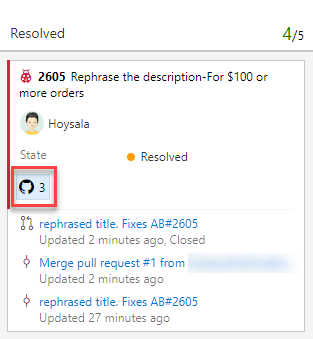
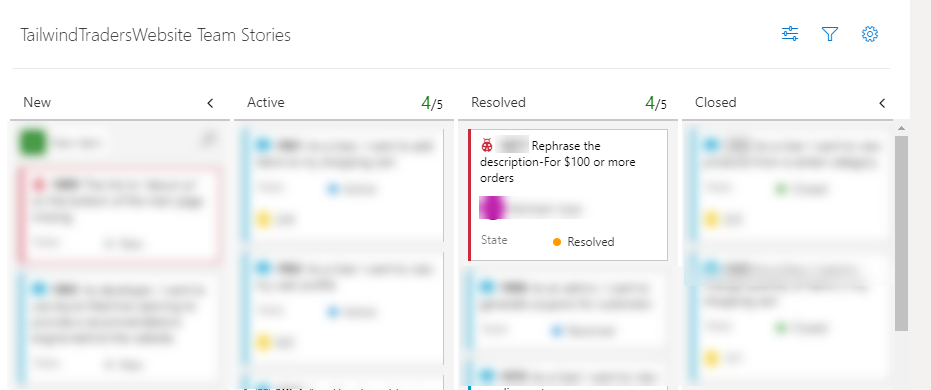
Return to the Azure DevOps portal and open the Kanban board. Since the bug we were working on was linked in a pull request that was approved, Azure DevOps will automatically transition the state of the work item to Resolved. You can also see that the related GitHub commits and pull request were linked to the work item.
-
The commit and pull request information should now be visible now with the click of the GitHub icon in the Bug work item card.


Microsoft Teams is the chat-centered workspace that provides instant access to everything needed for DevOps teamwork. It is that dedicated hub that brings your teams, conversations, content, and tools from across Azure DevOps, GitHub, and Office together into one place.
You can view your teams Kanban board or your team dashboards within Microsoft Teams. These can be added using Tabs. Tabs allow team members to access your service on a dedicated canvas, within a channel or in user’s personal app space.
-
Open Microsoft Teams which you configured earlier.
-
Messages are a good way to connect and keep a history of the conversation. It’s even better to use emoji, stickers, and GIFs to make a great impression. Open the Conversations tab to start a conversation with your team.

Microsoft Teams apps and connectors are available for a wide variety of platforms, including Azure DevOps and GitHub. This team has subscribed to updates from Azure DevOps for work item and pipeline updates, as well as updates on GitHub pull requests. This makes it easy for everyone to be aware of what’s going on, as well as to act as a single place for discussion about changes as they occur. Explore the various notifications that have come through over the course of the demo. However, you can also manually link items from GitHub and Azure DevOps in conversation.
-
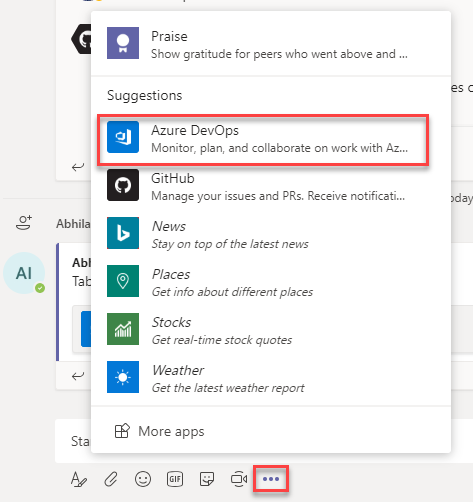
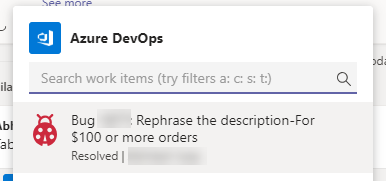
From the Messaging extensions menu, select Azure DevOps. This will provide a set of options to easily share and discuss information specific to that integration.
-
You can easily search, find and discuss work items from Azure DevOps in Teams, keeping the conversation and collaboration within your Teams app. To try this, Select the bug that you resolved in the last exercise(Bug #2605 in this example).
-
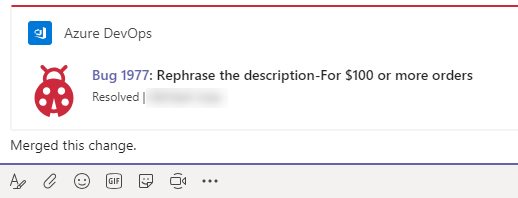
Select the bug work item to discuss and share comments about it with the team.
-
You can also the view the recent Pull Requests within the Teams. This provides a way to check in on GitHub pull requests without having to leave the context of other conversations and collaboration being done for this specific project.

-
Switch to the Stories Board tab to get an interactive access to the Azure DevOps Kanban board directly from within Microsoft Teams.


Microsoft Teams is a great place to manage certain DevOps processes, such as approving deployments. To illustrate this, we’ll add a pre-deployment approval to the release pipeline and invoke it using the same GitHub pull request model as before.
-
Return to the Azure DevOps browser tab. Navigate to Pipelines, select the release pipeline, click Edit to edit the pipeline.

-
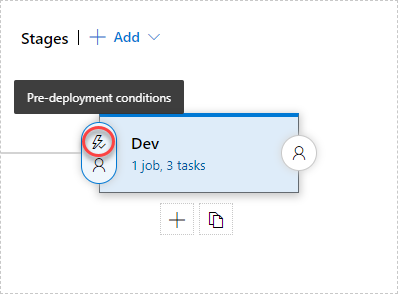
Click Pre-deployment conditions for Stage Dev.
-
Select the option to Enable the Pre-deployment approvals and add yourself as an approver. Click Save.

-
Return to the GitHub browser tab. You will now make a minor change to the codebase so that you can create a pull request and generate an approval request.
-
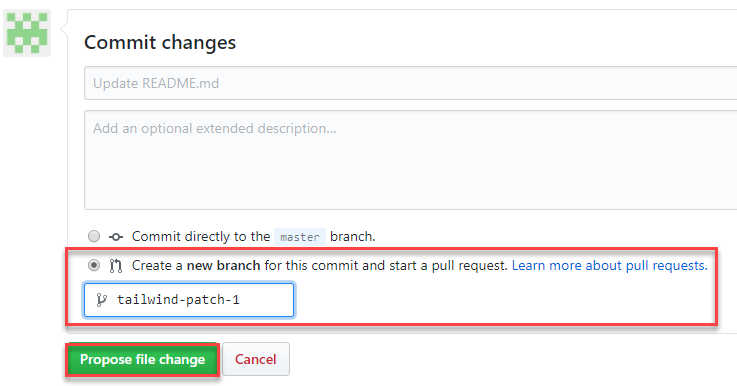
Select the Code tab. Click the Edit button to make a quick update to the readme file. Make a minor change (add a new line). Check the Create a new branch and give it a name. Click Propose file change.

-
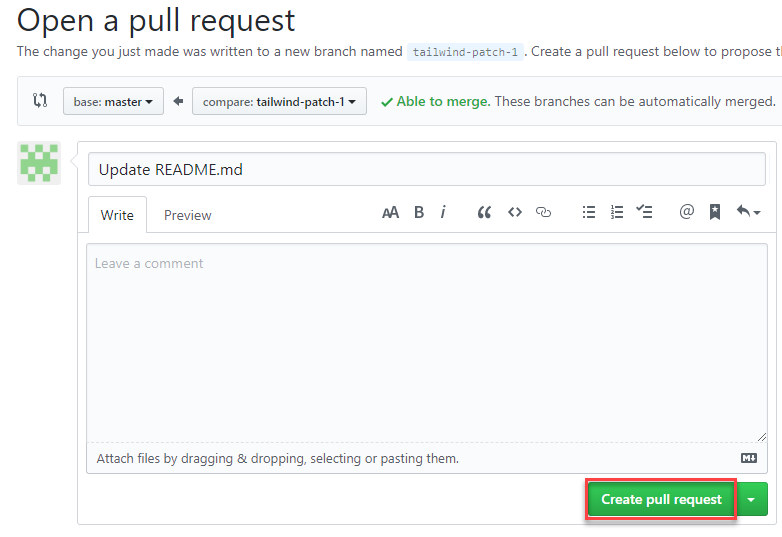
Click Create pull request.
-
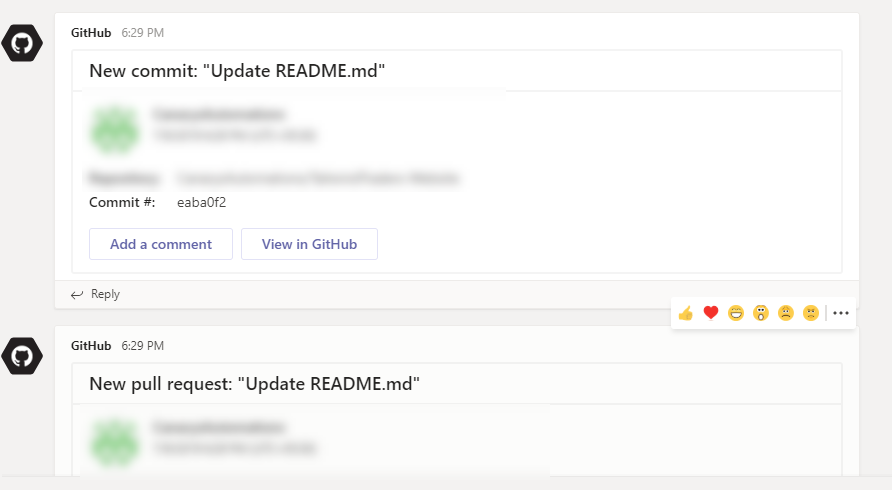
Switch to Microsoft Teams. Previously, you would have integrated GitHub connector with Teams (If not, please refer the pre-requisites section). Using this connector, you should be able to see new conversation notifications for the commit and pull request.
-
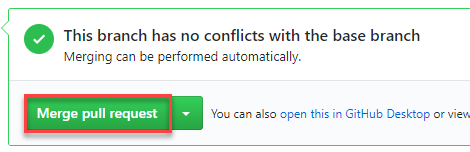
Return to GitHub and click Merge pull request. Click Confirm merge.
-
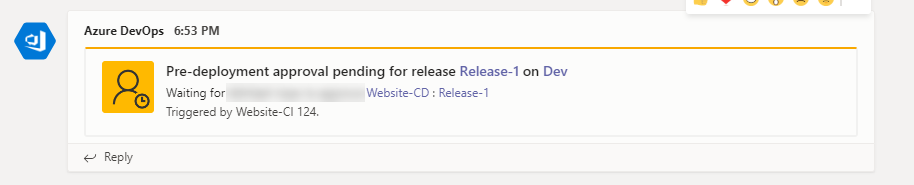
Navigate to Microsoft Teams. Previously, you would have integrated Azure DevOps connector with GitHub. So, when the release pipeline is ready to deploy, you will receive a notification in Teams. Click the link to be directed to Azure DevOps portal to approve the release.
-
When the deployment succeeds, you will receive another notification of success in the Teams tab.


Many organizations have their projects hosted in GitHub, and we just showed how you can set up automated deployment to Azure in minutes. And it doesn’t matter what kind of application they’re building or what kind of environment they’re deploying to. Once this automation is in place, companies can turn their focus to developing business value rather than on the infrastructure.