| title | titleSuffix | description | author | ms.author | ms.date | ms.topic | ms.service | services |
|---|---|---|---|---|---|---|---|---|
Instruction of a dual-protocol volume for Azure NetApp Files |
ANF Dual Protocol |
In this article, you will learn how to create dual-protocol volumes of ANF |
Meisei Takemoto |
b-mtakemoto |
02/25/2022 |
instruction |
azure-netapp-files |
storage |
Azure NetApp Files では NFS (NFSv3 or NFSv4.1) または SMB3 または dual protocol (NFSv3 and SMB, or NFSv4.1 and SMB) がサポートされています。このサイトでは LDAP user mapping を使っての dual protocol 設定方法を順を追って説明します
- ADDS または AADDS (Windows 2019 など) Windows client (Windows 10 など) Linux (Ubuntu など) を準備します
- ANFのサブネットを作成し、Microsoft.NetApp/volumes に委任します

| New user / group | Where | ID |
|---|---|---|
| User: ldap01 | on Linux | uid 139 |
| User: ldap02 | on Linux | uid 140 |
| Group: ldapg | on Linux | gid 555 |
| User: ldap01 | on Windows | uid 139 |
| User: ldap02 | on Windows | uid 140 |
| User: ldapg | on Windows | gid 555 |
| Parameter | Value |
|---|---|
| LOCATION | japaneast |
| RESOURCEGROUP | anflab-rg |
| ANF SUBNET | testsubnet |
| NETAPP ACCOUNT | netapptestaccount |
| NNETAPP POOL | netapptestpool |
| NETAPP VOLUME | netapptestvolume |
| DOMAIN JOIN USERNAME | azureadmin |
| DOMAIN JOIN PASSWORD | null |
| SMB SERVER NAME | pmcsmb |
| DNS LIST | 10.0.0.4 |
| AD FQDN | testdomain.local |
- Linux users と Windows AD users 自動で sync しません。マニュアルで user と group を map させます
- Linux と Windows で認証方法は異なります。下記を参照ください。
| Protocol | Security style | Name-mapping direction | Permissions applied |
|---|---|---|---|
| SMB | Unix |
Windows to UNIX | UNIX (mode bits or NFSv4.x ACLs) |
| SMB | Ntfs |
Windows to UNIX | NTFS ACLs (based on Windows SID accessing share) |
| NFSv3 | Unix |
None | UNIX (mode bits or NFSv4.x ACLs) |
| NFS | Ntfs |
UNIX to Windows | NTFS ACLs (based on mapped Windows user SID) |
- [NFSv3 and SMB] と [NFSv4.1 and SMB] ともにサポートしていますが、ここでは [NFSv3 and SMB] を使用します
- 同じ user を Windows (Active Directory) と Linux 両方に作る必要があります
-
ANF アカウントを作成する
az netappfiles account create \
  -g anflab-rg \
  --name netapptestaccount -l japaneast
-
ANF pool を作成する
az netappfiles pool create \
 --resource-group anflab-rg \
 --location japaneast \
 --account-name netapptestaccount \
 --pool-name netapptestpool \
 --size 4 \
 --service-level Standard
-
DNS の設定を変更
az network vnet update -g MyResourceGroup \ -n {vnet_name} --dns-servers 10.0.0.4Note: {vnet_name} は実際の環境の VNet名 に置き換え。10.0.0.4 は Primary Domain Controller
-
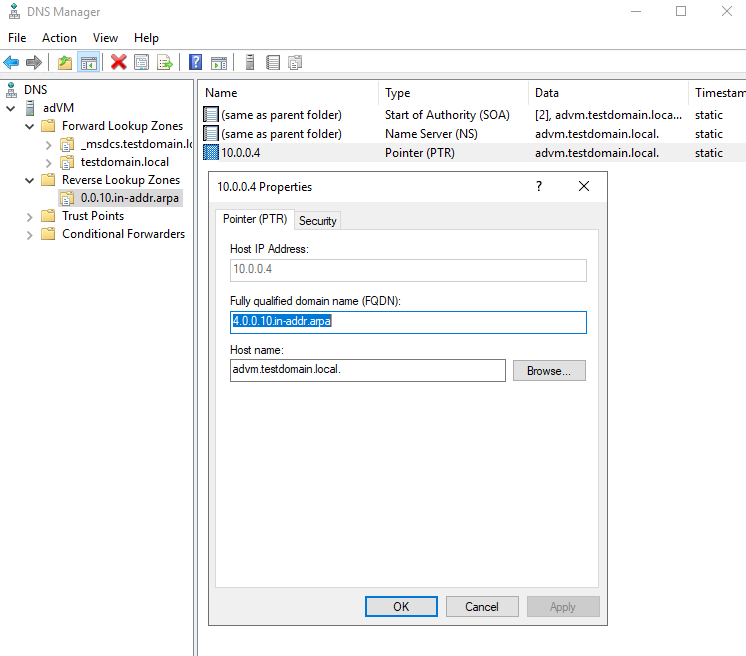
Reverse DNS を設定
- ここでは Domain Controller を DNS として使用しているので、Windows にて設定
-
Active Directory User と Group を作成
- Active Directory User
pcuserとldap01とldap02を作成 - Group
ldapgを作成し、ldap01とldap02をldapgのメンバーとする
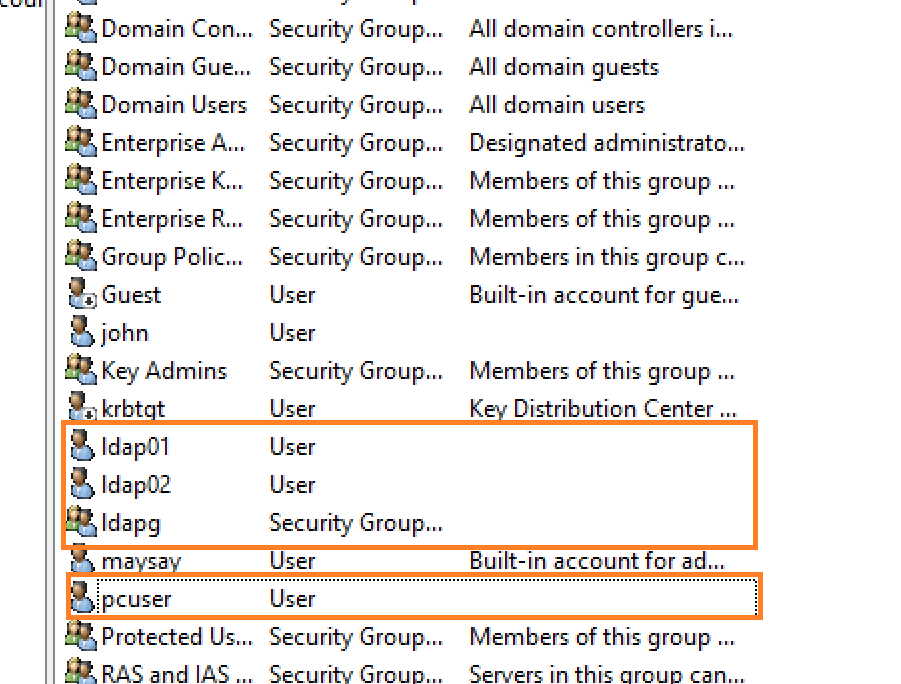
- Active Directory User
-
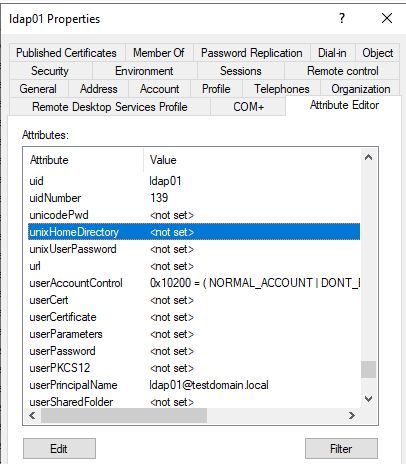
LDAP POSIX Attribute の設定
- グループ ldapg の attributes の設定:
objectClass: group, posixGroup,
gidNumber: 555

- ユーザー ldap01 の attributes の設定:
uid: idap01,
uidNumber: 139,
gidNumber: 555,
objectClass: user, posixAccount
- ユーザー ldap02 の attributes の設定:
uid: idap02,
uidNumber: 140,
gidNumber: 555,
objectClass: user, posixAccount
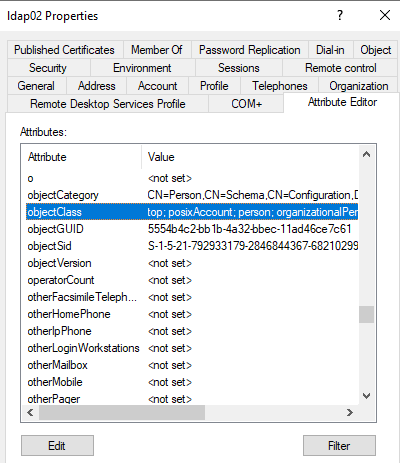
Note: uid gid は重複しないように
cat /etc/passwdcat /etc/groupで空きを確認します - グループ ldapg の attributes の設定:
-
Linux で group と users を作成 (6で作成したものと同じ gid, uid を 使う)
- 新しいグループ
ldapgを gid 555 で作成
group add -g 555 ldapg
- 新しいユーザー
ldap01を uid 139, groupldapgで作成し、パスワードを設定
useradd -u 139 ldap01 -g ldapg
passwd ldap01
- 新しいユーザー
ldap02を uid 140, groupldapgで作成し、パスワードを設定
useradd -u 140 ldap02 -g ldapg
passwd ldap02
- 新しいグループ
-
Azure Portal にて Active Direcotry Connections の設定

- AZ CLI ならこちら
RESOURCEGROUP_NAME="ANFLabo-RG"
NETAPP_ACCOUNT_NAME="netapptestaccount"
DOMAIN_JOIN_USERNAME=azureadmin
DOMAIN_JOIN_PASSWORD=null
SMB_SERVER_NAME="pmcsmb"
DNS_LIST="10.0.0.4"
AD_FQDN="testdomain.local"

az netappfiles account ad add --resource-group $RESOURCEGROUP_NAME \
  --name $NETAPP_ACCOUNT_NAME \
  --username $DOMAIN_JOIN_USERNAME \
  --password $DOMAIN_JOIN_PASSWORD \
  --smb-server-name $SMB_SERVER_NAME \
  --dns $DNS_LIST \
  --domain $AD_FQDN
-
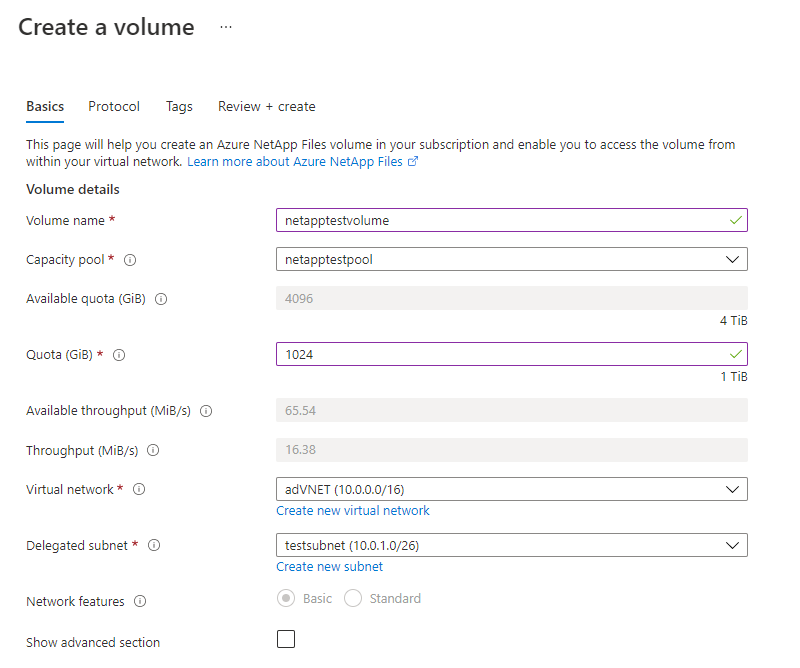
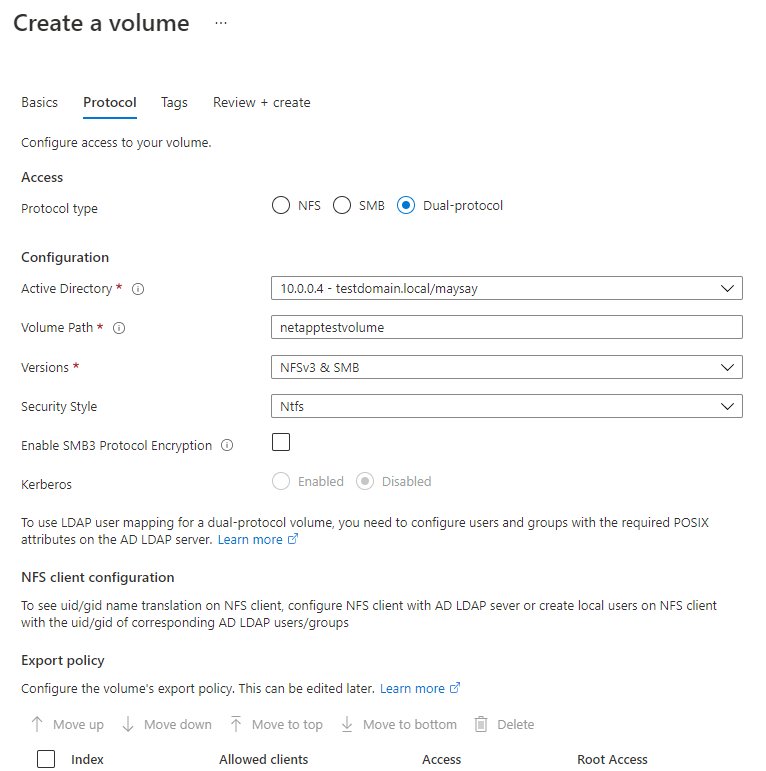
ANF volume を作成 (必ずGUIで CLIだと上手くできないので、無難に)
- Dual Protocol を選ぶ。その他はdefault
-
Volume のデプロイが完成したら、Mount instructions に従い mount


-
このようにMount instructions に SMB と NFS の instructions が現れます
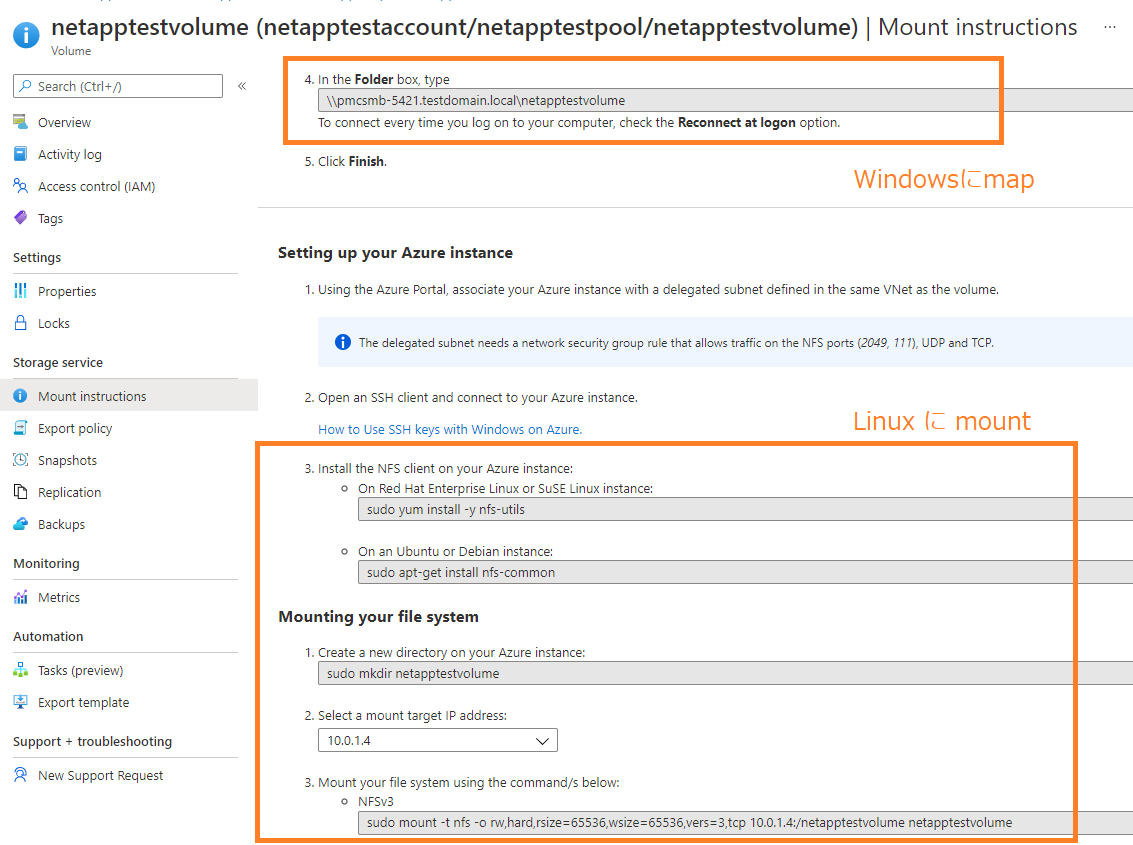

- これで完了です
-
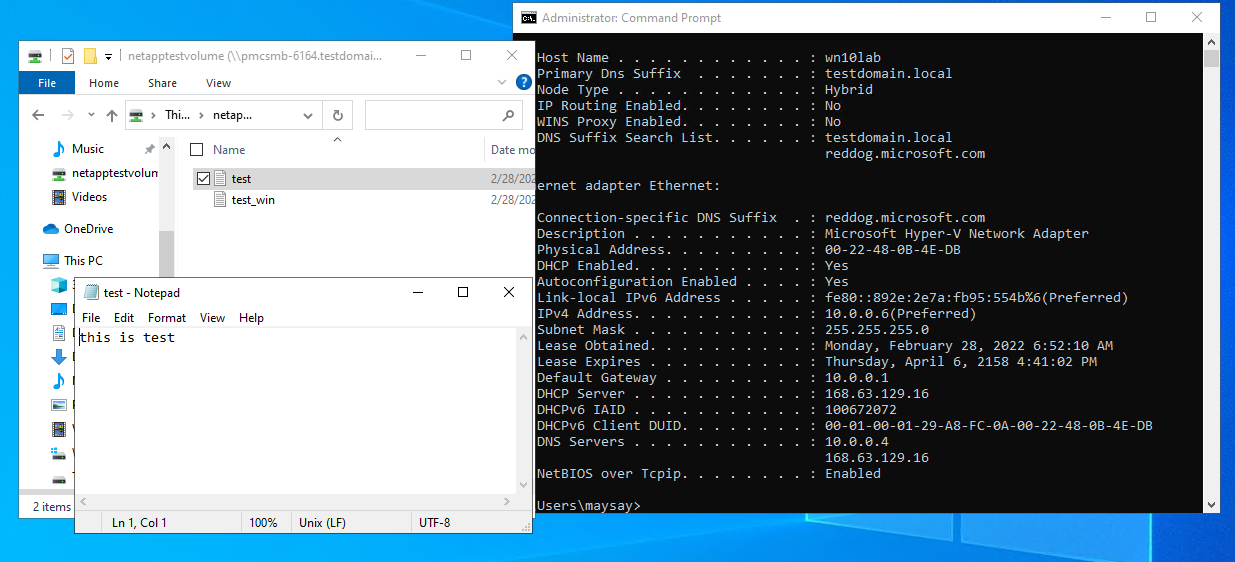
Windows でのスクリーンショット
-
Linux でのスクリーンショット どちらからも書き込みことが可能です


