2024-08: We have released new DexCap hardware updates to address known issues. Check out latest tutorial (Hardware Setup, Software Setup, Data Collection) for more information.
- Overview
- Installation
- Data Collection
- Data Processing
- Building Training Dataset
- Training Policy
- Acknowledgements
- BibTeX
- License
This repository is the implementation code for "DexCap: Scalable and Portable Mocap Data Collection System for Dexterous Manipulation" (Paper, Website) by Wang et al. at The Movement Lab and Stanford Vision and Learning Lab.
In this repo, we provide our full implementation code for Data collection, Data processing, Building dataset, and Training policy.
First, we install and build the environment on the mini-PC (NUC) for data collection. This installation is based on a Windows platform. After installing the software for the Rokoko motion capture glove and Anaconda, create the conda environment:
cd DexCap/install
conda env create -n mocap -f env_nuc_windows.yml
The second step is to install and build environments for the Ubuntu workstation, which could also be a headless server for dataset building and training. Simply follow:
conda create -n dexcap python=3.8
conda activate dexcap
cd DexCap/install
pip install -r env_ws_requirements.txt
cd STEP3_train_policy
pip install -e .
First, start the Rokoko Studio software and make sure the motion capture glove is detected. Choose the Livestreaming function and use the Custom connection with the following settings:
Include connection: True
Forward IP: 192.168.0.200
Port: 14551
Data format: Json
Make sure the NUC has been connected to the portable Wi-Fi router and the IP address has been set to 192.168.0.200.
Feel free to change to another address and modify the settings correspondingly. After starting the streaming, we can now open a conda terminal and use the following script to catch the raw data of the mocap glove:
conda activate mocap
cd DexCap/STEP1_collect_data
python redis_glove_server.py
After starting the streaming, open another conda terminal and start data collection with:
python data_recording.py -s --store_hand -o ./save_data_scenario_1
The data will first be stored in the memory. After finishing the current episode, use Ctrl+C to stop the recording, and the program will automatically start saving the data on the local SSD in a multi-threaded manner.
The collected raw data follows the structure of:
save_data_scenario_1
├── frame_0
│   ├── color_image.jpg           # Chest camera RGB image
│   ├── depth_image.png           # Chest camera depth image
│   ├── pose.txt                  # Chest camera 6-DoF pose in world frame
│   ├── pose_2.txt                # Left hand 6-DoF pose in world frame
│   ├── pose_3.txt                # Right hand 6_DoF pose in world frame
│   ├── left_hand_joint.txt       # Left hand joint positions (3D) in the palm frame
│   └── right_hand_joint.txt      # Right hand joint positions (3D) in the palm frame
├── frame_1
└── ...
First, we can visualize the collected data through:
cd DexCap/STEP1_collect_data
python replay_human_traj_vis.py --directory save_data_scenario_1
A point cloud visualizer based on Open3D will show up, and you can see the captured hand motion as in the following
(Optional) We also provide an interface for correcting initial drifts of the SLAM, if needed. Run the following script and use the numeric keypad of the keyboard to correct the drifts. The correction will be applied to the entire video.
python replay_human_traj_vis.py --directory save_data_scenario_1 --calib
python calculate_offset_vis_calib.py --directory save_data_scenario_1
The next step is to transform the point cloud and mocap data to the robot operation space. Run the following script and use the numeric keypad to adjust the world frame of the data to align with the robot table frame. This process usually takes < 10 seconds and only needs to be done once for each data episode.
python transform_to_robot_table.py --directory save_data_scenario_1
Finally, cut the whole data episode into several task demos with the following script.
python demo_clipping_3d.py --directory save_data_scenario_1
You can download our raw dataset from Link. And use replay_human_traj_vis.py to visualize the data.
After collecting and processing the raw data, we can now transfer the data to the workstation and use the following script to generate a hdf5 dataset file in robomimic format for training.
python demo_create_hdf5.py
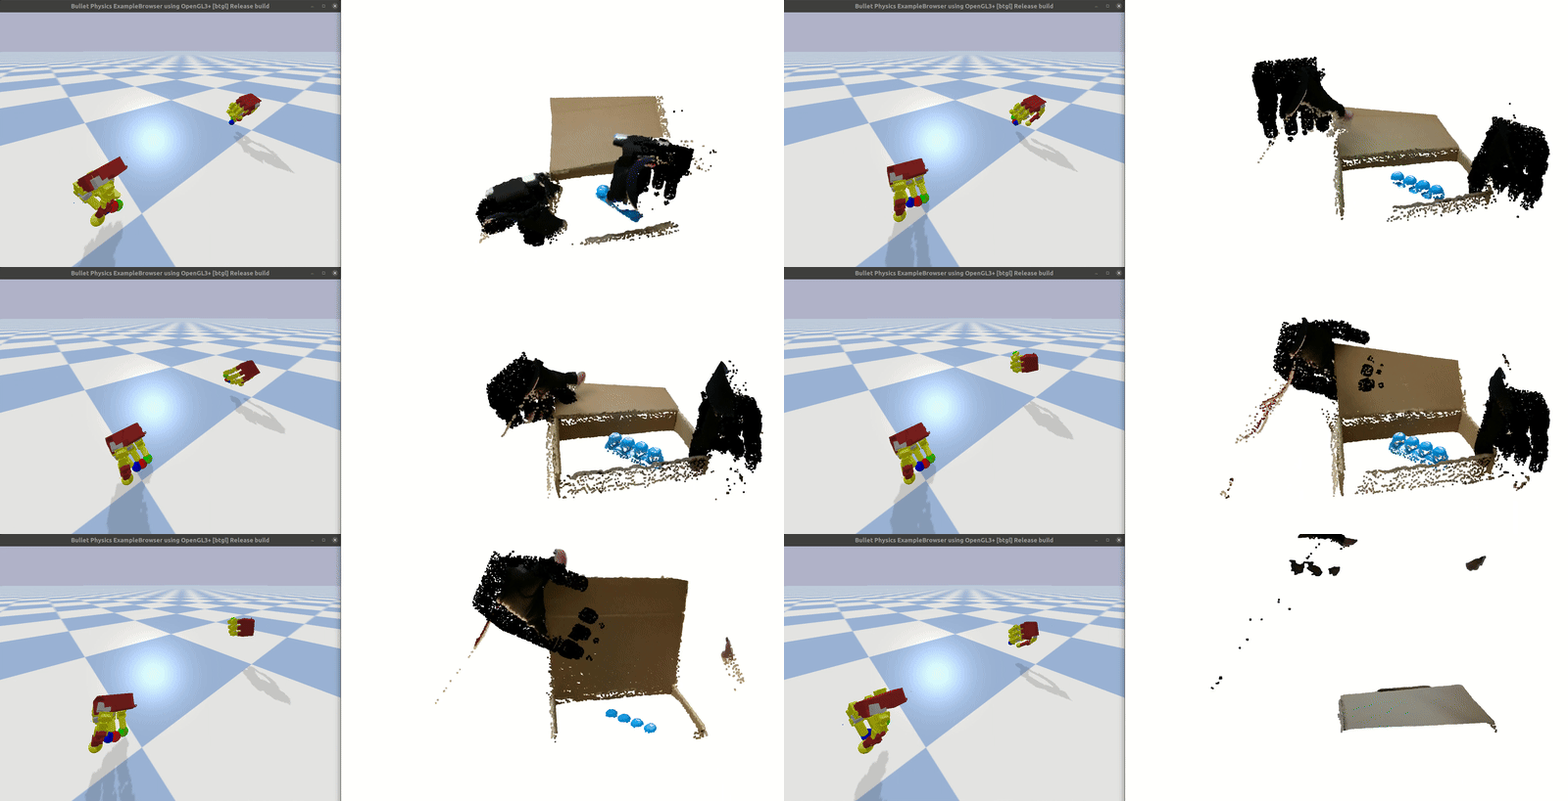
This process will use inverse kinematics (based on PyBullet) to match the robot LEAP hand's fingertips to the human fingertips in the mocap data. When the human's hand is visible in the camera view, a point cloud mesh of the robot hand built with forward kinematics is added to the point cloud observation as shown in the following video. The redundant point clouds (background, table surface) are also removed.
You can download our processed dataset from Link.
After building the hdf5 dataset, we can start policy training with the following script and config file:
cd DexCap/STEP3_train_policy/robomimic
python scripts/train.py --config training_config/[NAME_OF_CONFIG].json
The default training config will train a point cloud-based Diffusion Policy, which takes the point cloud observation from the chest camera (transformed to the fixed world frame) as input and generates a sequence (20 steps) of actions for both robot hands and arms (46 dimensions in total). For more details on the algorithm, please check out our study paper.
- Our policy training is implemented based on robomimic, Diffusion Policy.
- The robot arm controller is based on Deoxys.
- The robot LEAP hand controller is based on LEAP_Hand_API.
@article{wang2024dexcap,
  title = {DexCap: Scalable and Portable Mocap Data Collection System for Dexterous Manipulation},
  author = {Wang, Chen and Shi, Haochen and Wang, Weizhuo and Zhang, Ruohan and Fei-Fei, Li and Liu, C. Karen},
  journal = {arXiv preprint arXiv:2403.07788},
  year = {2024}
}
Licensed under the MIT License


