TeHyBug firmware for Indicatorr Board with 15 WS2812B LEDS, Buzzer, Pir Sensor and support additional external sensors like AHT10 and BMX280.
- OLED Display support
- 15 RGB indication LEDs
- Buzzer for generating sounds (tiny alarm)
- Pir Motion Sensor
- Open door (reed switch) sensor support
- Battery Charging IC on Board for a Battey Backup
- AHT20 Temperature and Humidity Sensor on board
- HomeAssistant (https://www.home-assistant.io/) MQTT Autodiscovery mode (just provide the mqtt brocker ip and the device will appear in your HA)
- Web Server for OTA Updates, simply upload new firmware versions via web interface
- Web Server that serves the sensor data in Json Format
- Possible to turn off WIFI and work in offline display only mode (Hit reset and hold the Button IO_5 when you see the TeHyBug logo, once the LED turns purple, release the button). To find out that the wifi is on, there will be a small dot on the right side of the display with sensordata
- Hold the mode button for 15 seconds to factory reset your device and delete the wifi configuration
- Supports connection of external TeHyBug Universal Sensors
To flash firmware use the .esp8266.bin file. For flashing and programming you can use ARDUINO IDE, select there generic ESP8285 board. Also you can use the ESPTool to flash binaries to the board or other tools which are described at: https://nodemcu.readthedocs.io/en/latest/flash/
To update the firmware from OTA WebInterface open http:https://tehybug.local/update in your browser, if this doesnt work, try to find out its IP from your router admin menu or use any local network ip scanner app for your mobile phone to get the device ip and then open http:https://<ip_address>/update with your browser.
To show the temperature in Fahrenheit instead of Celsius, open http:https://tehybug.local/config or http:https://<ip_address>/config with your browser to save the configuration.
For the update page you will have to provide a username and a password:
Username: TeHyBug
Password: FreshAirMakesSense
- hold the Mode button for 15 seconds to do a factory reset (works only with already configured devices)
- hold the Mode button and hit the Reset button to boot the device into a flashing mode (in case you want to flash a firmware manually via USB)
- hit it to reboot the device, works in combination with other buttons
- no functionality yet.


- Connect external sensor to the board 3,5mm audio jack connector.
- Connect the power supply to micro USB port
- TeHyBug will boot, the led will turn blue and the logo will appear on the display (if display is available)
- Connect to a TeHyBug wifi network like the image below
-

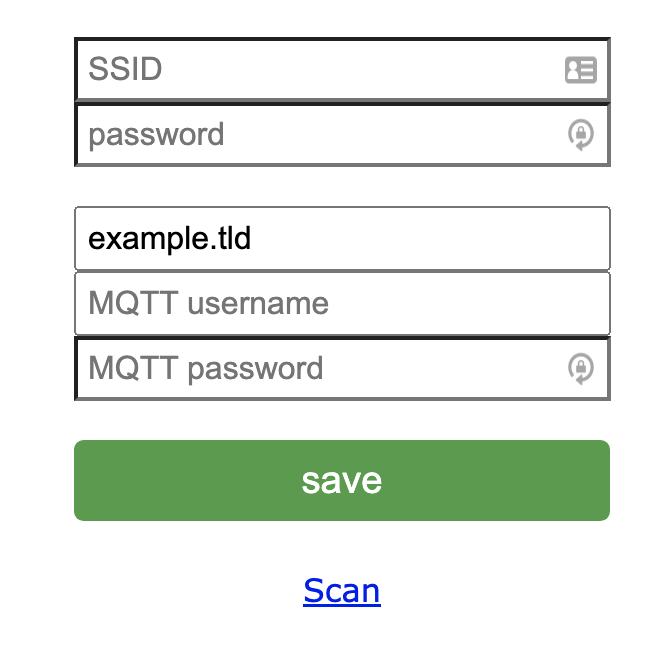
- open http:https://192.168.4.1/ in your browser, and click the configuration button
-