This is a repo explaining how to program the ESP32 and use some sensors like e.g. the CO2-sensor MH-Z14A.
I am an absolute beginner when it comes to C++ or microcontroller or sensors. I am a pro in doing things wrong at first - and by writing it down to avoid that hopefully in the future.
So here is some of the wrongs I stumbled into:
Find the proper cable (on *nix ):
$ ls /dev/tty* > unconnected.log;
# connect with a new cable
$ ls /dev/tty* > connected.log ;
$ diff unconnected.log connected.log
# if no tty shows up in the diff, try another cable or usb port and restart procedure
I had to try 6 cables before '/dev/ttyUSB' did show up - what a relieve, ESP32 is not broken!
Download the arduino ide from their homepage (not via your OS packet manager - it may be way outdated!).
Install esptools: https://github.com/espressif/esptool/
(on linux: $ pip3 install esptool.
There is also a Debian/Ubuntu package python3-serial that can be installed first (apt install python3-serial).
Bring the ESP32 board to recognition by arduino ide: Follow "Installation instructions using Arduino IDE Boards Manager" at https://github.com/espressif/arduino-esp32/blob/master/docs/arduino-ide/boards_manager.md:
Add the ESP32 board: File->Preferences->additional_boards_manager_urls: https://raw.githubusercontent.com/espressif/arduino-esp32/gh-pages/package_esp32_index.json
Then Tools->Board_menu and install esp32 platform (and don't forget to select your ESP32 board from Tools->Board_menu after installation).
If you got EMRDY:1 when in arduino ide->tools->serial_monitor you are not
connected. Wrong serial port or wrong cable or what.
If you upload a sketch and only get characters trash like:
)%M⸮
every second or so, press the small "en" button on your ESP32. This enables it.
If serial monitor keeps being empty: change the baud rate of the monitor (right bottom selector)
to the value you use in the uploaded program (look at Serial.begin($value); ).
See https://randomnerdtutorials.com/esp32-dht11-dht22-temperature-humidity-sensor-arduino-ide/
Read the DHT22 humidity and temperature sensor following. Worked instantly :)
See https://github.com/rafalmag/ESP32-MH-Z14A
Read the MH-Z14A CO2-Sensor. That was hard - I got some plausible, but very round measure (either 410 ppm or 430 ppm) around 12 times (~1 minute) (this is normal, so wait a bit till the sensor sends correct data) after which I got permanently 5000 ppm and sometimes -1 . 5000 ppm happens to be the maximum of the sensors measuring capacity. That's also the value written to output after the sensor is booted.
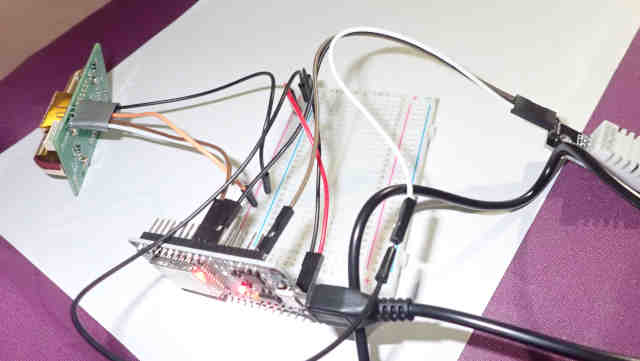
So ... problem was that I connected the ESP32 eve 3.3V connector to power the MH-Z14A like proposed in "DHT22" (where this was sufficient to use the DHT22) via the breadboard as shown in the link above. After reading https://www.letscontrolit.com/forum/viewtopic.php?f=2&t=1785 I understood that the problem was too low voltage. Here https://www.esp32.com/viewtopic.php?t=11904 is shown how to get the 5V (it's the red VIN connector). Now the sensor measures nice, unround values :)
I did my best to simplify the program (it consists of one file and doesn't need any library besides the standard Arduino) and wrote all kinds of notes and sources of problems into it:
https://github.com/dr0i/ESP32/ESP32-MH-Z14A/co2FromSerial.cpp
Bought "DC5V 5M WS2812 5050 SMD RGB 3 Pins LED Module Strip Light with Female
Male Connector" , i.e. 50 really bright LEDs for just 11 Euro at banggood .
One can simply cut the cable to use the amount of LEDs one wish.
Using FastLED.h I got it to work. It's easy to use it, but I experienced some
difficulties, though:
flash read err, 1000 resulting in reboots, is caused by a power issuse, see:
espressif/esp-idf#113
I managed to use 23 LEDs of the stripe, which has 50 overall.
"If you are using a 3-wire led chipset, (aka Neopixels, WS2812, TM1809), you may have run into some problems when trying to pair it with reading serial data ..." https://github.com/FastLED/FastLED/wiki/Interrupt-problems
It's about interrupts. Even with set to 240 Mhz I experienced problems. !Should have bought a 4-wire led chipset!
Interestingly, just opening "Tools->Serial Monitor" may cause unpredictable sideeffects because of these interrupts. Most important is the number of used LEDs: I had no problems to use 23 LEDs but discovered some strange effects when using all 50 LEDs. Also, when using too much LEDs, it seems that arduino ide may loose the /dev/ttyUSB0 device. To power off the too many LEDs one can disconnect the USB or the 5V power cable from the ESP. Then load the program (the device will be found now!) and reconnect the power cable.
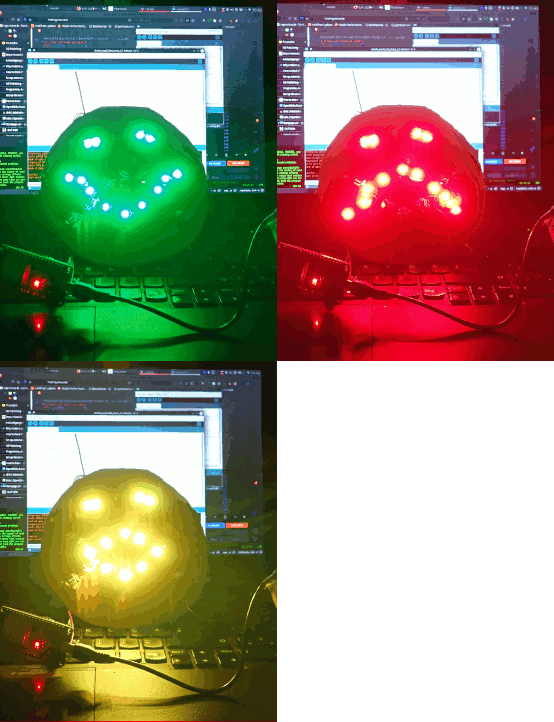
This is the prototype with ~20 cm in diameter using 20 LEDs running https://github.com/dr0i/ESP32/blob/master/ESP32-neopixel_led_stripe/sketch_esp32_led_stripes_3.1.cpp :
 It's really bright and great and should have a good visibility even in bright
daylight!
