Brendon Smith (br3ndonland)
- Installation
- Hardware
- macOS
- Homebrew package management
- Shell
- Text editors
- Fonts
- Language-specific setup
- PGP
- SSH
- General productivity
- Media
- Science
Dotfiles are application configuration and settings files. They frequently begin with a dot, hence the name. This dotfiles repository is meant to be installed in conjunction with my Homebrew Brewfile and Strap.
A Brewfile is a list of Homebrew packages and casks (applications) that can be installed in a batch by Homebrew Bundle. The Brewfile can even be used to install Mac App Store apps with the mas CLI. Note that you must sign in to the App Store ahead of time for mas to work.
Strap is a shell script to automate setup of a new macOS development machine. Strap is idempotent, meaning it can be run repeatedly on the same system. There are several options for generating strap.sh. The web app is easiest, but Strap can also be set up locally.
All the user needs to do when setting up their macOS development machine is download the strap script customized for their GitHub account, then run it with bash ~/Downloads/strap.sh.
During execution of strap.sh, Strap can run three scripts from the dotfiles repo. The scripts must be executable (chmod +x, execute permissions can be committed to version control with Git), stored in the dotfiles repo in script/, and named exactly (without extensions) for Strap to recognize them.
- dotfiles/script/setup
- dotfiles/script/bootstrap
- dotfiles/script/strap-after-setup
See the script/ directory for the scripts in this repo.
| MacBook Air mid-2013 11" | |
|---|---|
| Processor | 1.7 GHz Intel Core i7 |
| Memory | 8 GB 1600 MHz DDR3 |
| Graphics | Intel HD Graphics 5000 1536 MB |
-
External hard drives (Seagate Backup Plus Slim, Western Digital My Passport)
-
AmazonBasics USB 3.0 hubs
-
Plugable USB3-E1000 Gigabit Ethernet Adapter (drivers available here)
-
Blue Yeti Blackout microphone
-
When I first began standing work, I created a DIY standing desk in my kitchen cabinet.

- I used my Kensington SafeDock to elevate my MacBook in my kitchen cabinet, and wrapped the cable lock around a pipe near the ceiling.
- I ran an ethernet cable from my router into the cabinet.
- I added an LED light to the cabinet door.
-
To improve my posture and endurance, I also use a SlingShot Hip Circle, Gold Toe compression socks, Altra zero-drop shoes, and a balance board.


-
macOS setup is automated with macos.sh.
-
Karabiner Elements is used for keymapping.
-
Settings are stored in .config/karabiner/karabiner.json. Note that Karabiner will auto-format the JSON with four spaces. To avoid changing the formatting with the Prettier autoformatter, I added karabiner.json to .prettierignore.
-
Simple modifications:
From key To key caps_lock escape escape caps_lock -
Complex modifications:
- Launch Terminal with Cmd+Escape
- See karabiner.json for more.
-
Devices
- Disable built-in keyboard when external keyboard is connected
-
-
Homebrew is a package manager that includes Homebrew-Cask to manage other macOS applications.
-
See the Homebrew docs for further info.
-
My list of Homebrew packages and casks is available in my homebrew-brewfile repo, and engineered for use with strap.
-
The Brewfile works with Homebrew Bundle to manage all Homebrew packages and casks together.
-
Key Brew Bundle commands:
# Install everything in the Brewfile
brew bundle install --global
# Check for programs listed in Brewfile
brew bundle check --global
# Remove any Homebrew packages and casks not in Brewfile
brew bundle cleanup --force --global
- I use Zsh as my shell, which functions like Bash but offers more customization.
- I install with Homebrew to maintain consistent versions across multiple machines. However, note that Zsh is now the default shell for new macOS users starting with macOS Catalina.
- See the Wes Bos Command Line Power User course for an introduction to Zsh.
- I use the Pure prompt with Zsh.
- For my terminal application, I use Kitty, a GPU-based terminal emulator.
- I write code with VSCodium, an alternate build of Microsoft Visual Studio Code (VSCode) that is free of proprietary features and telemetry.
- I sometimes still use VSCode for the remote development features, to work on servers via SSH. I'm considering code-server or Pony SSH for use with VSCodium.
- I used to configure VSCode and VSCodium using the Settings Sync extension. I now have my settings, keybindings, and extensions stored here in my dotfiles repo. Extensions can be installed by running codium_extensions.sh along with the name of the editor, like
codium_extensions.sh codium. The shell script was quite easy to write. I based it on npm_globals.sh, and used the VSCode extension CLI. - Microsoft is rolling out a new settings sync feature built directly into VSCode. It requires a Microsoft account, and syncs through Azure.
- For Jupyter Notebooks, I use JupyterLab. I install JupyterLab within a Python virtual environment, as recommended in the docs.
- For R and R Markdown, I use RStudio.
I mostly use Dank Mono, but also like Fira Code and Ubuntu Mono.
-
node is a JavaScript runtime used to run JavaScript outside of a web browser.
-
npm is a package manager written in node.js, included when node is installed.
- It's difficult to keep track of global npm packages. There's no easy way to do it with the usual package.json. As Isaac Schlueter commented in 2012,
Yeah, we're never going to do this.
- Instead, package names can be specified in a text file, npm-globals.txt, and installed with a shell script, npm_globals.sh. Global npm packages will be installed in /usr/local/lib/node_modules.
- npm-check can be used to manage global packages after install, with
npm-check -ug. If not using npm-check, a list of global npm packages can be seen after installation withnpm list -g --depth=0.
- It's difficult to keep track of global npm packages. There's no easy way to do it with the usual package.json. As Isaac Schlueter commented in 2012,
-
I use the Prettier autoformatter and the Prettier VSCode extension to format my web code, including JavaScript and Vue.js. Prettier is an extremely helpful productivity tool, and I highly recommend it. Autoformatters save time and prevent bikeshedding.
-
ESLint notes:
-
Compared with Prettier, ESLint formats less code languages, requires complicated setup, and doesn't work well when installed globally. I previously attempted to use a global ESLint installation with the VSCode ESLint extension, but was getting errors about plugins. As the ESLint docs explain:
It is also possible to install ESLint globally rather than locally (using
npm install eslint --global). However, this is not recommended, and any plugins or shareable configs that you use must be installed locally in either case. -
The errors persist even after specifying the path to global npm packages:
// VSCode settings.json
{
  "eslint.nodePath": "/usr/local/lib/node_modules"
}
-
If ESLint and plugins are installed in the project directory, the following settings can be added to the VSCode settings.json, for use with the VSCode ESLint extension and eslint-plugin-vue. I typically don't use ESLint to auto-fix files, because Pretter is preferred.
// VSCode settings.json
{
  "eslint.autoFixOnSave": false,
  "eslint.enable": true,
  "eslint.validate": ["javascript", "javascriptreact", "vue"]
}
-
I do still retain a global .eslintrc in my dotfiles repo, because it is a useful template for sensible defaults.
-
-
In the past, I also used JavaScript Standard Style (aka StandardJS). Standard Style has also reportedly been favored by Brendan Eich (creator of JavaScript) and Sir Tim Berners-Lee (creator of the World Wide Web). Prettier provides a similar code style, but with more features, so I use Prettier instead.
- I format Python code with Black.
- VSCode provides built-in support for Black. I set VSCode to autoformat on save.
- Black is still considered a pre-release.
- If you prefer the less-decisive PEP 8 format, I recommend autopep8 for autoformatting. VSCode also has built-in Python formatting support for autopep8.
- See my template-python repo for useful tooling and additional sensible defaults.
- I use Gnu Privacy Guard (GPG, the free implementation of Pretty Good Privacy (PGP)), Keybase, and ProtonMail to encrypt and share messages, passwords, and other sensitive info.
- PGP vs SSL: SSL/TLS/HTTPS encrypts data in transit, but the storage provider like Dropbox, Google, or Slack can still read it. Communications which are end-to-end PGP encrypted can only be read by the sender or recipient, never the provider.
GPG is an implementation of OpenPGP.
- Install
gpgwith a package manager:- Ubuntu:
sudo apt-get install gpg - macOS:
brew install gpg.
- Ubuntu:
- Run
gpg --full-generate-keyfrom the command line to generate a key. Respond to the command-line prompts. The maximum key size of4096is recommended. - View keys with
gpg --list-secret-keys. - Run
gpg --send-keys <keynumber>to share the public key with the GPG database. It takes about 10 minutes for the key to show up in the GPG database. - Export your GPG public key:
- Copy to clipboard (for pasting into GitHub/GitLab):
gpg --armor --export | pbcopy - Export to a file:
gpg --armor --export > public.gpg
- Copy to clipboard (for pasting into GitHub/GitLab):
- Locate another user's key in the global database with
gpg --search-keys <email>. - Encrypting communications
- Encrypt a message with
echo "Hello, World!" | gpg --encrypt --armor --recipient "<email>". Optionally, save the encrypted message in a .gpg file. - If the message was saved in a file, send the file over email, Slack, or any other medium.
- Decrypt the message with
gpg --decrypt.- If copying the text directly, include it in quotes:
echo "BIG LONG GPG STRING" | gpg --decrypt. - If reading a file, include the filename when decrypting:
gpg --decrypt gcloud.gpg. - Decrypted output can be autosaved to a new file:
gpg --decrypt gcloud.gpg --output file.txt.
- If copying the text directly, include it in quotes:
- Encrypt a message with
-
Configure Git to use GPG and your key for commits, using .gitconfig:
- Set
signingkey:git config --global user.signingkey 16digit_PGPkeyidthe 16 digit PGP key id is the partial 16 digit number listed on thesecline).[user] name = your name email = [email protected] signingkey = 16digit_PGPkeyid
- Turn on
gpgsign:[commit] gpgsign = true
- Set
-
Configure GPG to allow Git commit signing with one of these options, depending on desired config:
-
Use
tty(for command-line commits):ttyis a back-end service used by GPG to pass information through the program. See the GPG Agent Options docs for more.- Export the
GPG_TTYenvironment variable:export GPG_TTY=$(tty) - Can add to shell profile to automatically export
-
Disable
ttyand usepinentry(for commits in VSCode or other IDE):- Install
pinentrywith package manager:- macOS:
brew install pinentry-mac - Ubuntu Linux:
apt install pinentry
- macOS:
- Update GPG config files:
- ~/.gnupg/gpg.conf:
no-tty - ~/.gnupg/gpg-agent.conf:
pinentry-program /usr/local/bin/pinentry-mac
- ~/.gnupg/gpg.conf:
- Ensure proper permissions are set on GPG config files:
chmod 700 ~/.gnupg
chmod 600 ~/.gnupg/gpg.conf
- Note that, with
no-tty, you will get an error if trying to rungpgfrom the command line.
- Install
-
-
Trust GPG keys using the GPG TTY interface:
- If you see
gpg: WARNING: This key is not certified with a trusted signature!when examining signed Git commits withgit log --show-signature, you may want to trust the keys. - Enable
ttyif you previously disabled it (comment outno-ttyin ~/.gnupg/gpg.conf). - Enter the GPG key editor from the command line with
gpg --edit-key <PGPkeyid>. - Set trust level for the key by typing
trust, and entering a trust level. - See the GPG docs for more info.
- If you see
-
If working on a server, you can use ssh agent forwarding to access your SSH and GPG keys without having to copy them.
UPDATE: Keybase was acquired by Zoom, and its future is uncertain.
- Zoom Blog 20200507: Zoom acquires Keybase and announces goal of developing the most broadly used enterprise end-to-end encryption offering
- Keybase Blog 20200507: Keybase joins Zoom
- The Verge 20200507: Zoom buys the identity service Keybase as part of 90-day security push
- PGP key and identity management (see below)
- Chat (see below)
- Teams: see Keybase Book: Teams, and blog posts on teams and updates to teams.
- Encrypted files: Keybase file system (KBFS). Like an encrypted Dropbox or Google Drive cloud storage system. Integrates with the macOS finder through use of the FUSE for macOS package.
- Git (see below)
- See Keybase docs for more.
- Keybase solves the key identity problem.
- Even if you have someone's public PGP key, you can't verify it actually came from them unless you exchange it in person.
- Keybase provides a unified identity for verification of PGP keys. Each device gets its own private key, and they share identity.
- It was previously challenging to move PGP keys among devices, but now it can be accomplished simply by signing in to Keybase.
- Following someone is a way of verifying their cryptographic identity, not a way of subscribing to updates from the person like social media. I think calling this "following" is confusing. It's really more like verifying.
- Keybase uses the NaCl (salt) library for encryption, which turned out to be a great choice. It's been stable and has avoided vulnerabilities. They also used Go to build many of the features.
- The Keybase database is represented as a merkle tree. See Keybase docs: server security and Wikipedia.
- Keybase doesn't directly run on blockchain, but they do push the Keybase merkle root to the Bitcoin blockchain for verification.
- The Software Engineering Daily podcast episode with Max Krohn from 2017-10-24 has more helpful explanation.
-
To see available commands, run
keybase help pgpor see the command-line docs. -
Manage GPG/PGP keys in Keybase from the command line with
keybase pgp. -
List keys with
keybase pgp list. -
Generate a new PGP key with
keybase pgp gen.-
If you already have a key, add the
--multiflag, likekeybase pgp gen --multi. -
You will be prompted with several options. I set a password on my key to keep it secure. Storing the private key on the keybase.io servers is a contentious option, because it hypothetically could put the key at risk. However, I agree with this comment: if you don't trust Keybase, don't use Keybase. From what I understand, if you select
Push an encrypted copy of your new secret key to the Keybase.io server? [Y/n] Yduringkeybase pgp gen, it will have the same ultimate effect askeybase pgp push-private. Here are the important options for key management:# Generate a PGP key keybase pgp gen # Sync PGP key with Keybase using Keybase servers keybase pgp push-private 16digit_PGPkeyid # Export PGP key from Keybase to GPG using Keybase servers keybase pgp pull-private 16digit_PGPkeyid # Manual export of public key from Keybase to GitHub keybase pgp export -q key_id | pbcopy # then go to GitHub settings and paste # Manual export of public key from Keybase to GPG keybase pgp export -q 16digit_PGPkeyid | gpg --import # Manual export of private key to GPG keybase pgp export -q 16digit_PGPkeyid --secret | gpg --allow-secret-key-import --import
-
When the key is generated, Keybase will automatically export the key to the GPG keyring.
-
Keybase chat looks and feels like Slack, but has several advantages.
- Keybase is open-source. Slack is not.
- Keybase chat is end-to-end encrypted. Slack is not.
- Keybase chat does not have a free message limit. Slack does. I frequently hit this free message limit when participating in large workspaces for my courses on Udacity, and it negatively impacted my ability to build projects with classmates. We switched to a Keybase team instead.
- Keybase has not leaked passwords. Slack has been vulnerable to password leaks and other attacks, and it took Slack four years before they notified users. The Keybase CEO's Slack credentials were compromised.
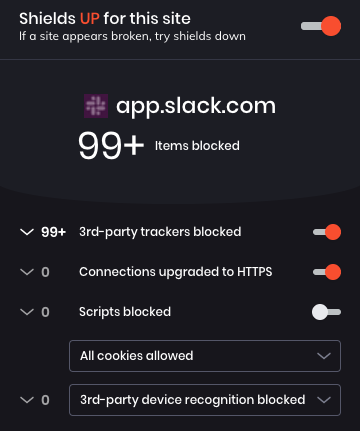
- Keybase does not use third-party trackers. Slack is polluted with trackers. Here's a screenshot of the Brave browser blocking Slack trackers during a typical session in the Slack workspace used in my previous developer job:
Keybase provides useful cryptographic tools for PGP encrypting and decrypting files. One common use case is storing credentials in encrypted files. Here's how to improve security when configuring Docker for use with GitHub Packages:
# generate PAT in GitHub and copy to clipboard
# https://docs.github.com/en/github/authenticating-to-github/creating-a-personal-access-token

# transfer PAT from clipboard to PGP encrypted file
pbpaste | keybase pgp encrypt -o pat-github-packages.asc -s

# decrypt and log in: https://docs.docker.com/engine/reference/commandline/login/
keybase pgp decrypt -i pat-github-packages.asc | docker login \
https://docker.pkg.github.com -u YOUR_GITHUB_USERNAME --password-stdin-
Keybase allows users and teams to create and store end-to-end encrypted Git repositories. See the Keybase Git docs and Keybase Git blog post.
-
Treat Keybase Git repos as remotes (like GitHub repos). They can be cloned, pushed, and pulled, as you would do for GitHub repos.
git remote add keybase keybase:https://$PUBLIC_OR_PRIVATE/$USERNAME/$REPONAME
git push keybase
-
As of Keybase 5.1.0, Git LFS is also enabled.
-
Keybase can't yet be used to sign Git commits, as described above. The best method, as described here, is to export your PGP key from Keybase to GPG, and then sign Git commits with GPG. Eventually, I would like to set Keybase as the signing program in my ~/.gitconfig and skip the export to GPG.
-
.gitconfig for GPG
...
[commit]
gpgsign = true
[gpg]
program = gpg
...
-
.gitconfig for Keybase?
...
[commit]
pgpsign = true
[pgp]
program = keybase
...
-
-
There has been some debate about the need to sign Git commits at all. Linus Torvalds has recommended the use of
git tag -sto sign with tags instead. The Keybase developers sign releases with tags, but don't always sign commits to the Keybase source code. However, in order to sign tags, you still need to export the PGP key. Whether you sign all commits or just tags, Keybase should improve this feature.
I use ProtonMail for PGP-encrypted email.
-
Generate an SSH key and add it to the SSH agent:
ssh-keygen -t rsa -b 4096 -C "[email protected]" -f ~/.ssh/id_rsa_"$(whoami)"
eval "$(ssh-agent -s)"
ssh-add -K ~/.ssh/id_rsa_"$(whoami)"
-
Connect to GitHub with SSH. This allows your computer to send information to GitHub over an SSH connection, so you can push changes without having to provide your username and password every time. These steps will allow your computer to connect to GitHub with SSH, and should only need to be performed once for each machine.
- Add SSH key to GitHub account:
pbcopy < ~/.ssh/id_rsa_"$(whoami)".pub- Go to GitHub and paste the key.
- Check SSH connection:
ssh -T [email protected]- Verify output looks similar to output provided in the linked GitHub article, type
yes, verify username.
- Add SSH key to GitHub account:
-
If working on a server, you can use ssh agent forwarding to access your SSH and GPG keys without having to copy them.
Host yourserver.com
  ForwardAgent yes
- 1Password (Homebrew Cask or Mac App Store)
- Backblaze (Homebrew Cask)
- Bear (Mac App Store)
- Firefox Developer Edition (Homebrew Cask)
- Firefox account: sync preferences and add-ons
- 1Password extension for desktop app
- DuckDuckGo Privacy Essentials
- Vue.js DevTools
- Dark Reader (Mozilla recommended extension)
- Stylus (alternative to Dark Reader, also a Mozilla recommended extension)
- macOS Keynote, Numbers, and Pages
- ProtonVPN (Homebrew Cask)