This setup is based heavily on the latest EFA guide and particularly the tutorial on using EFA with NCCL.
There are 2 ways to create your EFA-enabled cluster. First, you can stand up one node, and create an AMI, as in the tutorial above, or you can simply set up multiple instances simultaneously in AWS. We will do the latter here even though it means following a few more configuration steps directly on each node.
As in the tutorial above, you can run the NCCL tests upfront, but this step is not really essential and may be skipped. Note that you may not use an instance template to create your cluster if you are using EFA.
Fine-tuning in AWS should be done on p3dn.24xlarge, or preferably P4 instances (e.g. p4d.24xlarge).
Other instance types are not suitable for fine-tuning with EFA.
It is recommended but not required to use a shared file system for training.
This tutorial shows step-by-step configuration of Amazon Elastic File System (EFS).
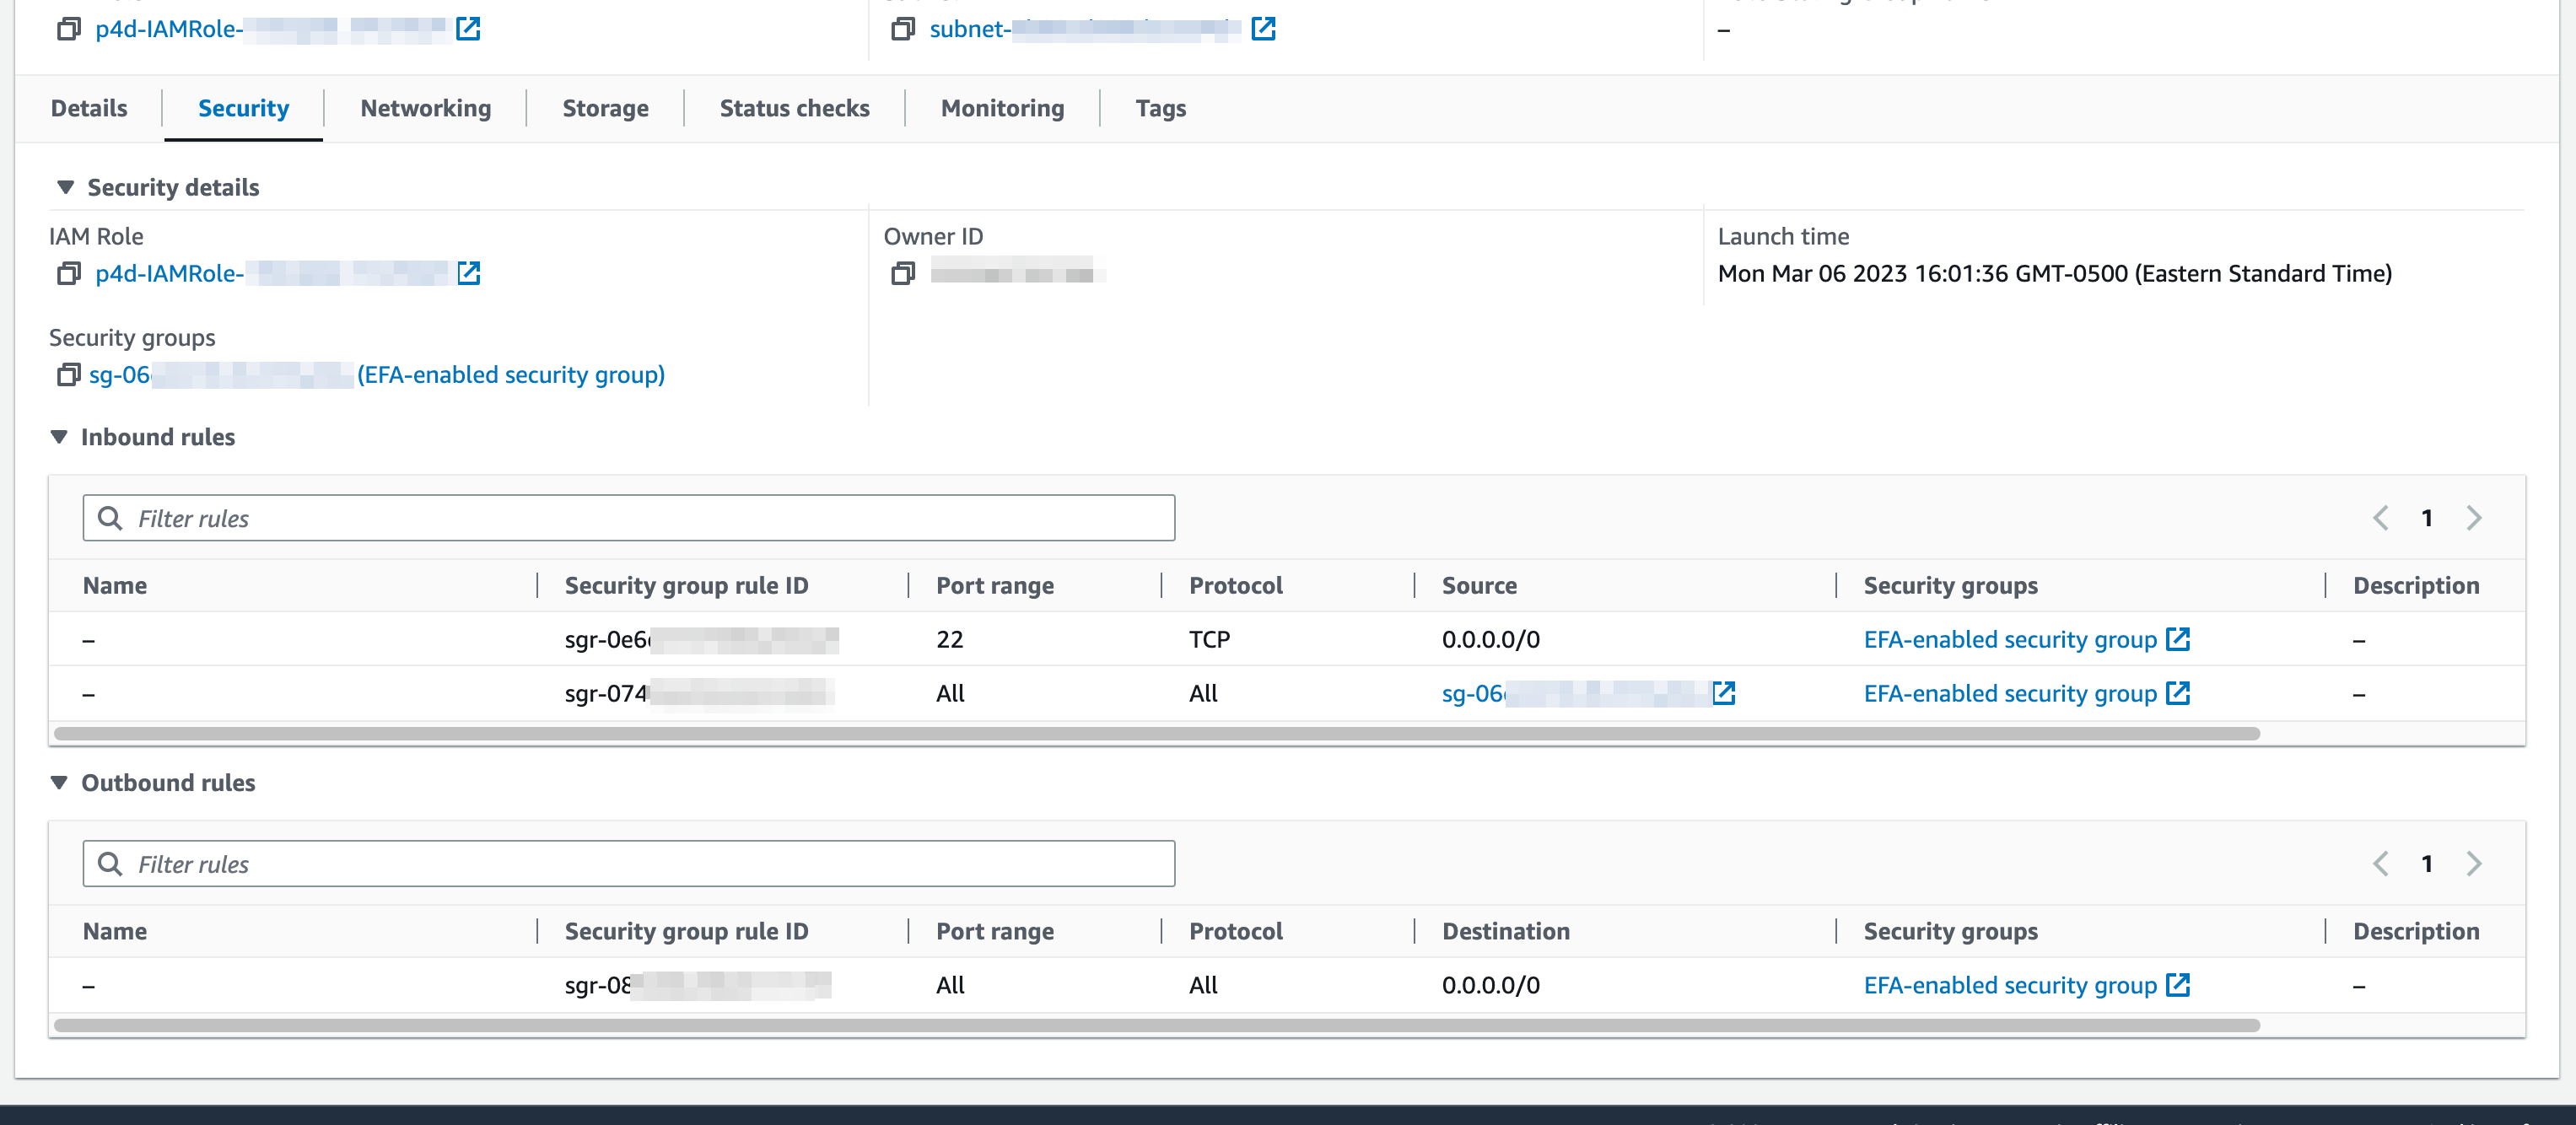
To set up EFA, we need a Security Group set up with inbound and outbound traffic allowed for any member of the Security Group. You will also want inbound traffic on SSH allowed (which is default):
In the EC2 dashboard sidebar, under Network & Security, click on Security Groups and
then in the top right corner, click on the Create security group button.
In the Create security group window, do the following:
For Security group name, enter a descriptive name for the security group, such as EFA-enabled security group.
For VPC, select the VPC into which you intend to launch your EFA-enabled instances.
Choose Create security group.
Set up your inbound and outbound traffic rules as shown below:
Using a shared file system makes the process of accessing the model weights, configuration and training data easier, and it makes it simple to save and restore checkpoints. It also means that artifacts of the job may be persisted after the GPU-enabled compute nodes are terminated.
In this document, we will set up an Amazon Elastic File System (EFS) volume that will be shared across training nodes. This requires a bit more setup, but is not much more complicated, and is recommended, because it makes the processing and handling of results much easier.
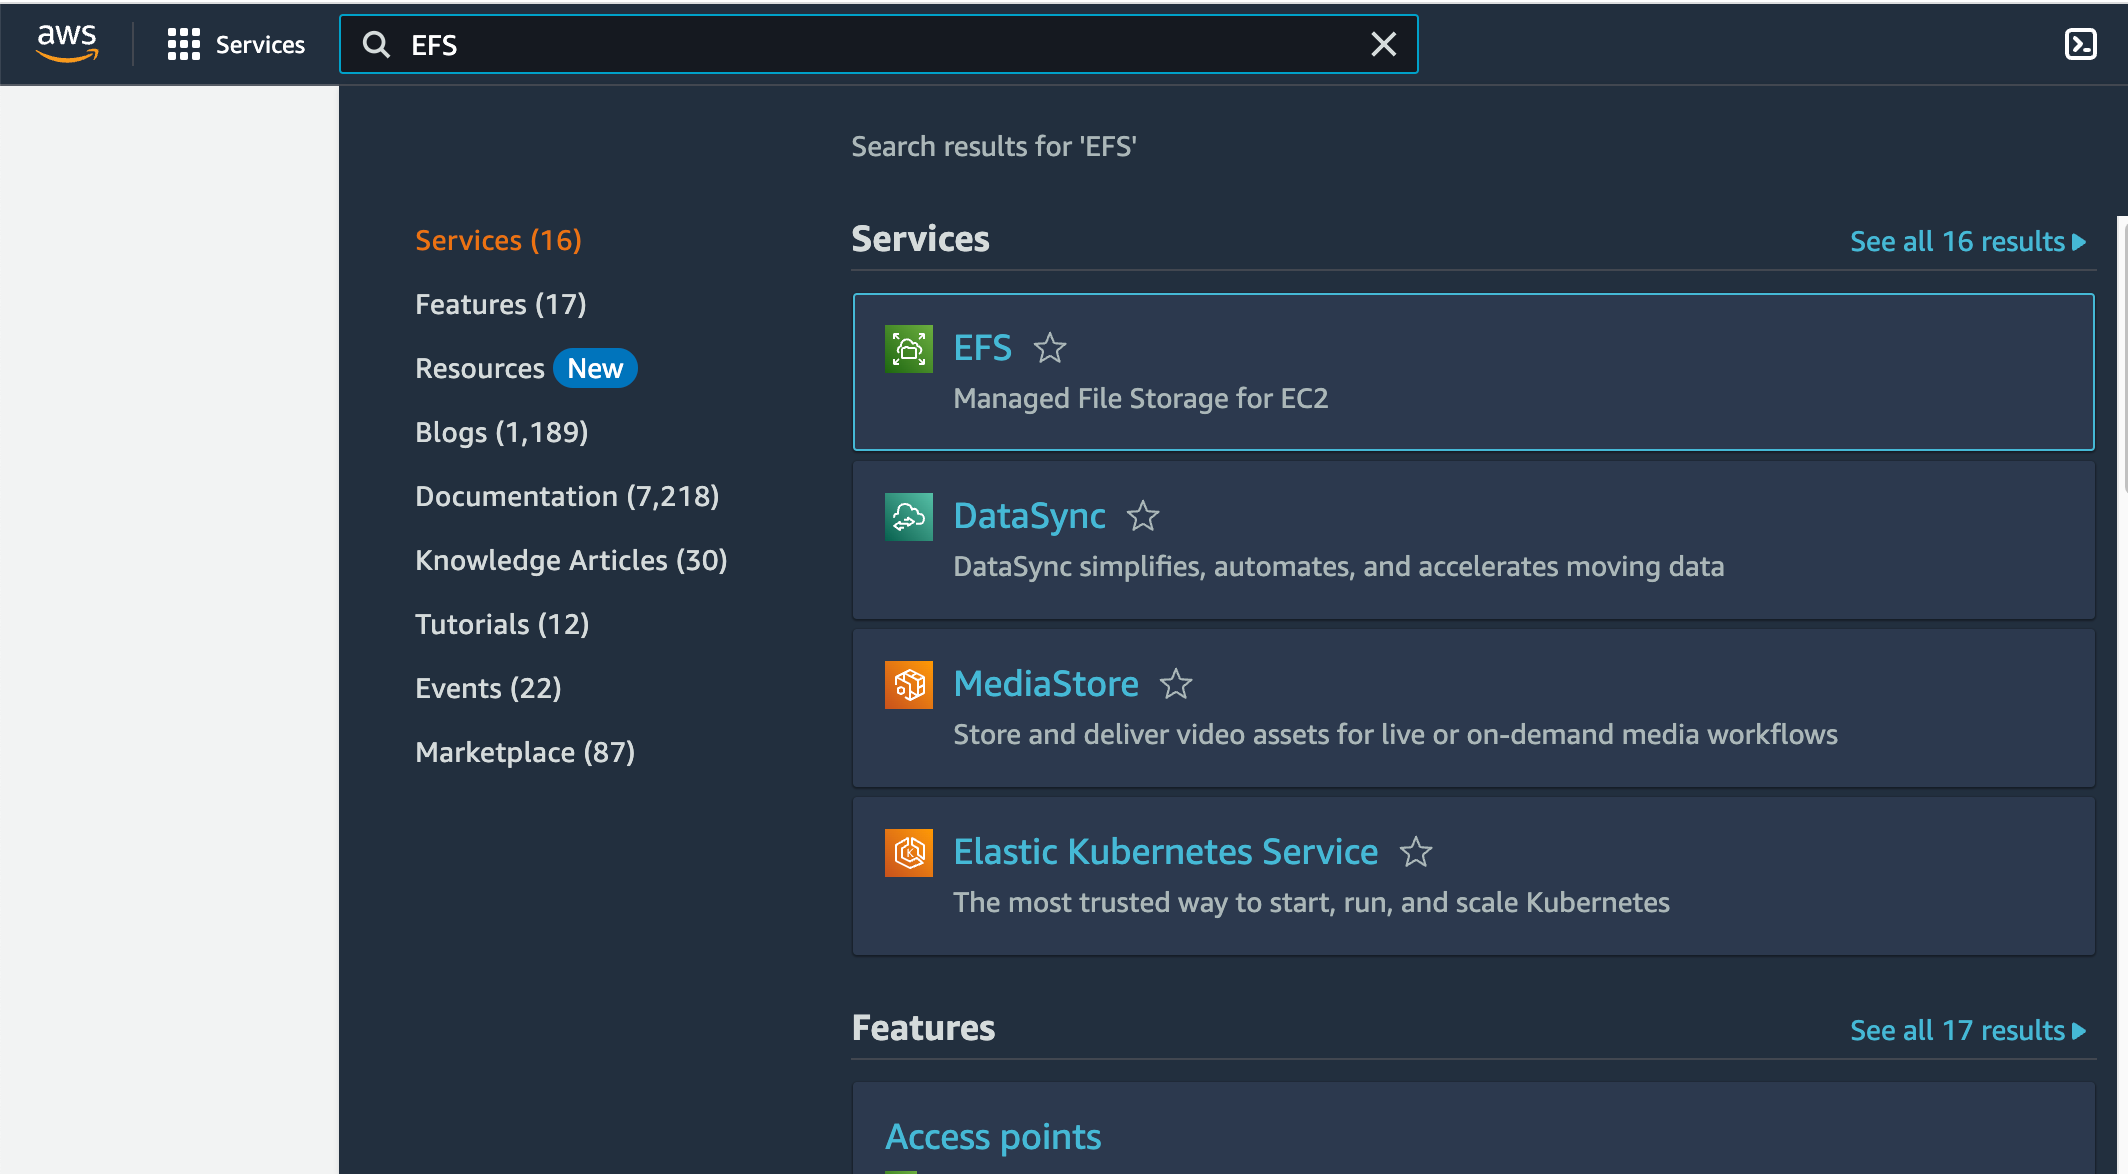
To use EFS, first create the file system. From the AWS console, search for EFS and select the result:
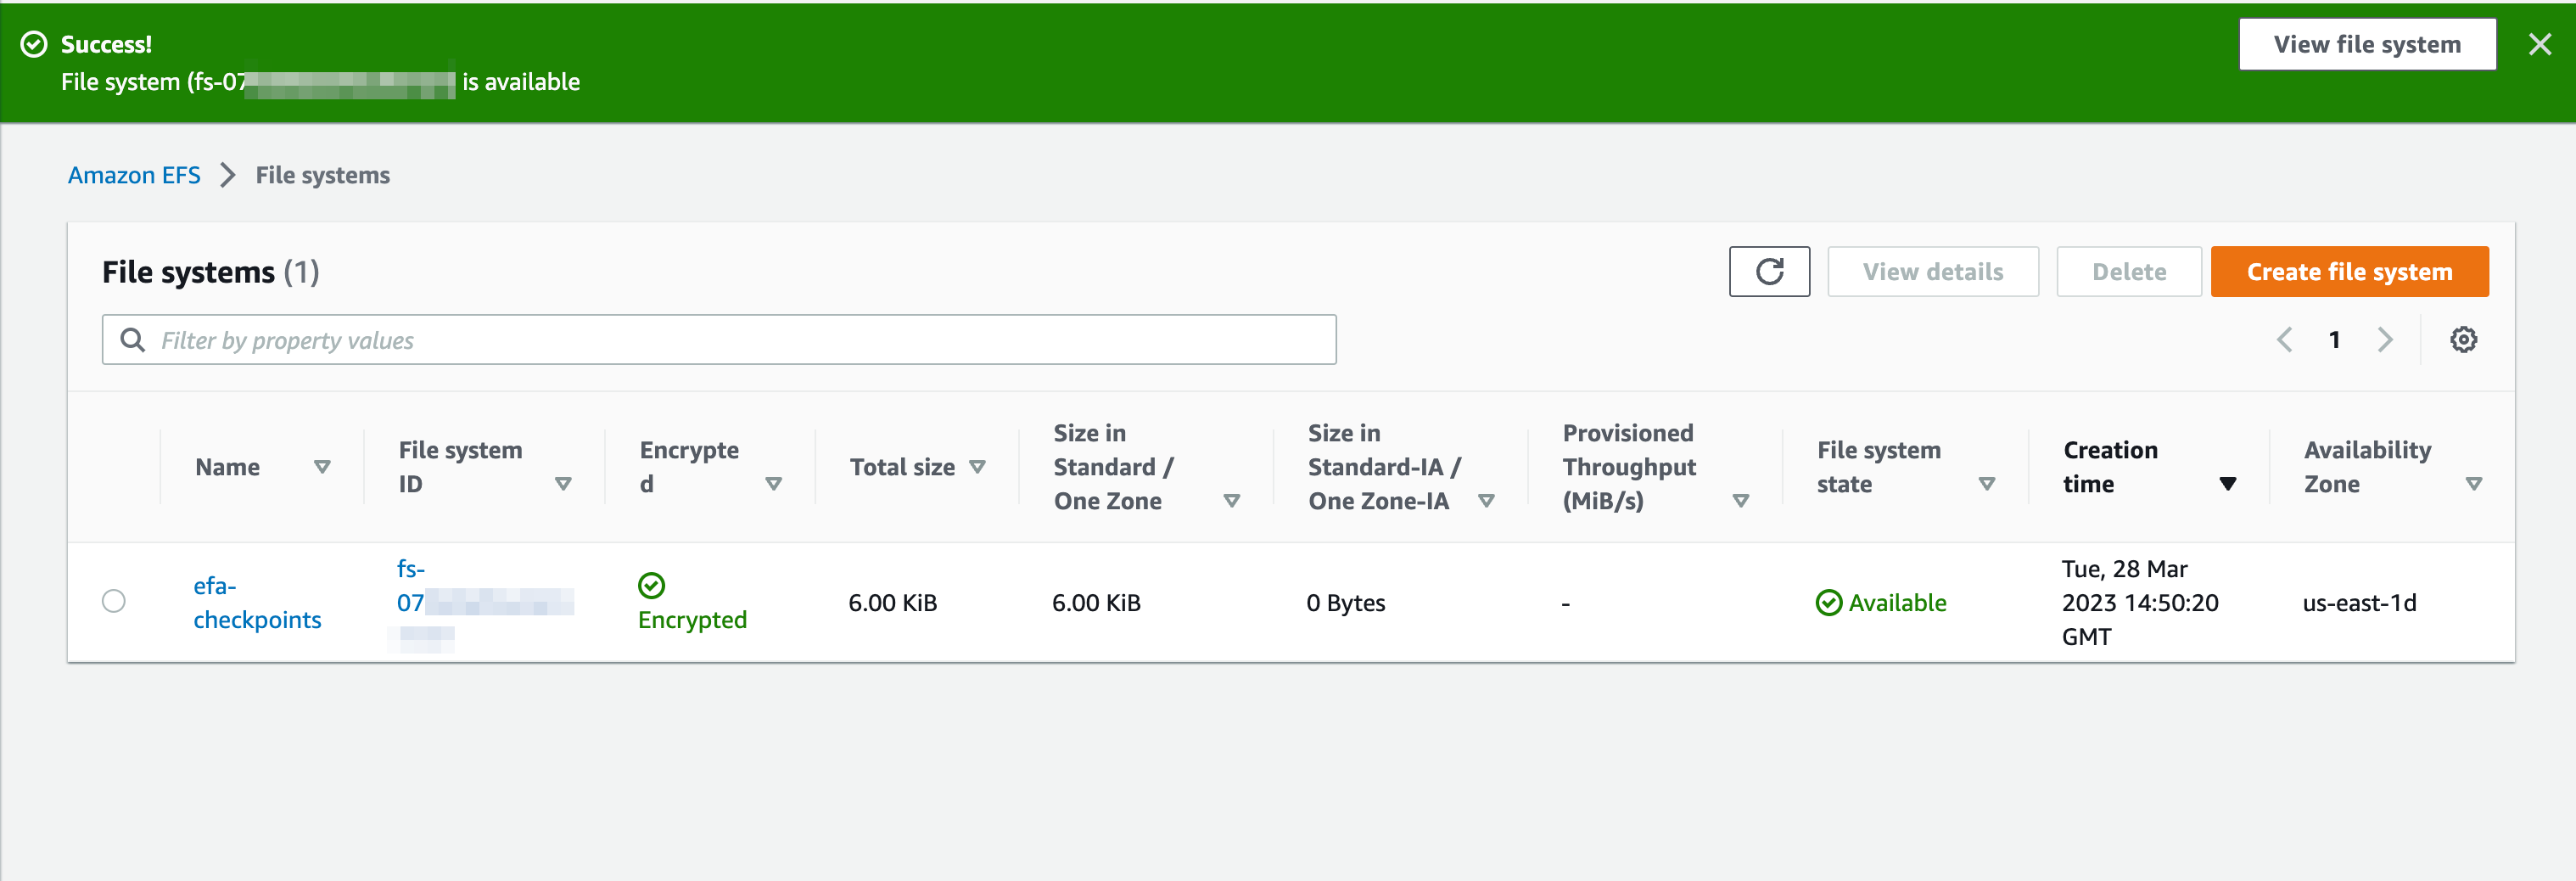
From there, create an EFS store. In the example below, we know that we are targeting a cluster in a particular availability zone already (since we are using EFA), so we just create a One Zone instance:
In the EC2 dashboard, click on the Launch instance button. This will take you to a page titled Launch an instance.
Any recent DL AMI should support EFA. For this tutorial, we assume Deep Learning AMI GPU PyTorch 1.13.1 (Amazon Linux 2)
If you want to use another AMI, additional setup steps may be required, or the installation process might vary slightly.
The fine-tuning scripts have been primarily tested on p3dn.24xlarge and p4d.24xlarge instances. The p3dns have 32GB of RAM per GPU and the p4d
s have 40. Additionally, the p4s have Ampere chips, and can support native bfloat16 which will make training faster.
Once you select the Instance type, you can either select an existing Key pair or create one. This will generate a .pem file that we can use for SSH to the boxes.
For the Network Settings, we will need to set our system up with EFA.
Then specify our newly created Security Group:
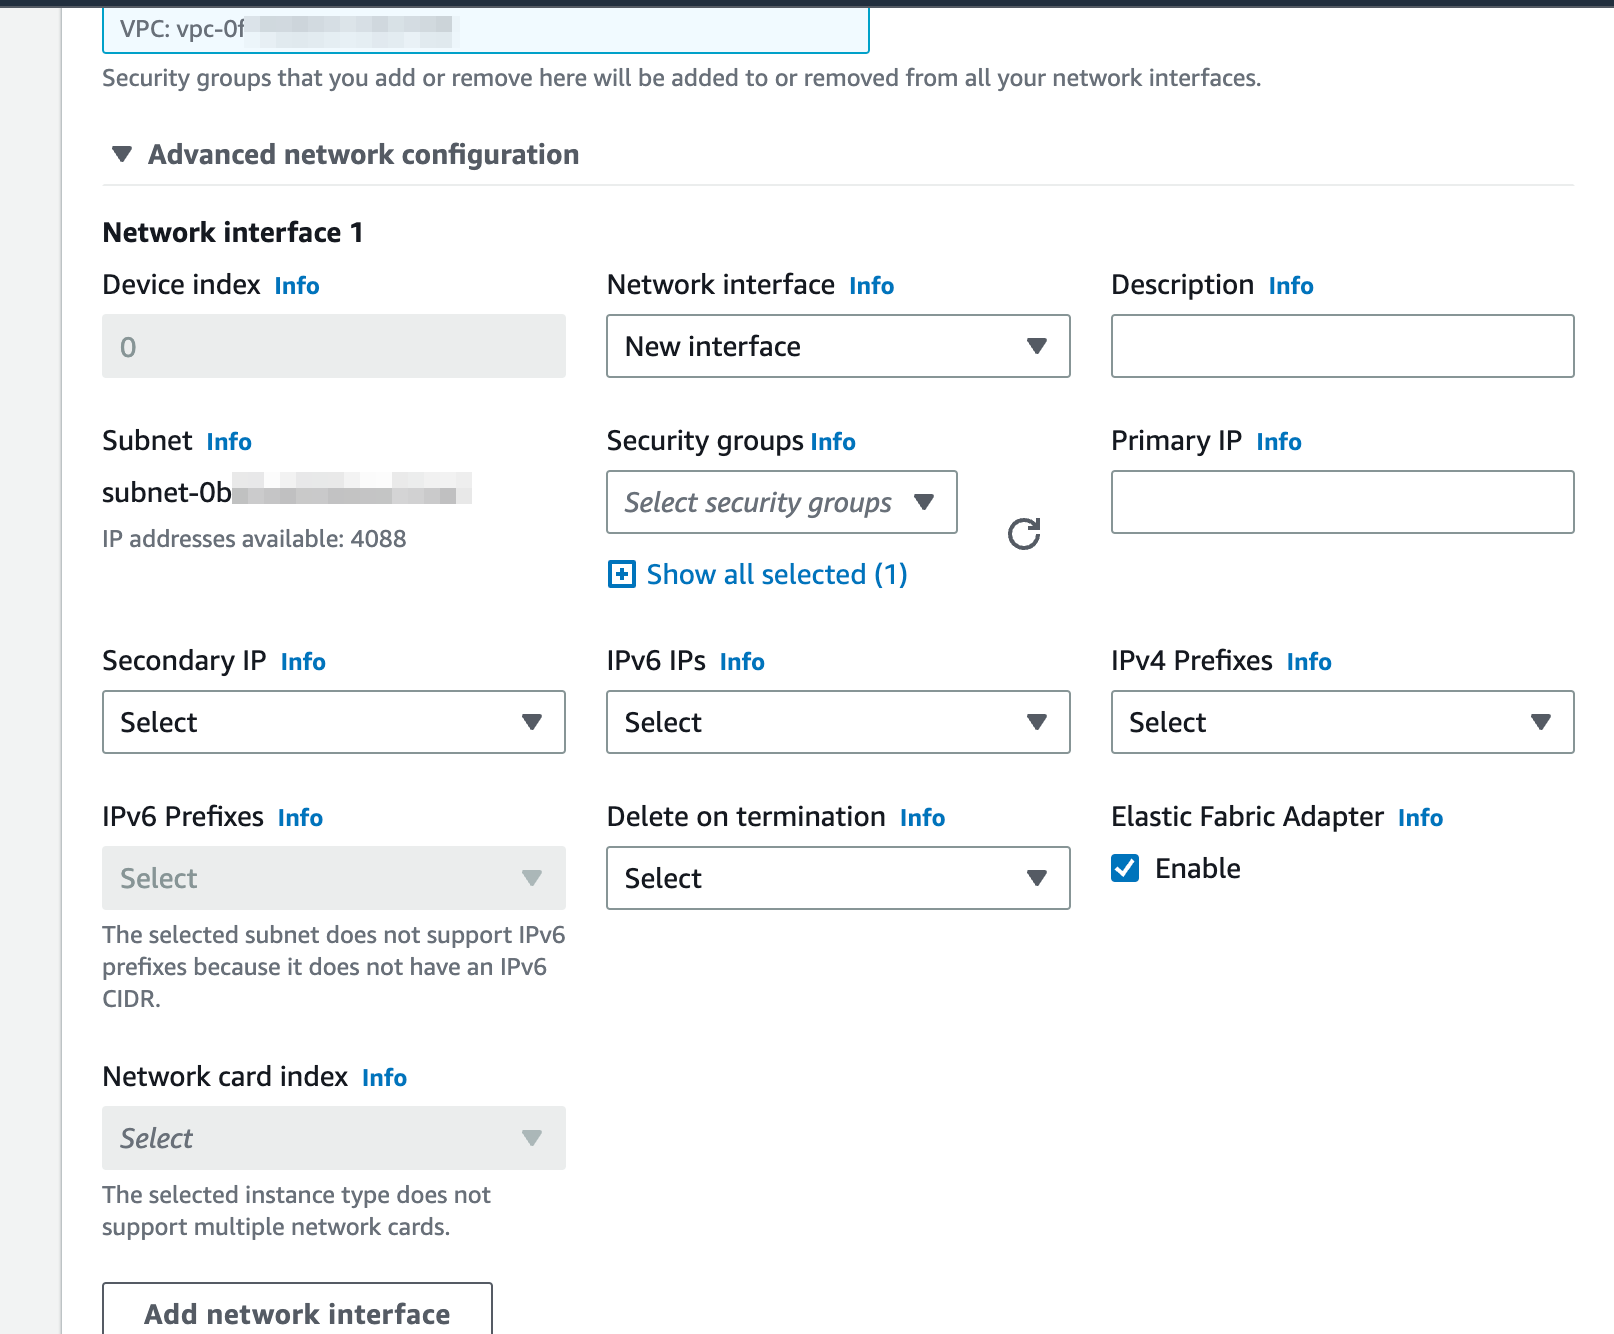
Then in the advanced networking options, turn on EFA:
If you are using direct attached storage, your will probably want at least 1024GB per instance (the generated checkpoints are very large).
You can set this value under Configure storage.
To access EC2, you may need to attach an IAM role with S3 access to your instance.
Finally, on the right hand panel of the instance creation page, select the number of instances you wish to launch.
For p3dn.24xlarges, at least 3 instances are needed to prevent needing CPU offloading.
For p4d.24xlarges, at least 2 instances are needed.
When we create the instances, we attach the EFS and set a mount point, which will be visible on each instance in the cluster.
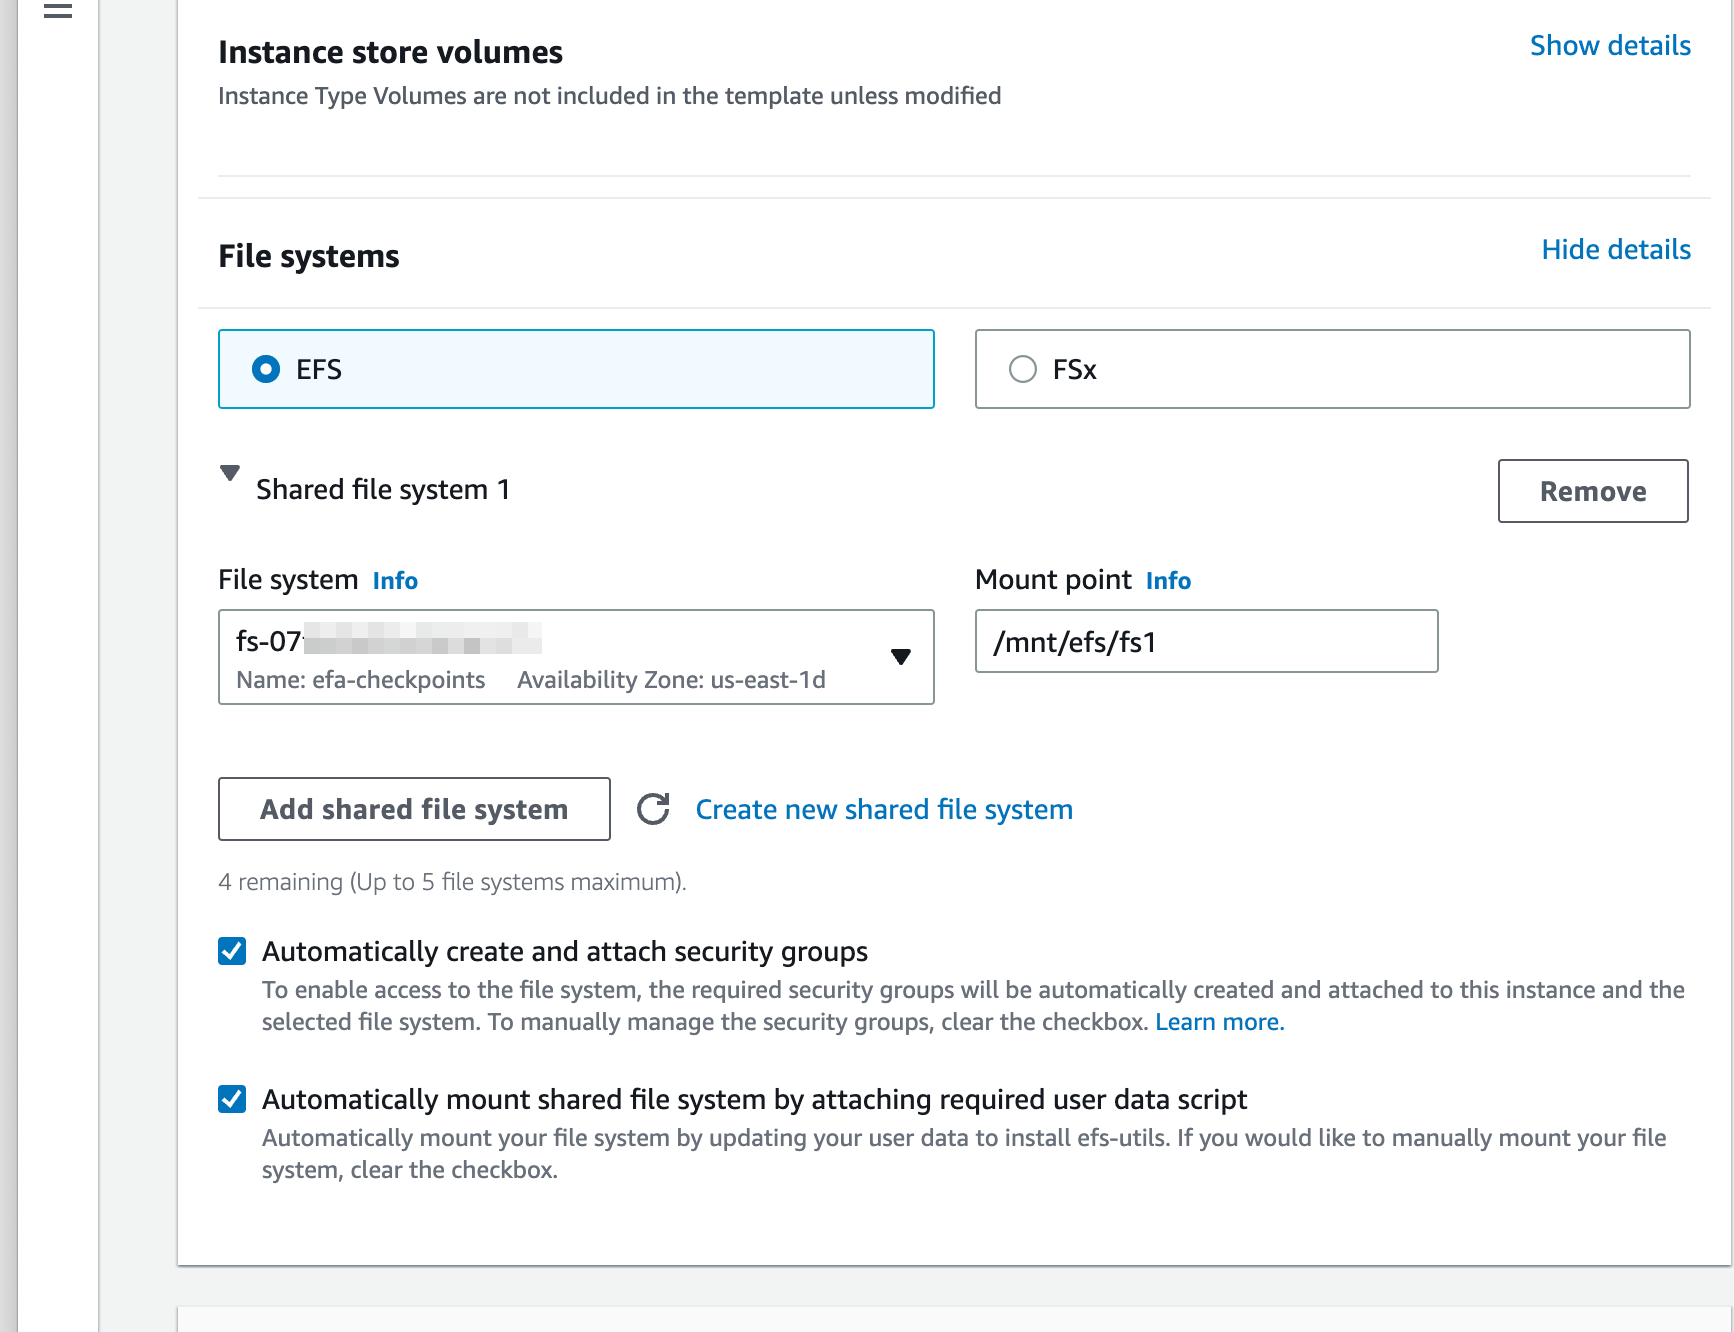 Once you have created your EFA-enabled, EFS cluster you can store all of your training data, the model weights and your configuration the mount point. Note that you may need to adjust the permissions so that the regular ec2-user or ubuntu user can write to the mount.
- Not enough capacity: Sometimes you may encounter errors with capacity. For these, you may try creating your instances in another region or switching instance type (e.g. from
p4dtop3dn). - vCPU quota issues: You may need to request a vCPU quota increase in your target region. The error for that contains a hyperlink that helps you navigate to the self-service request page where you can request more.
Here is a basic rundown of installation for bash using the AMI above. Assuming you are using direct attached storage, run these commands on all instances. If you want to use a shared file-system across instances, we have additional documentation setting up EFS.
git clone https://github.com/amazon-science/alexa-teacher-models.git
conda init bash
echo "source activate pytorch" >> .bashrc
source ~/.bashrc
cd alexa-teacher-models/
pip install -e .[ft]
cd scripts
aws s3 cp --recursive s3:https://alexa-teacher-models/AlexaTM/AlexaTM-20b-1_0/ AlexaTM-20b-1_0/
aws s3 cp --recursive s3:https://<your-bucket>/<your-dataset> <your-dataset>
If you wish to run tensorboard, open up a port in your SecurityGroup for incoming traffic, then pip install tensorboard prior to running the fine-tuning code.
Make sure you have a private key setup for your instances. This would be the PEM when you created your instances. Here, its named, id_rsa.
If you already have a public key, you can skip the first line.
chmod 600 id_rsa
ssh-keygen -f id_rsa -y > id_rsa.pub
mv id_rsa ~/.ssh/
mv id_rsa.pub ~/.ssh/
ssh ec2-user@<ip>
You need to install pdsh.
sudo amazon-linux-extras install epel -y
sudo yum install pdsh
The hostfile is set up private IPs for each of the machines. You should be able to SSH manually between nodes without having to authenticate.
$ cat hostfile
machine1 slots=8
machine2 slots=8
The master node (the node you are running the job from) should be at the top of the file.
Otherwise, you will have to manually pass in --master_addr machine2 to deepspeed.
Note If you get errors otherwise compiling fused adam, you may need to put Ninja in a standard area. The steps are from here
The fine-tuning script supports CSV files, JSON files and pre-procesed HuggingFace Arrow datasets (local and remote).
The input source field can be any name in the dataset, as long as it is passed to the fine-tuning script via --source_field <name>.
Similarly, the target field can be any name in the dataset, as long as it is passed via --target_field. The defaulted names are x and y.
Typically, for AlexaTM, we will want to fine-tune the model to predict the next sequence, given an input sequence (causal modeling).
The model is pretrained with a [CLM] token on the front of each sample to tell it to do causal modeling. For fine-tuning, we typically will want to continue this approach, by passing --source_prefix "[CLM] "
The provided fine-tuning script works on HuggingFace datasets from the hub, as well as local file datasets. After you have prepared your compute instances and datasets, training should work using the following command:
deepspeed --hostfile /path/to/hostfile --module alexa_teacher_models.scripts.finetune \
    --source_prefix "[CLM] " \
    --per_device_train_batch_size 1 \
    --deepspeed deepspeed/zero3.json \
    --model_name_or_path /path/to/AlexaTM-20b-pr/ \
    --max_length 512 --bf16 --output_dir output \
    --gradient_accumulation_steps 2 \
    --source_field src \
    --target_field tgt \
    --max_target_length 64 \
    --do_train --learning_rate 1e-7 \
    --train_file /path/to/train-dir --validation_file /path/to/valid-dir \
    --num_train_epochs 1 --save_steps 100
Once the model has run for a bit, you will be able to see performance numbers, and tensorboard (if enabled, see below for setup details) will start logging
We provide the option to tokenize the training data prior to running the fine-tuning script. Doing this may be advantageous, as it minimizes usage on expensive GPU compute resources for this process.
To run preprocessing upfront, execute the preproc.py script:
python -m alexa_teacher_models.scripts.preproc --model_name_or_path /path/to/AlexaTM-20b-pr/ \
    --max_length 512 \
    --max_target_length 64 \
    --source_prefix "[CLM] " \
    --output_dir /path/to/preproc \
    --train_file /path/to/raw/train.json \
    --validation_file /path/to/raw/validation.json
After this, the finetune execution script is the same except we add --is_preproc and we need to update the input file parameters to point at the preprocessed arrow directories.
If you want to add TensorBoard to your configuration, you can allow inbound HTTP traffic in your security group.
If you install using [ft], this will automatically install tensorboard.
Once tensorboard is installed, you can add --logging_dir <tensorboard-dir> to the command above to start seeing TensorBoard events,
and optionally --logging_steps <log-every-n-steps>
To run a tensorboard server in your instance:
$ sudo /path/to/bin/tensorboard —logdir <tensorboard-dir> —bind_all —port 80
Note if tensorboard is not installed when the job runs, the logging directory will not be generated during fine-tuning.
It is possible with minimal modifications to use the HuggingFace example scripts with this codebase.
For GPUs with bfloat16 intrinsic support (e.g. Ampere), its possible to just add
import alexa_teacher_models
at the top of the script without further modifications.
If you do not have access chips with bfloat16 support, we recommend using the fine-tuning script provided in this repository.
