This project provides an one-click deployment of the Depth Anything monocular depth estimation model developed by Hong Kong University and ByteDance. The deployment is visualized on reComputer J4012 (Jetson Orin NX 16GB, 100 TOPS) and includes a WebUI for model conversion to TensorRT and real-time depth estimation.

All models and inference engine implemented in this project are from the official Depth Anything.
-
One-click deployment for Depth Anything models.
-
WebUI for model conversion and depth estimation.
-
Support for uploading videos/images or using the local camera
-
Supports S, B, L models of Depth Anything with input sizes of 308, 384, 406, and 518.
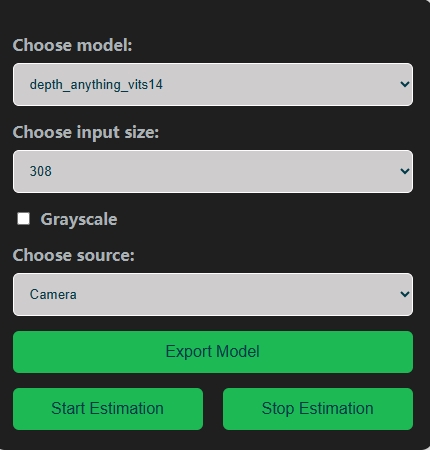
- Choose model: Select from depth_anything_vits14 models. (S, B, L)
- Choose input size: Select the desired input size.(308, 384, 406, 518)
- Grayscale option: Option to use grayscale.
- Choose source: Select the input source (Video, Image, Camera).
- Export Model: Automatically download and convert the model from PyTorch (.pth) to TensorRT format.
- Start Estimation: Begin depth estimation using the selected model and input source.
- Stop Estimation: Stop the ongoing depth estimation process.

- reComputer J4012 (🛒Buy Here)
- Docker installed on reComputer
- USB Camera (optional)
PyPI(recommend)
pip install jetson-examplesLinux (github trick)
curl -fsSL https://raw.githubusercontent.com/Seeed-Projects/jetson-examples/main/install.sh | shGithub (for Developer)
git clone https://github.com/Seeed-Projects/jetson-examples
cd jetson-examples
pip install .-
Run code:
reComputer run depth-anything
-
Open a web browser and input http:https://{reComputer ip}:5000. Use the WebUI to select the model, input size, and source.
-
Click on Export Model to download and convert the model.
-
Click on Start Estimation to begin the depth estimation process.
-
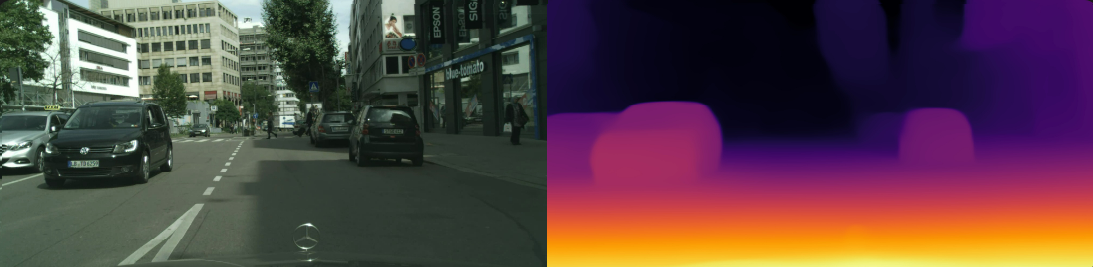
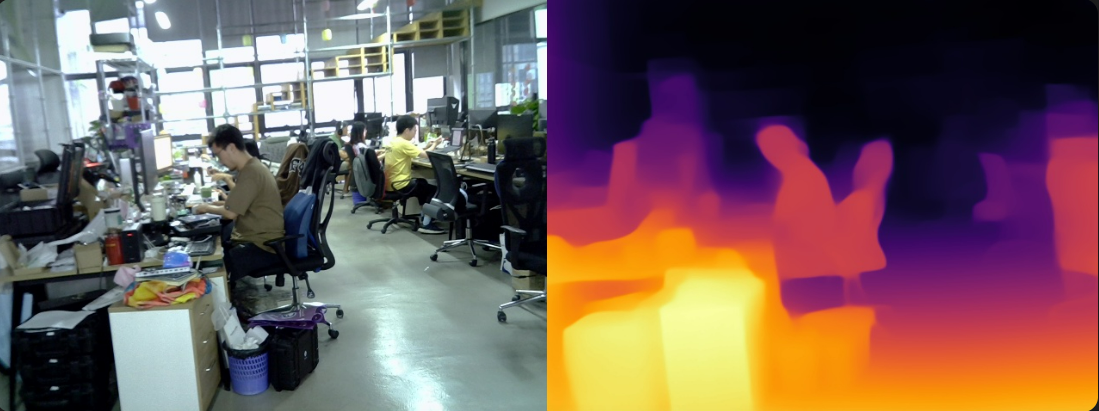
View the real-time depth estimation results on the WebUI.
- Security: Enhance surveillance systems with depth perception.

- Autonomous Driving: Improve environmental sensing for autonomous vehicles.
- Underwater Scenes: Apply depth estimation in underwater exploration.

- Indoor Scenes: Use depth estimation for indoor navigation and analysis.


- Depth Anything Official
- Depth Anything TensorRT
- Depth Anything ONNX
- Depth Anything ROS
- Depth Anything Android
We welcome contributions from the community. Please fork the repository and create a pull request with your changes.
This project is licensed under the MIT License.
- Depth Anything project by Hong Kong University and ByteDance.
- Seeed Studio team for their support and resources.