This is a guide deploy Django Projects on Heroku, securely using Python Decouple. Instead of using the settings.py file to store all the configuration information and secure keys of APIs, python-decouple provides a secure way of storing the information and deploying on Heroku. Lets get started!
-
Add the python-decouple package to your
requirements.txtfile in your Django Project. -
This can be done by simply adding the line
python-decoupleto the end of the file -
Run the requirements.txt file using pip to install the package
pip install -r requirements.txt
-
Now we will take our
settings.pyfile and move information from it to a local environment file -
First create a file named
.envin the root of your project. -
Add the
.envfile to your.gitignorefile to ensure the file does not get pushed to GitHub
Remember, the
envfile is only supposed to serve your local development environment, so any information added here should refer to your local development configuration such as database name, host etc.
- Add the following information from your
settings.pyfile to the.envfile
SECRET_KEY=<Secret key from settings.py file here>
DEBUG=True
DB_NAME=<Your database name here>
DB_USER=<Your database username here>
DB_PASSWORD=<Your database password here>
DB_HOST=<Your database hostname here>
DB_PORT=<Your database port number here>
- Consider the following sample
settings.pyfile
import os

SECRET_KEY = '3izb^ryglj(bvrjb2_y1fZvcnbky#358_l6-nn#i8fkug4mmz!'
DEBUG = True
DATABASES = {
    'default': {
        'ENGINE': 'django.db.backends.postgresql',
        'NAME': 'Django_DB',
        'USER': 'django_user',
        'PASSWORD': 'hA8(scA@!fg3*sc&xaGh&6%-l<._&xCf',
        'HOST': '127.0.0.1',
        'PORT': 5432,
    }
}
- For the above case, the
.envfile would look like below
SECRET_KEY=3izb^ryglj(bvrjb2_y1fZvcnbky#358_l6-nn#i8fkug4mmz!
DEBUG=True
DB_NAME=Django_DB
DB_USER=django_user
DB_PASSWORD=hA8(scA@!fg3*sc&xaGh&6%-l<._&xCf (If you do not have password for your local DB, set this to empty '')
DB_HOST=127.0.0.1
DB_PORT=5432
-
Now go back to your
settings.pyfile -
Add the python-decouple package at the top of the file
-
Retrieve the settings parameter from the
.envfile you just created -
Considering the same example as shown above, your
settings.pyshould now look like below
import os
from decouple import config

SECRET_KEY = config('SECRET_KEY')
DEBUG = config('DEBUG', cast=bool)
DATABASES = {
    'default': {
        'ENGINE': 'django.db.backends.postgresql',
        'NAME': config('DB_NAME'),
        'USER': config('DB_USER'),
        'PASSWORD': config('DB_PASSWORD'),
        'HOST': config('DB_HOST'),
        'PORT': config('DB_PORT'),
    }
}
-
Its no longer needed to use a
local_settings.pyfile and include it in thesettings.pyfile. -
Remove the below lines from the
settings.pyfile in case it exists
try:
    from .local_settings import *
except ImportError:
    pass
-
The environment variables can be added for all the API keys so that they are not exposed directly from the settings file.
-
Suppose you have settings for the email configuration, they can be translated as below
-
Inside the
.envfile, add the below information
EMAIL_HOST = smtp.gmail.com
EMAIL_PORT = 587
EMAIL_HOST_USER = [email protected]
EMAIL_HOST_PASSWORD = hlmoijelwgikzxtz
EMAIL_USE_TLS = True
- And then update the email configuration in your
settings.pyfile as below
EMAIL_HOST = config('EMAIL_HOST')
EMAIL_PORT = config('EMAIL_PORT')
EMAIL_HOST_USER = config('EMAIL_HOST_USER')
EMAIL_HOST_PASSWORD = config('EMAIL_HOST_PASSWORD')
EMAIL_USE_TLS = config('EMAIL_USE_TLS')
EMAIL_BACKEND = 'django.core.mail.backends.smtp.EmailBackend'
-
Extending the same functionality, we can do this for the API keys we use in our application
-
Suppose, you have API keys for implementing Social Authentication in your application
-
Inside the .env file, add the API key information as below:
SOCIAL_AUTH_FACEBOOK_KEY = 2014701805577940
SOCIAL_AUTH_FACEBOOK_SECRET = 93fefcfaf39ced0fe2dfda1b818a0ad2

SOCIAL_AUTH_TWITTER_KEY = NHuZqTxNdEHZqlIRToTgyH4oO
SOCIAL_AUTH_TWITTER_SECRET = b8JN998u3FbuocGBZ2fTAcjo7dB2sB6wuTOYeGZRmXBDzT3imN

SOCIAL_AUTH_GITHUB_KEY = 18daec47735b8d476139
SOCIAL_AUTH_GITHUB_SECRET = 1137e348adf3522881212536532fe87e7344a99f

SOCIAL_AUTH_GOOGLE_OAUTH2_KEY = 563302953971-ji2i092b21a5l1447n5a32ku93njjeae.apps.googleusercontent.com
SOCIAL_AUTH_GOOGLE_OAUTH2_SECRET = lcMoQqatS67aJGi3-Az0hgTl
- And then update the social authentication API keys in your
settings.pyfile as below
SOCIAL_AUTH_FACEBOOK_KEY = config('SOCIAL_AUTH_FACEBOOK_KEY')
SOCIAL_AUTH_FACEBOOK_SECRET = config('SOCIAL_AUTH_FACEBOOK_SECRET')

SOCIAL_AUTH_TWITTER_KEY = config('SOCIAL_AUTH_TWITTER_KEY')
SOCIAL_AUTH_TWITTER_SECRET = config('SOCIAL_AUTH_TWITTER_SECRET')

SOCIAL_AUTH_GITHUB_KEY = config('SOCIAL_AUTH_GITHUB_KEY')
SOCIAL_AUTH_GITHUB_SECRET = config('SOCIAL_AUTH_GITHUB_SECRET')

SOCIAL_AUTH_GOOGLE_OAUTH2_KEY = config('SOCIAL_AUTH_GOOGLE_OAUTH2_KEY')
SOCIAL_AUTH_GOOGLE_OAUTH2_SECRET = config('SOCIAL_AUTH_GOOGLE_OAUTH2_SECRET')
-
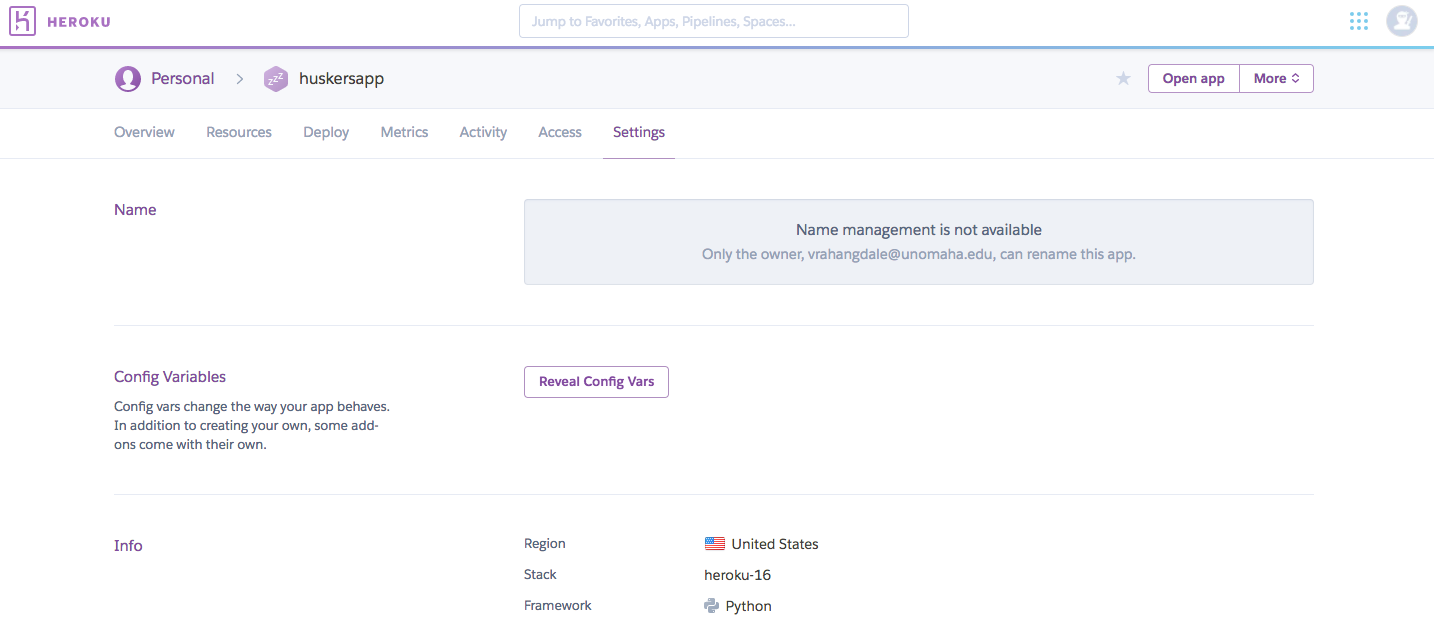
Inside Heroku's dashboard, select your app, and click on the Settings Tab
-
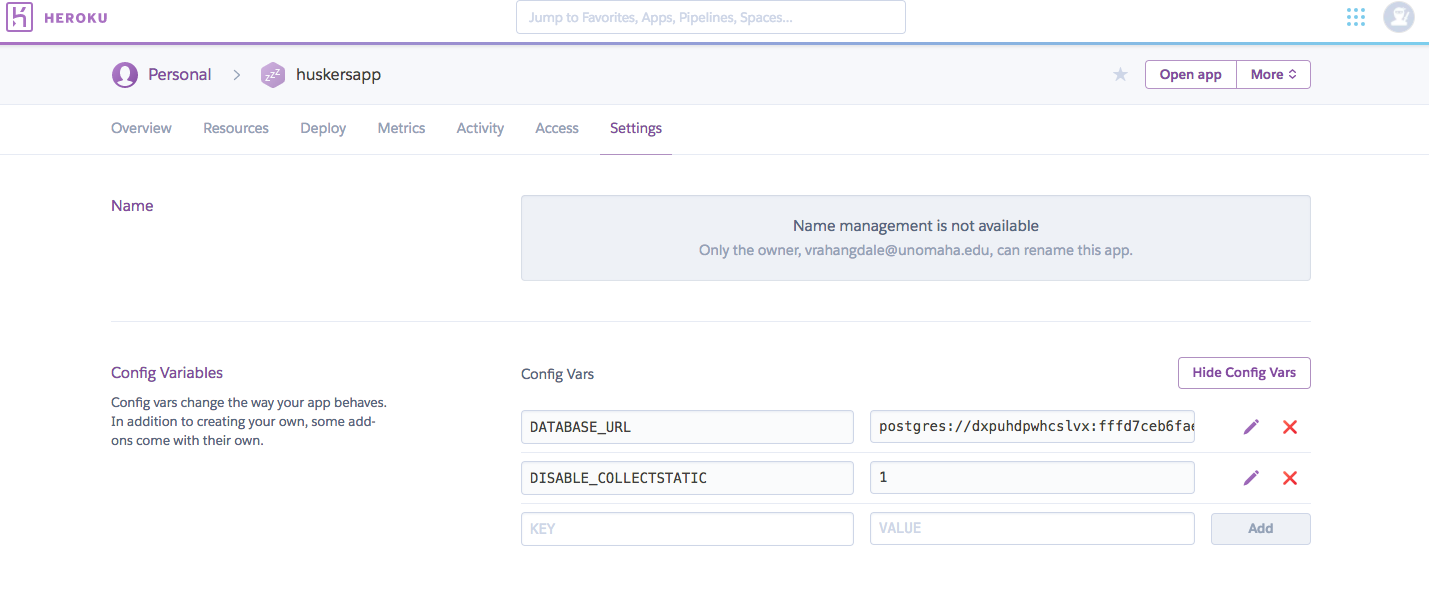
Inside the Settings tab, click on Reveal Config Vars button
-
Add the information as you have done for your
.envhere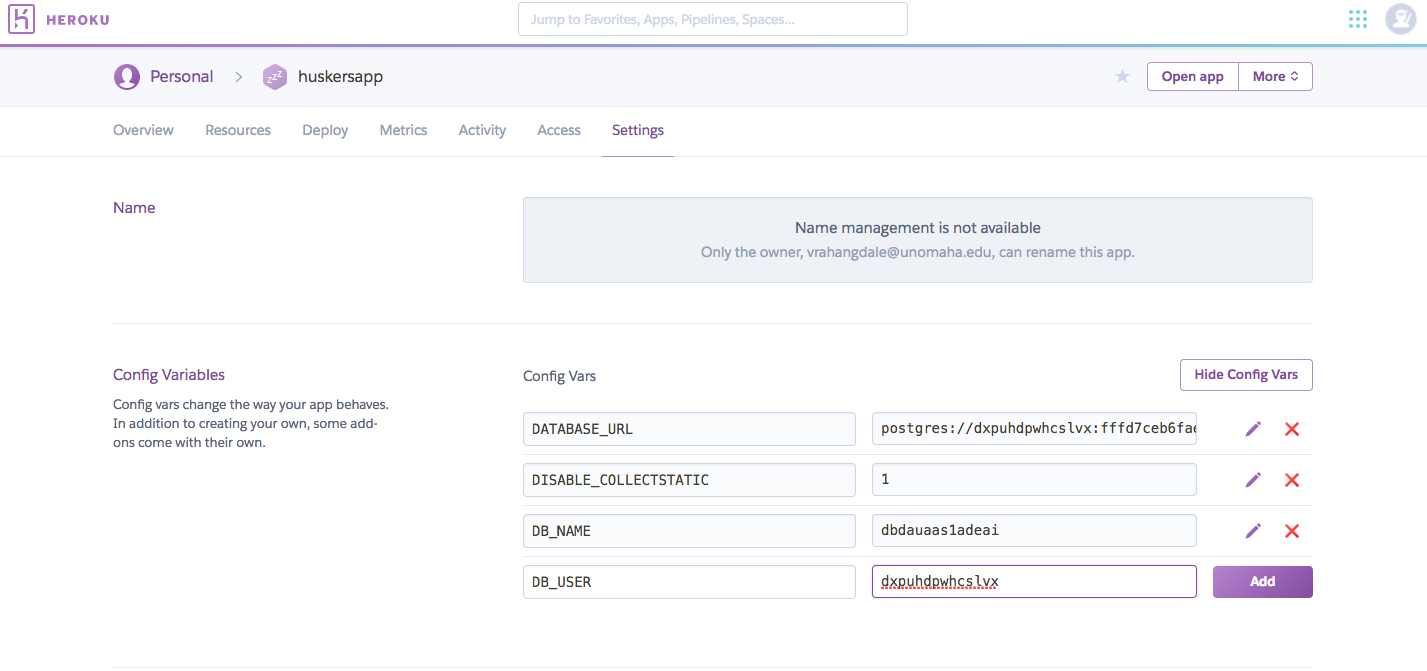


Thats it and the Heroku app is all setup.
-
You can find a sample
.envfile here -
You can download this file and rename it to
.envand add the configuration parameters, or simply create a.envfile and copy the contents in the format shown.