C library that provides a basic interface to play audio files or capture audio from a recording device and feed it in realtime through an FFT with some filtering for audio visualization. Playback of all audio file formats supported by miniaudio is supported (mp3, flac, WAV, etc.).
See simple_example.c for an example implementation. The provided example uses SDL2 to create the window and opengl context and draws some lines based on the visualizer output.
To initialize the library jum_initAudio is called, this allocates and sets up a new jum_AudioSetup struct, and gets the available playback and capture devices.
Once the audio setup is initialized, playback or capture can be started using jum_startPlayback or jum_startCapture.
To set up the FFT and visualization filtering, jum_initFFT must be called, this allocates and sets up a new jum_FFTSetup struct, using the provided user configuration.
Now that audio is playing/being captured into a buffer, and everything needed for the FFT is set up, the jum_FFTSetup and jum_AudioSetup can be passed to jum_analyze. jum_analyze also takes a value in milliseconds of time passed since the jum_analyze was last called, so that it can increment the fft pointer to the audio buffer the correct amount. jum_analyze stores the result is an array of floats between 0-1 in jum_AudioSetup.result.
Disclaimer: I don't know much DSP, some of the following information and implementation described may be innacurate, innefficient, and not the best way of doing things. Most of the extra filtering done is based somewhat on our perception of sound, but mostly just on how I wanted the visualizer output to look.
A fast fourier transform (FFT), is an algorithm to compute the discrete fourier transform of a set of samples, and convert the signal from the time domain into a representation in the frequency domain. The FFT is the basis for most* music visualization software. Like in the VLC media player as seen here:
vlc_music_vis.mp4
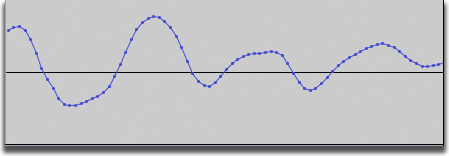
When we compute the DFT for a set of samples we get values back that represent the frequency components at equally distributed intervals from 0Hz to the sample rate of our audio file. To start, we will just take a subset of the audio samples being fed into (or captured from) our audio device, which are discrete floating point samples like this,
and display the raw FFT output. For demonstration purposes we will be using an mp3 file of an exponential sine wave frequency sweep. The raw FFT output looks like this: (each bar is one bin output by the FFT)
raw_fft.mp4
raw_fft_music.mp4
not great... luckily there's a lot we can do to get it looking better!
One of the most obvious things wrong with the previous example is the weird stuttering and jagged shape of the frequency output. By taking just a limited number of samples out of the audio buffer each frame, we are "windowing" the signal which produces spectral leakage. To mitigate the effects we can use something other than the "rectangular window"
that we are currently effectively using by just cutting out a chunk of the audio stream.
One option is a Hamming window.
If we multiply our chunk of the audio buffer by the windowing function before feeding it in to the FFT, our output now looks like this:

windowed.mp4
Much better! Notice how the stuttering is gone and the main frequency peak is smoother and more uniform.
The next thing that one might notice about our output when compared to that of VLC, is that although some might say the test audio sounds like the frequency is increasing at a constant rate, we can see that the frequency peak is moving very slow at the beginning and then speeds up. In any case, we know that for music visualization if we look at the western music scale we can see what the frequency distribution we really care about looks like (its approximately logarathmic).
You can see in the previous video, there are barely any bins for most of the lower pitches we can hear, and a lot of bins for higher frequencies that aren't very differentiable to us.
It makes sense for our audio visualization to have more bins for the lower frequencies and less for higher frequencies. In order to make this configurable to whatever we think looks good, jumaudio takes a 2D array of points for each frequency, and creates a look up table for the frequency of each bin in the output. Using this lookup table we take the raw output from the FFT and average it into these more favourably distributed bins.
For this example we are using a roughly logarithmic scale from 35Hz to 20kHz, as seen in simple_example.c. We remap the linearly distributed output of samples from the FFT onto whatever distribution we want, in order to better see what is really going on in the music/audio. The output with the frequency remapping looks like this:
frequency_mapped.mp4
As you can see, the frequency distribution now matches our exponential sine sweep much better. This will make a huge difference once we start playing music through our visualizer, we will be able to see individual pitches being played much clearer!
The next thing to tackle is that our perceived loudness is not the same as the absolute sound intensity of a signal, if we play a short piece of music through our visualizer, you will see what I mean.
without_weighting.mp4
To me, the low end seems disproportionally high on the output for how loud it sounds in the song, filtering this part is probably subject to personal taste, but jumaudio provides a means of scaling frequencies with different values, for simple_example.c I used some values based roughly on A-weighting and tweaked until I was happy with them. Another important step done here is taking the log of the raw FFT output, since our perception of loudness (dB) is also logarithmic. The output now looks like this:
with_weighting.mp4
When playing the music in the previous video, you may have noticed how jittery all of the bars are. To me this doesn't look great, I would prefer a smoother effect. To accomplish this we average out the value of the sample over time with an exponential moving average. One little trick we use for this is using a different alpha value for when the level is increasing vs. when it is decreasing, this enables us to have a quick attack but slow decay. The result looks pretty nice:
averaged.mp4
We're getting pretty close...
Another issue I have with the previous output is how jagged and sparse some of the bars are. Notice how since the original FFT was evenly distributed across all frequencies, now that we have remapped it to be roughly logarithmic, there aren't very many samples for the lower frequencies and there are single output points being shared across multiple bins, this gives us the blocky inconsistent look when compared to the higher frequencies, which have multiple samples per bin. To mitigate this we are going to take the average across multiple bins to attempt to smooth everything out. This way the lower frequencies will look less blocky, and the higher frequencies will have less out of place huge spires, hopefully you will be able to pick out the individual musical pitches out of our example audio now:
smoothed.mp4
final_chimes.mp4
final_music.mp4
TODO: add some shots with more interesting visualization :)
My first introduction to some of these techniques came from this very helpful post using the Processing library minim.
Audio files with very high sample rates (>48KHz), may have artifacting on the lower end of the spectrum. This is due to using a fixed number of samples for the FFT operation, independent of the sample rate of the audio file. The FFT produces an even distribution of samples across all frequencies, so if the maximum frequency is higher then there will be more space in between the center frequencies of the FFT output, causing lower resolution in the low end of the spectrum. This is mitigated by averaging across more bins at lower frequencies but may still be noticeable.