- AWS managed service which include: Code commit, Code artifact, Code build and Code deploy, Code pipeline
- SolarCloud
- Checkstyle
- Code editor (e.g sublime, vscode)
- Selenium software test
- Beanstalk
- Relational Database Service

-
Login to your AWS management console and navigate to CodeCommit section
CodeCommit > Repository > Create Repository Repository details name: vprofile-code-repo -
Create an IAM user for the CodeCommit been created
IAM > Add user -------------- details of user Name: vprofile-code-admin Attach policy: Attach the policy created below --------------- Create a policy to be attached service: CodeCommit name: vprofile-code-repo action: all Plicy name: vprofile-code-admin-repo-fullaccess -
After the creation of the IAM user we can upload SSH public key within the Security credentials section of the newly created user. Generate SSH from our local machine and upload in this section.
-
Create a
configfile at the working directory where we created the ssh key. Working directory:- .ssh/configvi .ssh/config -------------- Host git-codecommit.us-east-1.amazonaws.com User <SSH_Key_ID_from IAM_user> IdentityFile ~/.ssh/vpro-codecommit_rsa -
Chnage the permission of the config file
chmod 600 config -
We can now test our SSH connection to AWS CodeCommit by running the command
ssh git-codecommit.us-east-1.amazonaws.com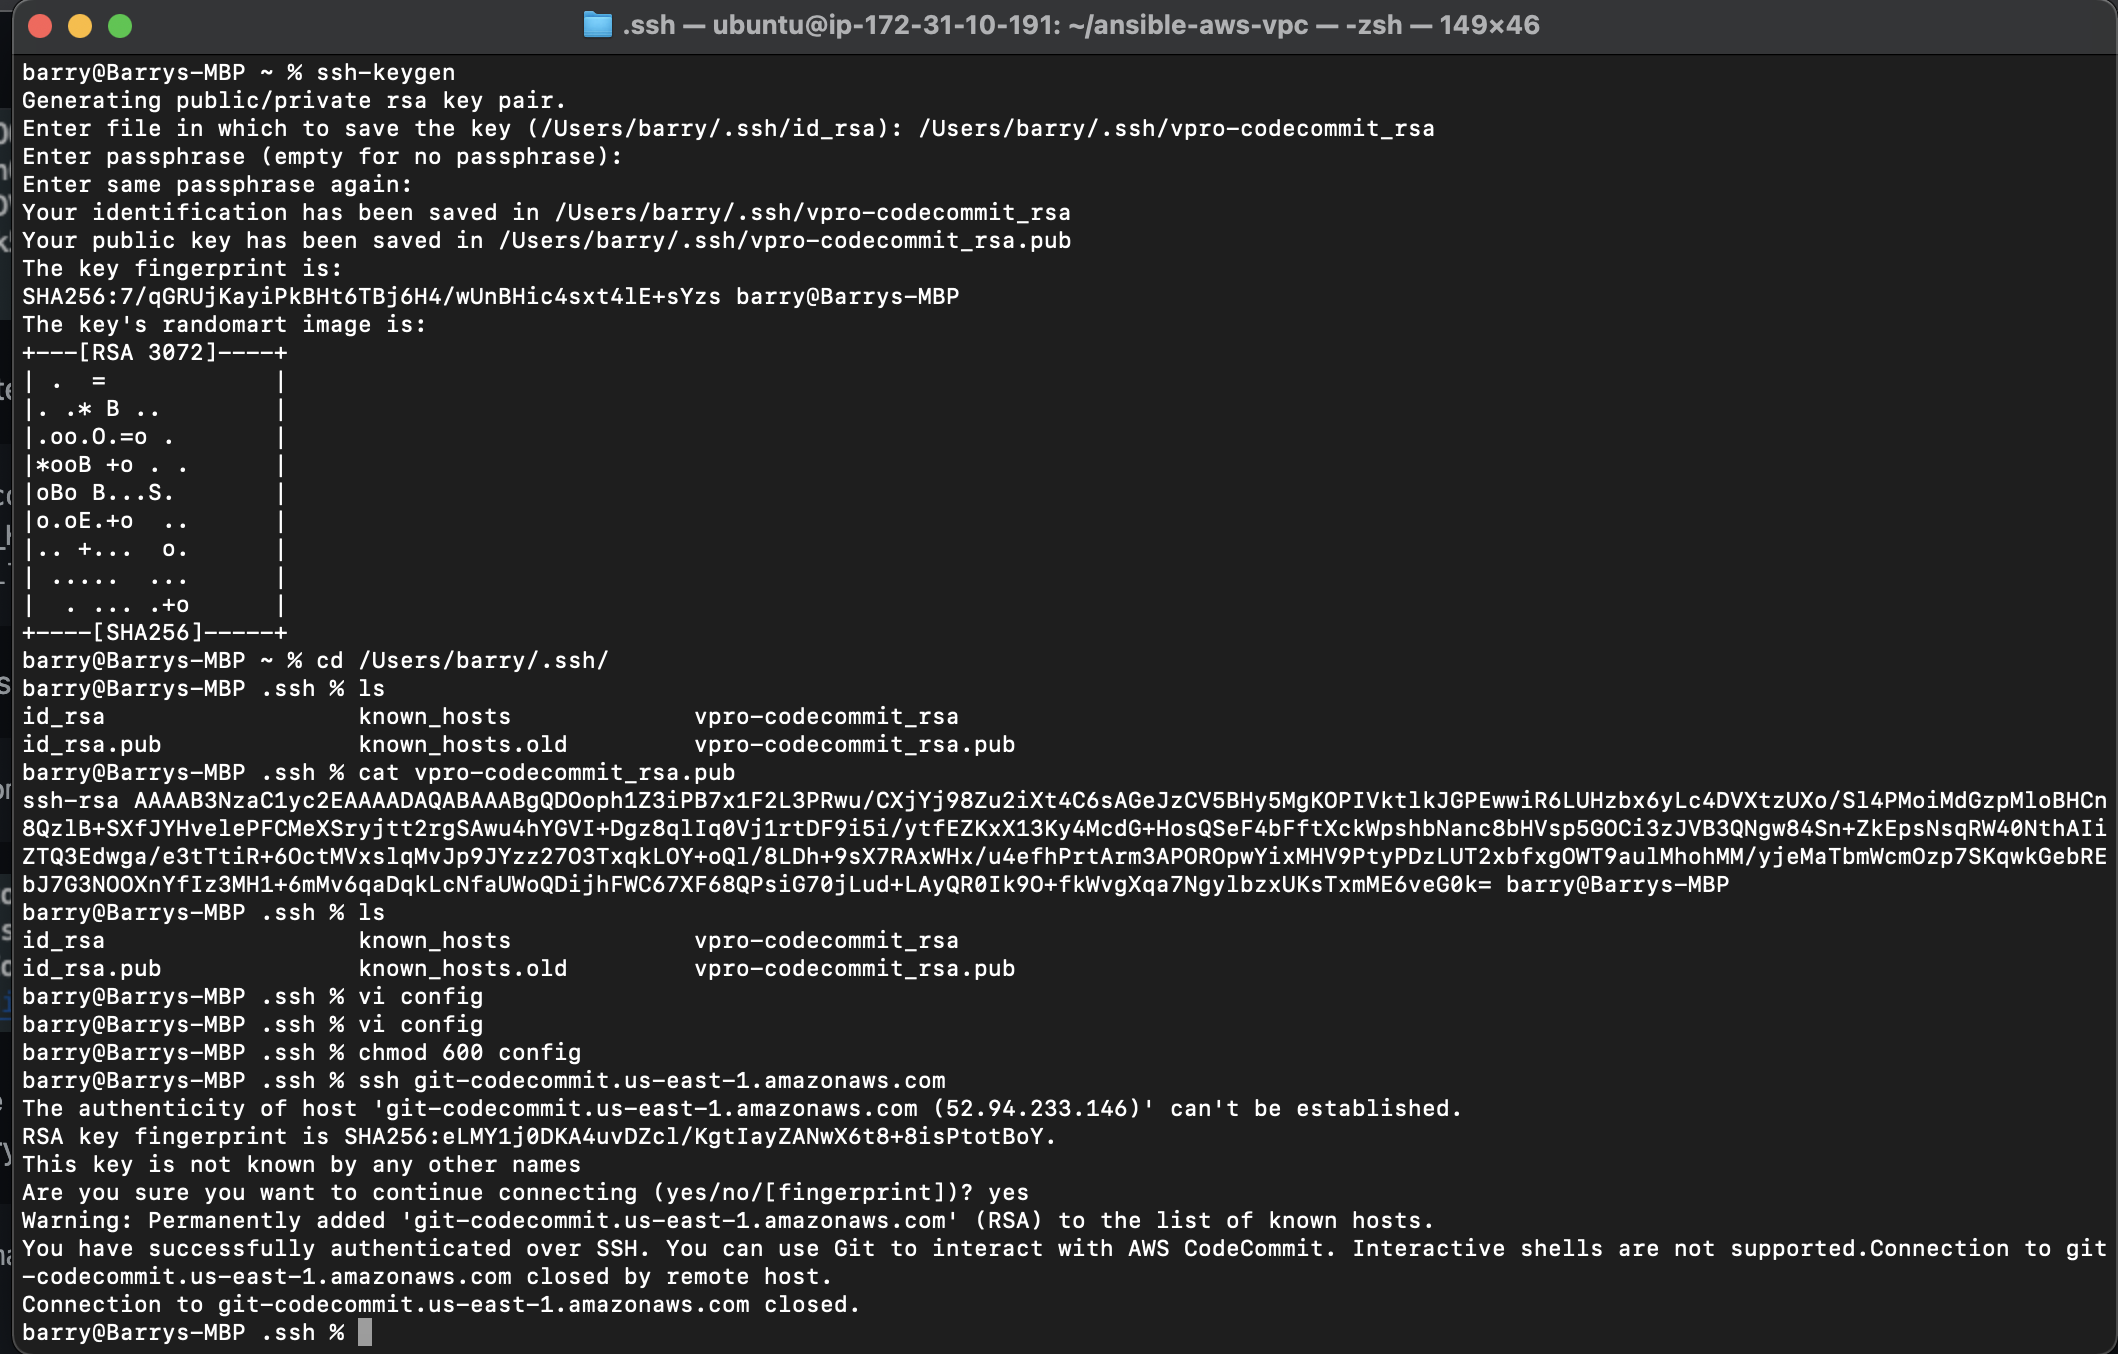
-
Next we clone the repository to a location that we want in our local. I will use the Github repository for vprofile-project in my local, and turn this repository to CodeCommit repository. When I am in Github repo directory, I will run below commands. source
git checkout master
git branch -a | grep -v HEAD | cut -d'/' -f3 | grep -v master > /tmp/branches
for i in `cat  /tmp/branches`; do git checkout $i; done
git fetch --tags
git remote rm origin
git remote add origin ssh:https://git-codecommit.us-east-1.amazonaws.com/v1/repos/vprofile-code-repo
cat .git/config
git push origin --all
git push --tags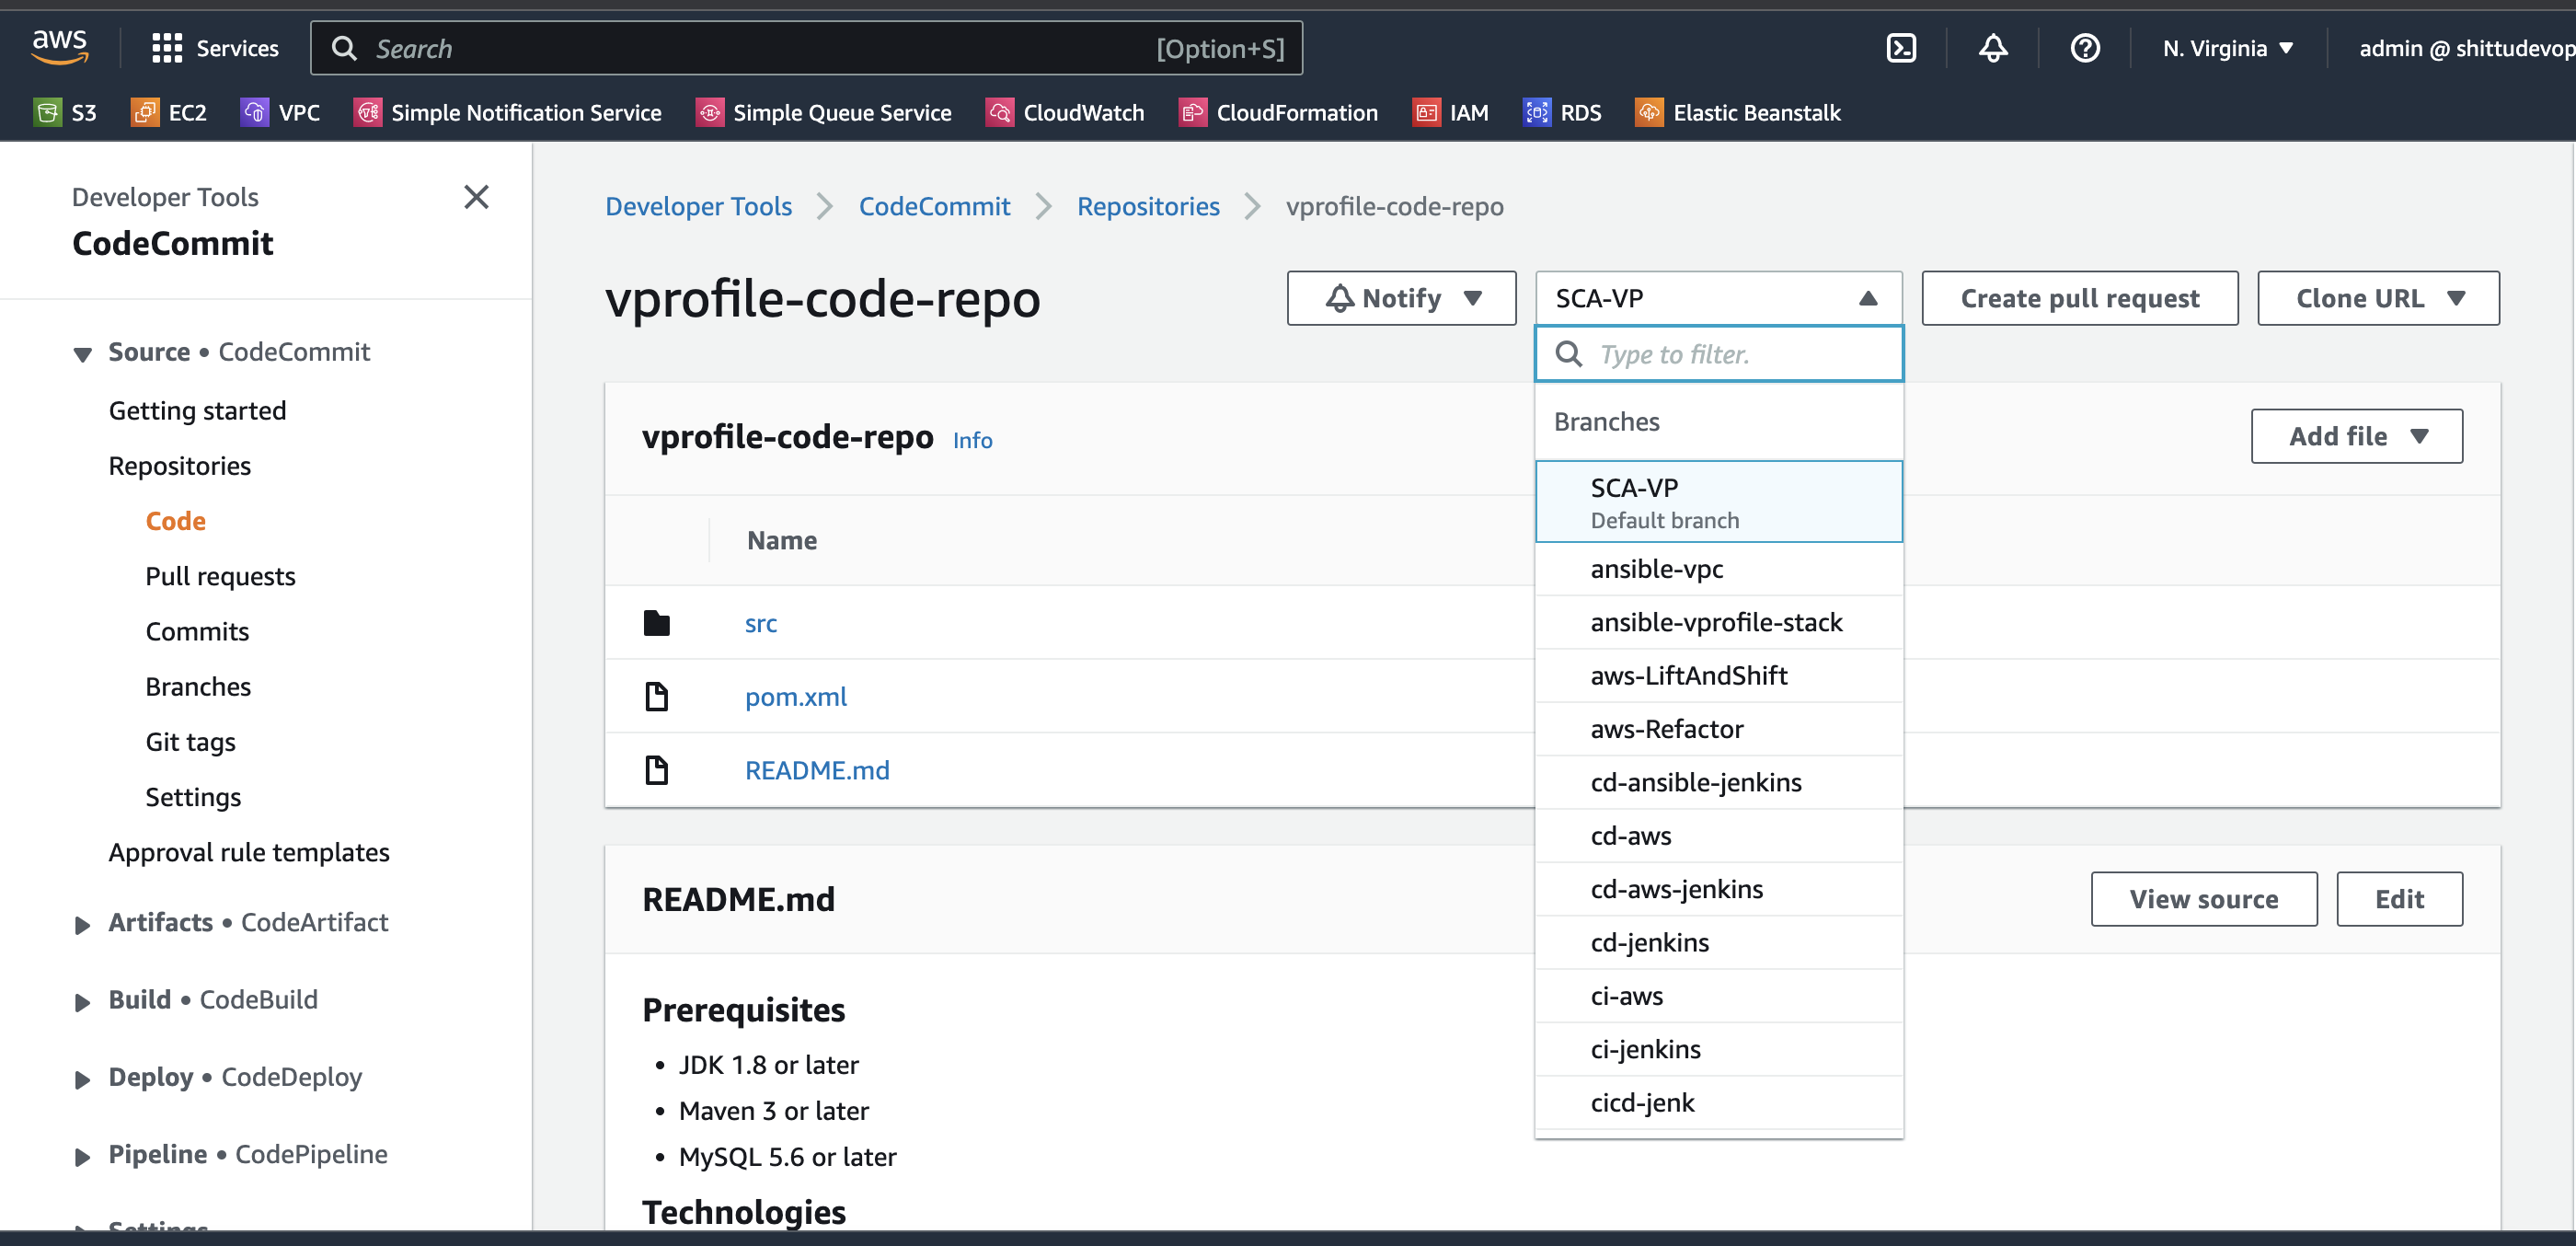


-
Create a Code Artifact for maven
Repository name: vprofile-maven-repo
Public upstream repositories: maven-central-store
AWS account: current account
Domain name: visualpath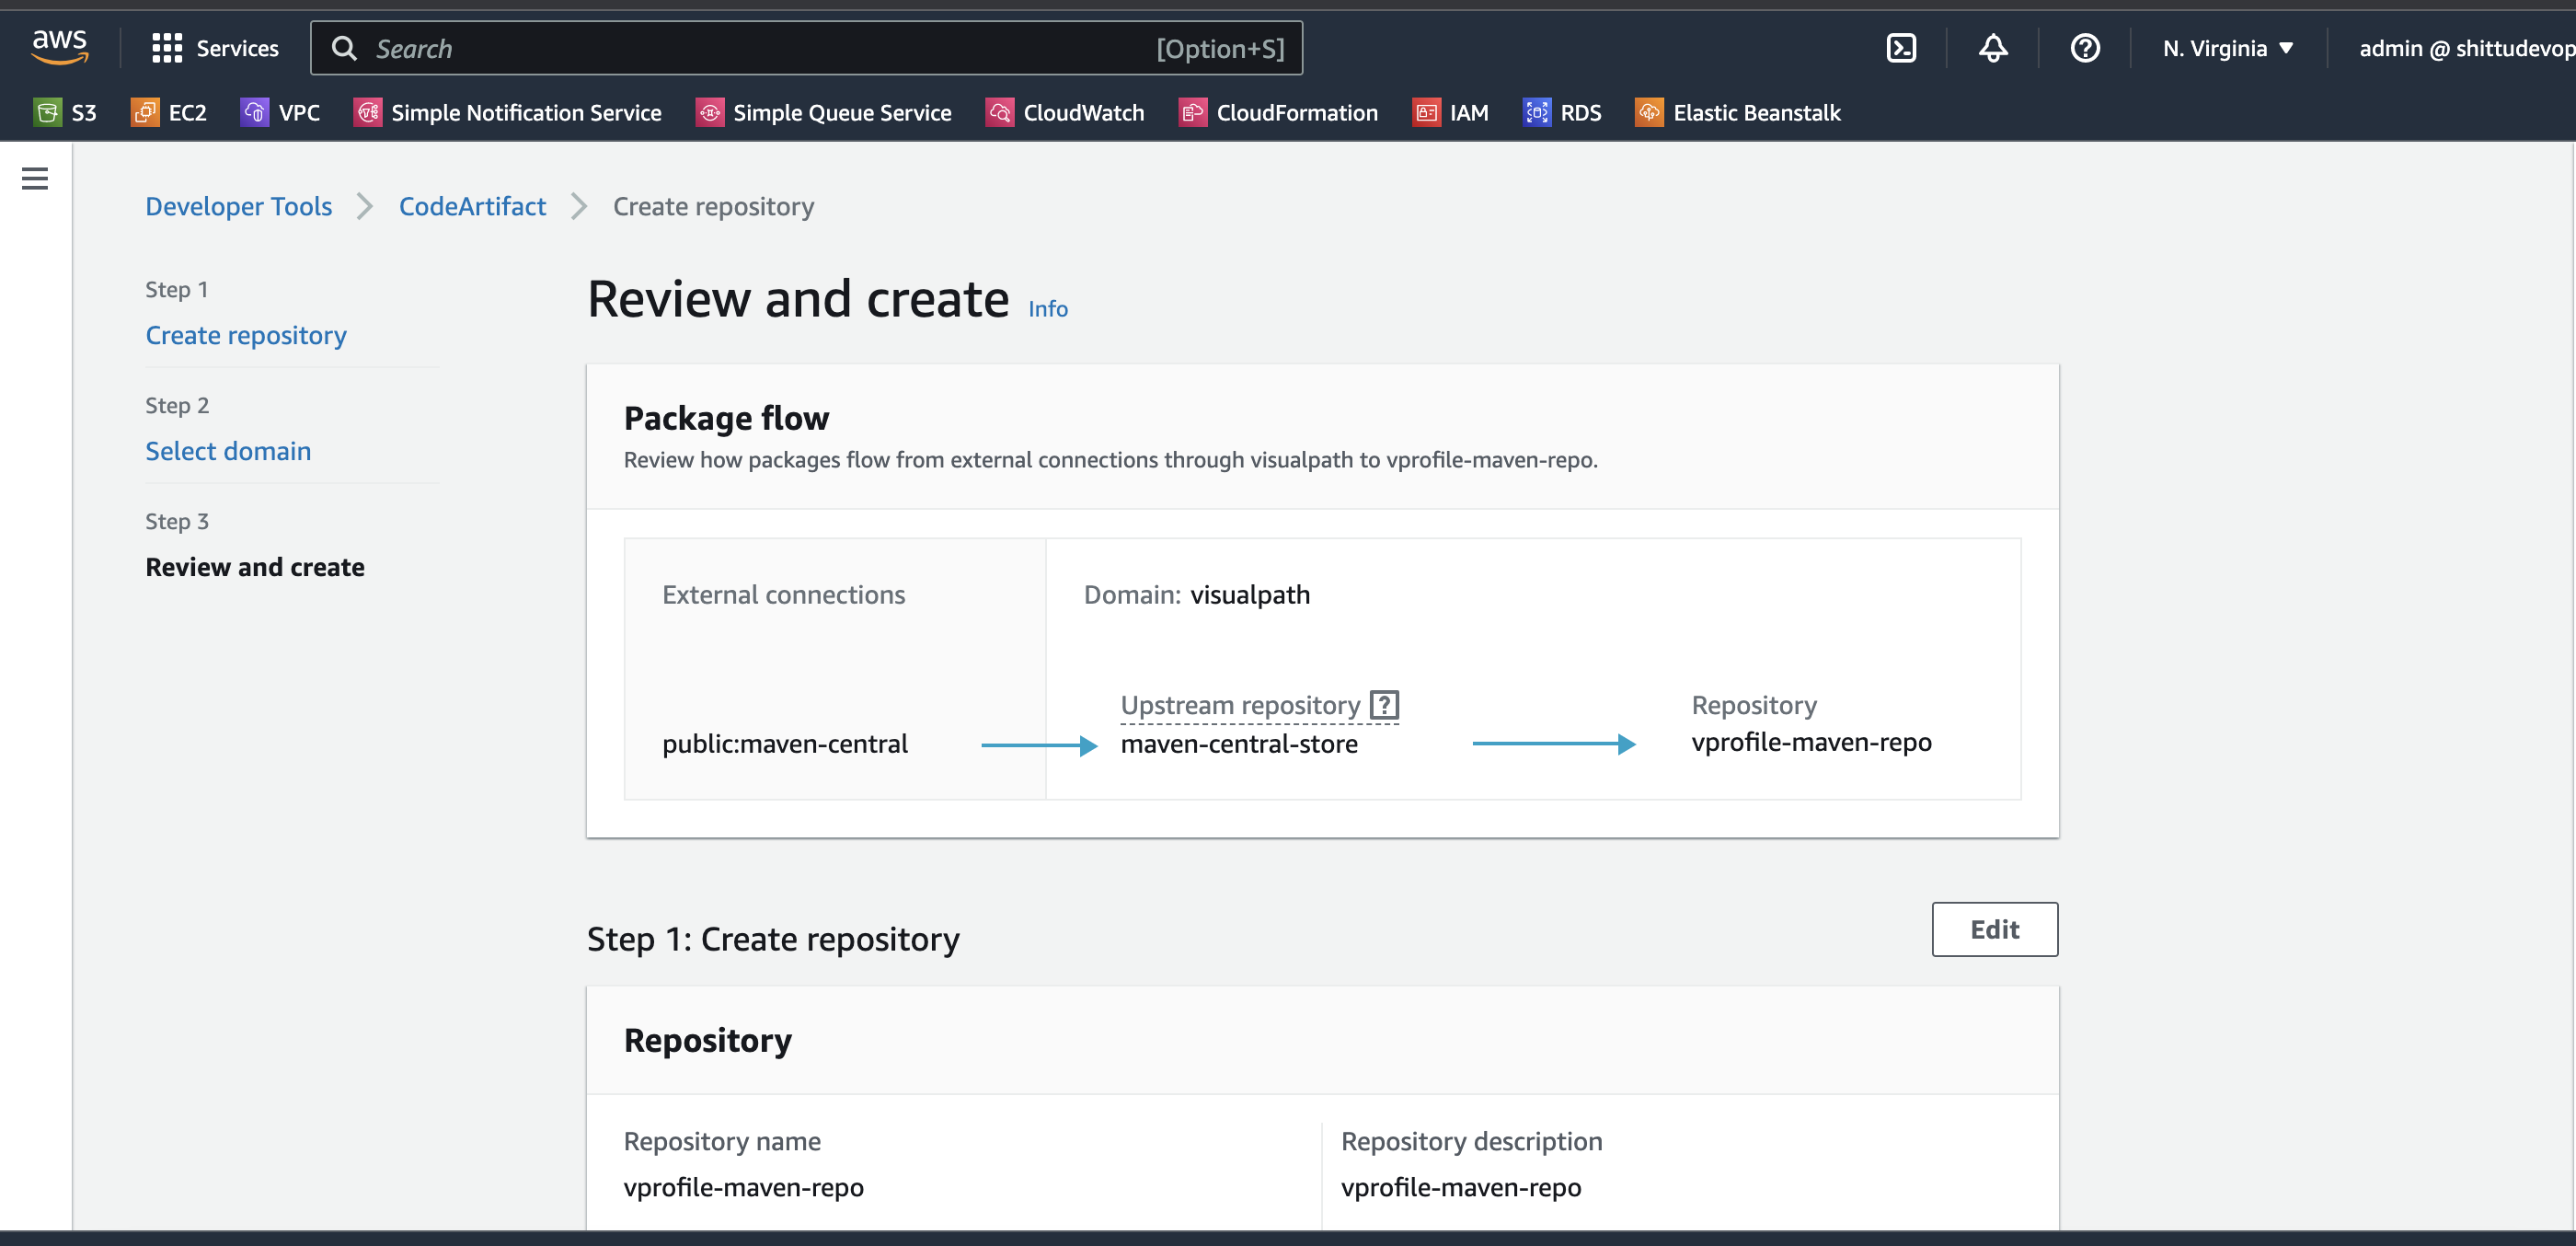
-
Again we will follow connection instructions given in CodeArtifact for maven-central-repo.

-
Create an IAM user for CodeArtifact and configure aws cli with its credentials. We will give Programmatic access to this user to be able to use aws cli and download credentials file.
aws configure # provide iam user credentials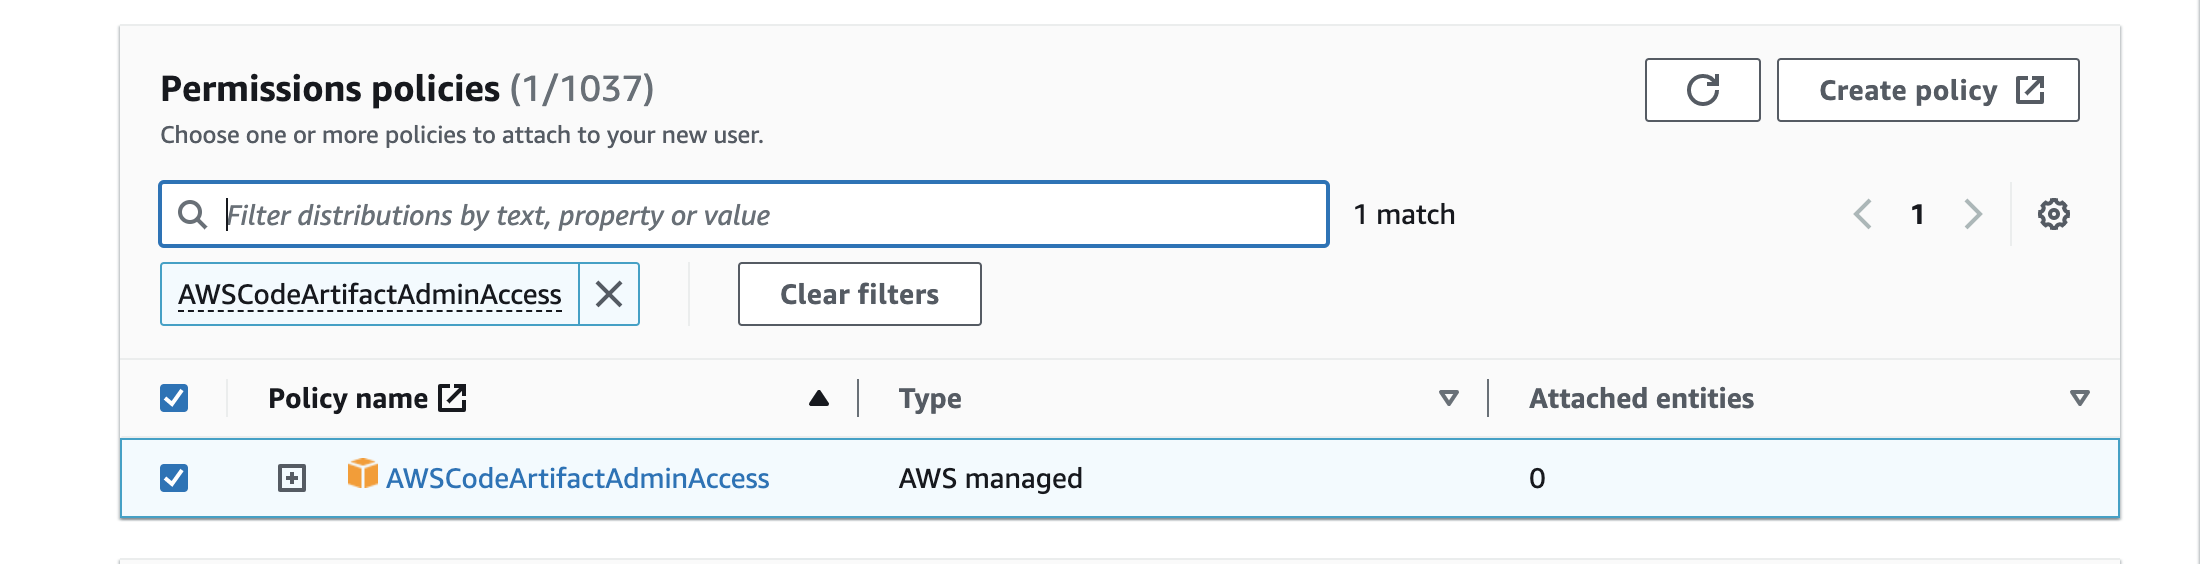
-
Run the command below for CodeArtifact authorization token for authorization to your repository
export CODEARTIFACT_AUTH_TOKEN=`aws codeartifact get-authorization-token --domain visualpath --domain-owner 438199817329 --region us-east-1 --query authorizationToken --output text` -
Switch to the working directory that has the repo we are working on and chckout the repo to ci-aws branch
git checkout ci-aws -
Update pom.xml and setting.xml file with correct urls as suggested in instruction and push these files to codeCommit.
git add .
git commit -m "message"
git push origin ci-aws


-
On th brouser paste the url and sign up for sonarcloud account
https://sonarcloud.io -
From account avatar -> My Account -> Security. Generate token name as
vprofile-sonar-cloud. Note the token.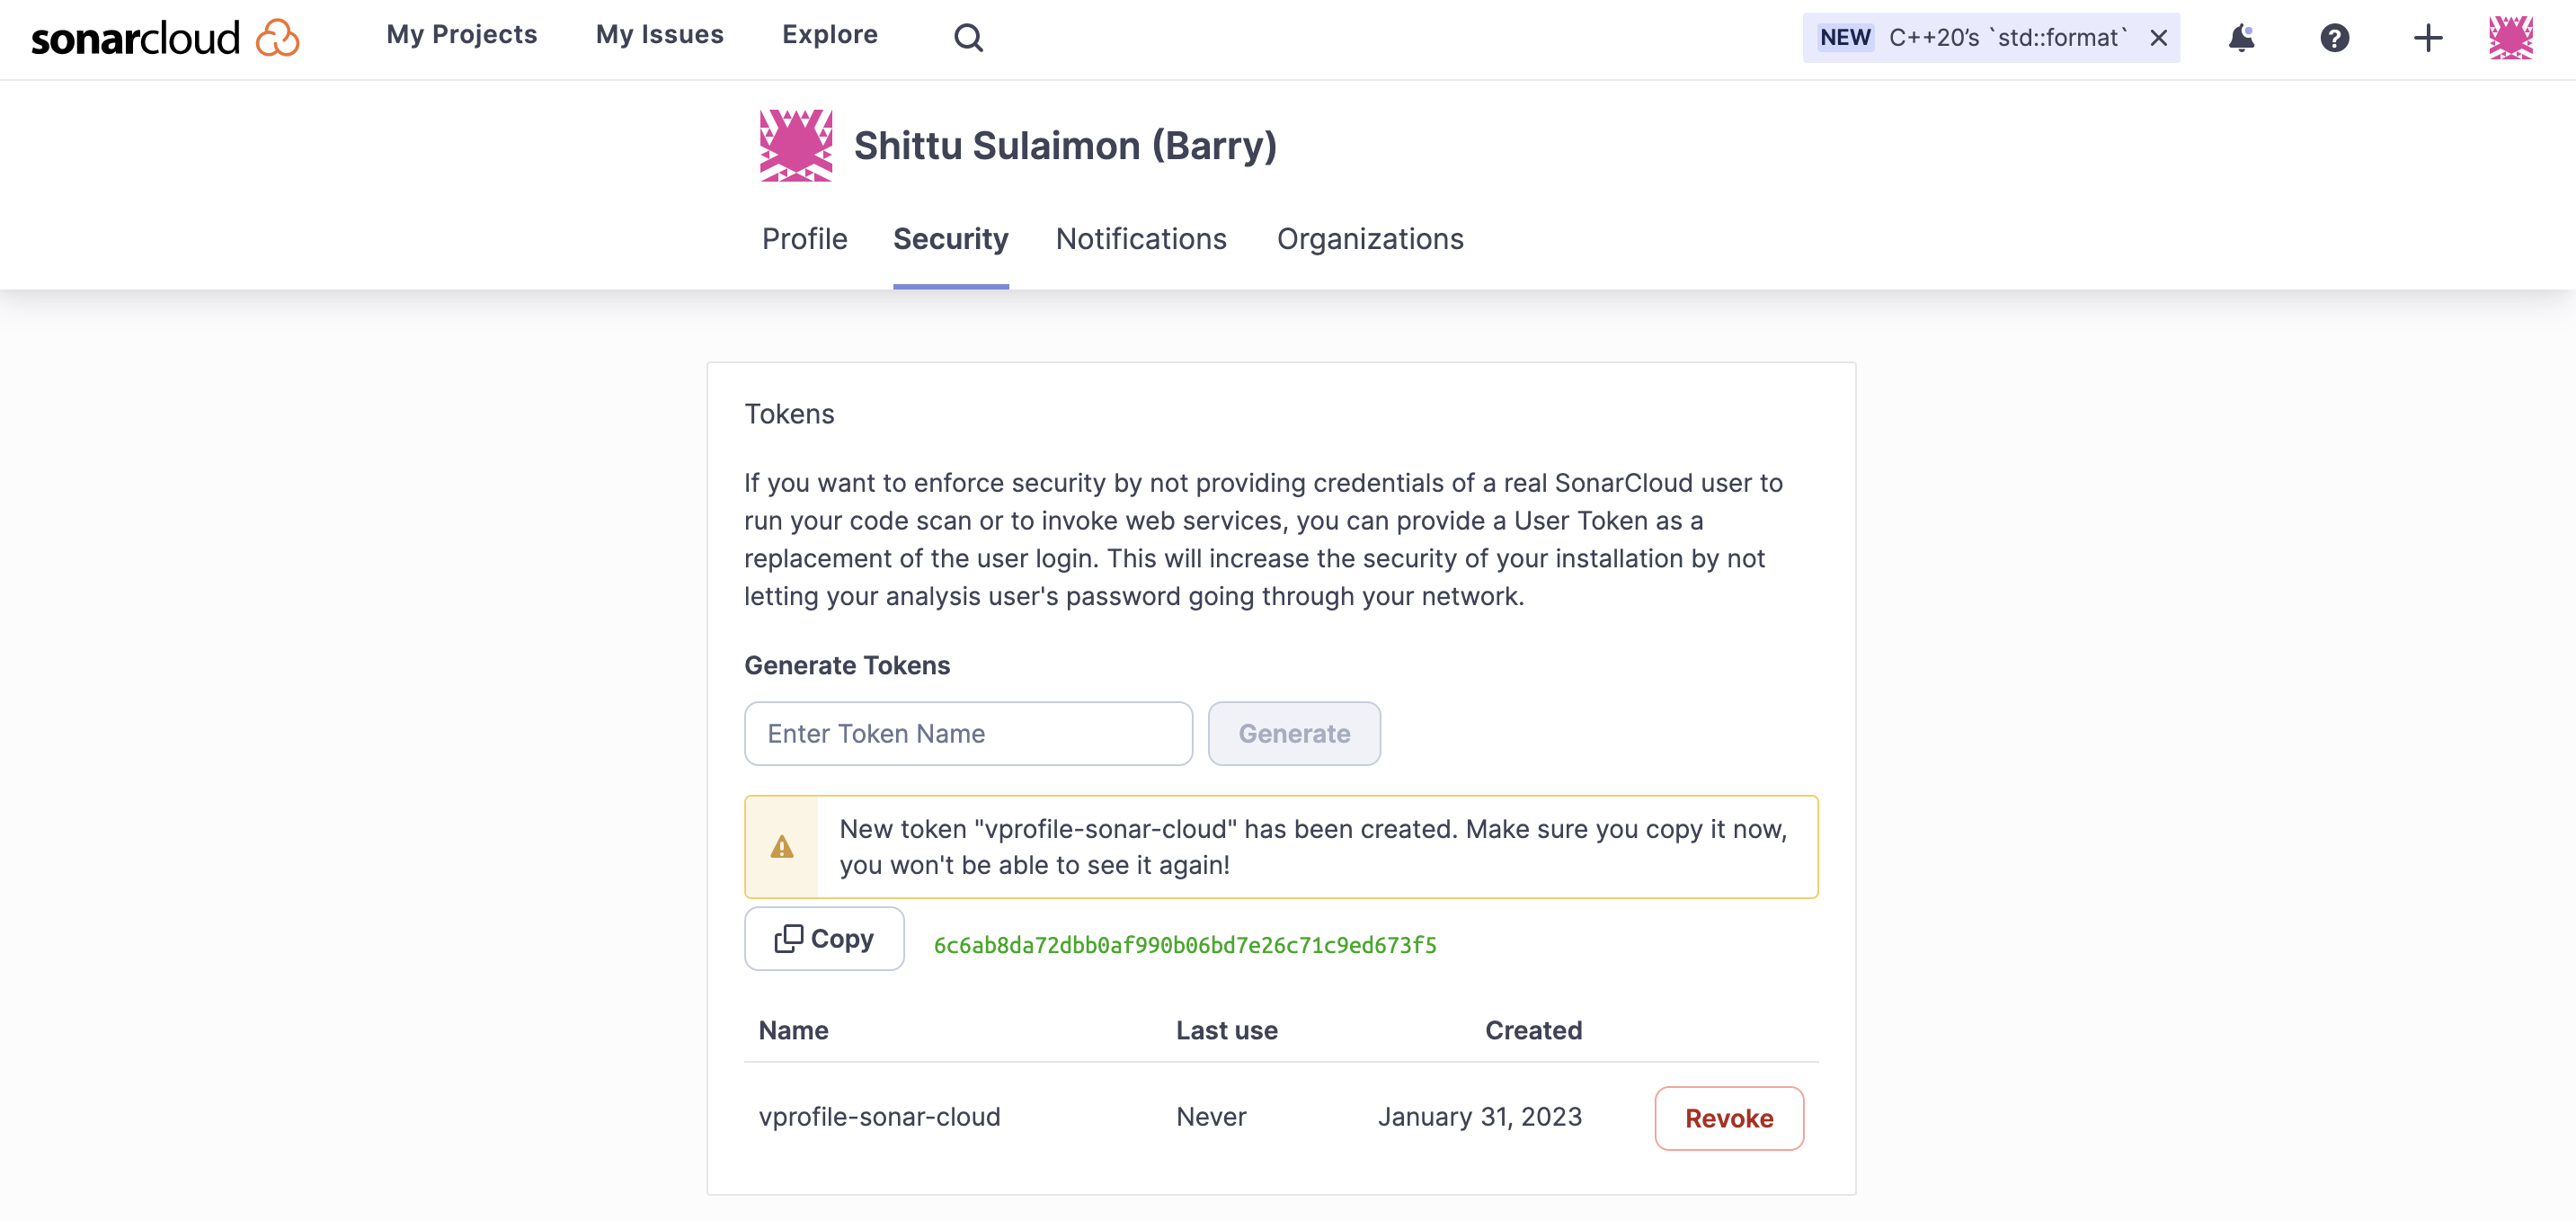
-
Next we create a project,
+->Analyze Project->create project manually. Below details will be used in our Build.Organization: apotitech-projectsapotitech-projects Name: vprofile-repo public

-
We will create paramters for below variables.
Organization: apotitech-projectsapotitech-projects
CODEARTIFACT_TOKEN	 SecureString
HOST      https://sonarcloud.io
PROJECT                vprofile-repo-rd
SONARTOKEN             SecureString
-
From AWS Console, go to CodeBuild -> Create Build Project. This step is similar to Jenkins Job.
ProjectName: Vprofile-Build Source: CodeCommit Branch: ci-aws Environment: Ubuntu runtime: standard:5.0 New service role Insert build commands from foler aws-files/sonar_buildspec.yml Logs-> GroupName: vprofile-buildlogs StreamName: sonarbuildjob -
We need to update sonar_buildspec.yml file paramter store sections with the exact names we have given in SSM Parameter store.
-
We need to add a policy to the service role created for this Build project. Find name of role from Environment, go to IAM add policy
-
Now we can build the project

-
I can add Quality Gate to this Build Project, we can create a Qulaity gate from SonarCloud and add to our project.

-
From AWS Console, go to CodeBuild -> Create Build Project. This step is similar to Jenkins Job.
ProjectName: Vprofile-Build-Artifact Source: CodeCommit Branch: ci-aws Environment: Ubuntu runtime: standard:5.0 Use existing role from previous build Insert build commands from foler aws-files/build_buildspec.yml Logs-> GroupName: vprofile-buildlogs StreamName: artifactbuildjob -
Its time to build project.


-
First we will create an SNS topic from SNS service and subscribe to topic with email.
-
We need confirm our subscription from our email.
-
Now we create an S3 bucket to store our deployed artifacts.
-
Create CodePipeline with the information
Name: vprofile-CI-Pipeline SourceProvider: Codecommit branch: ci-aws Change detection options: CloudWatch events Build Provider: CodeBuild ProjectName: vprofile-Build-Aetifact BuildType: single build Deploy provider: Amazon S3 Bucket name: vprofile98-build-artifact object name: pipeline-artifact -
Last step before running our pipeline is we need to setup Notifications, go to Settings in CodePipeline -> Notifications.
-
Let's run our CodePipeline.
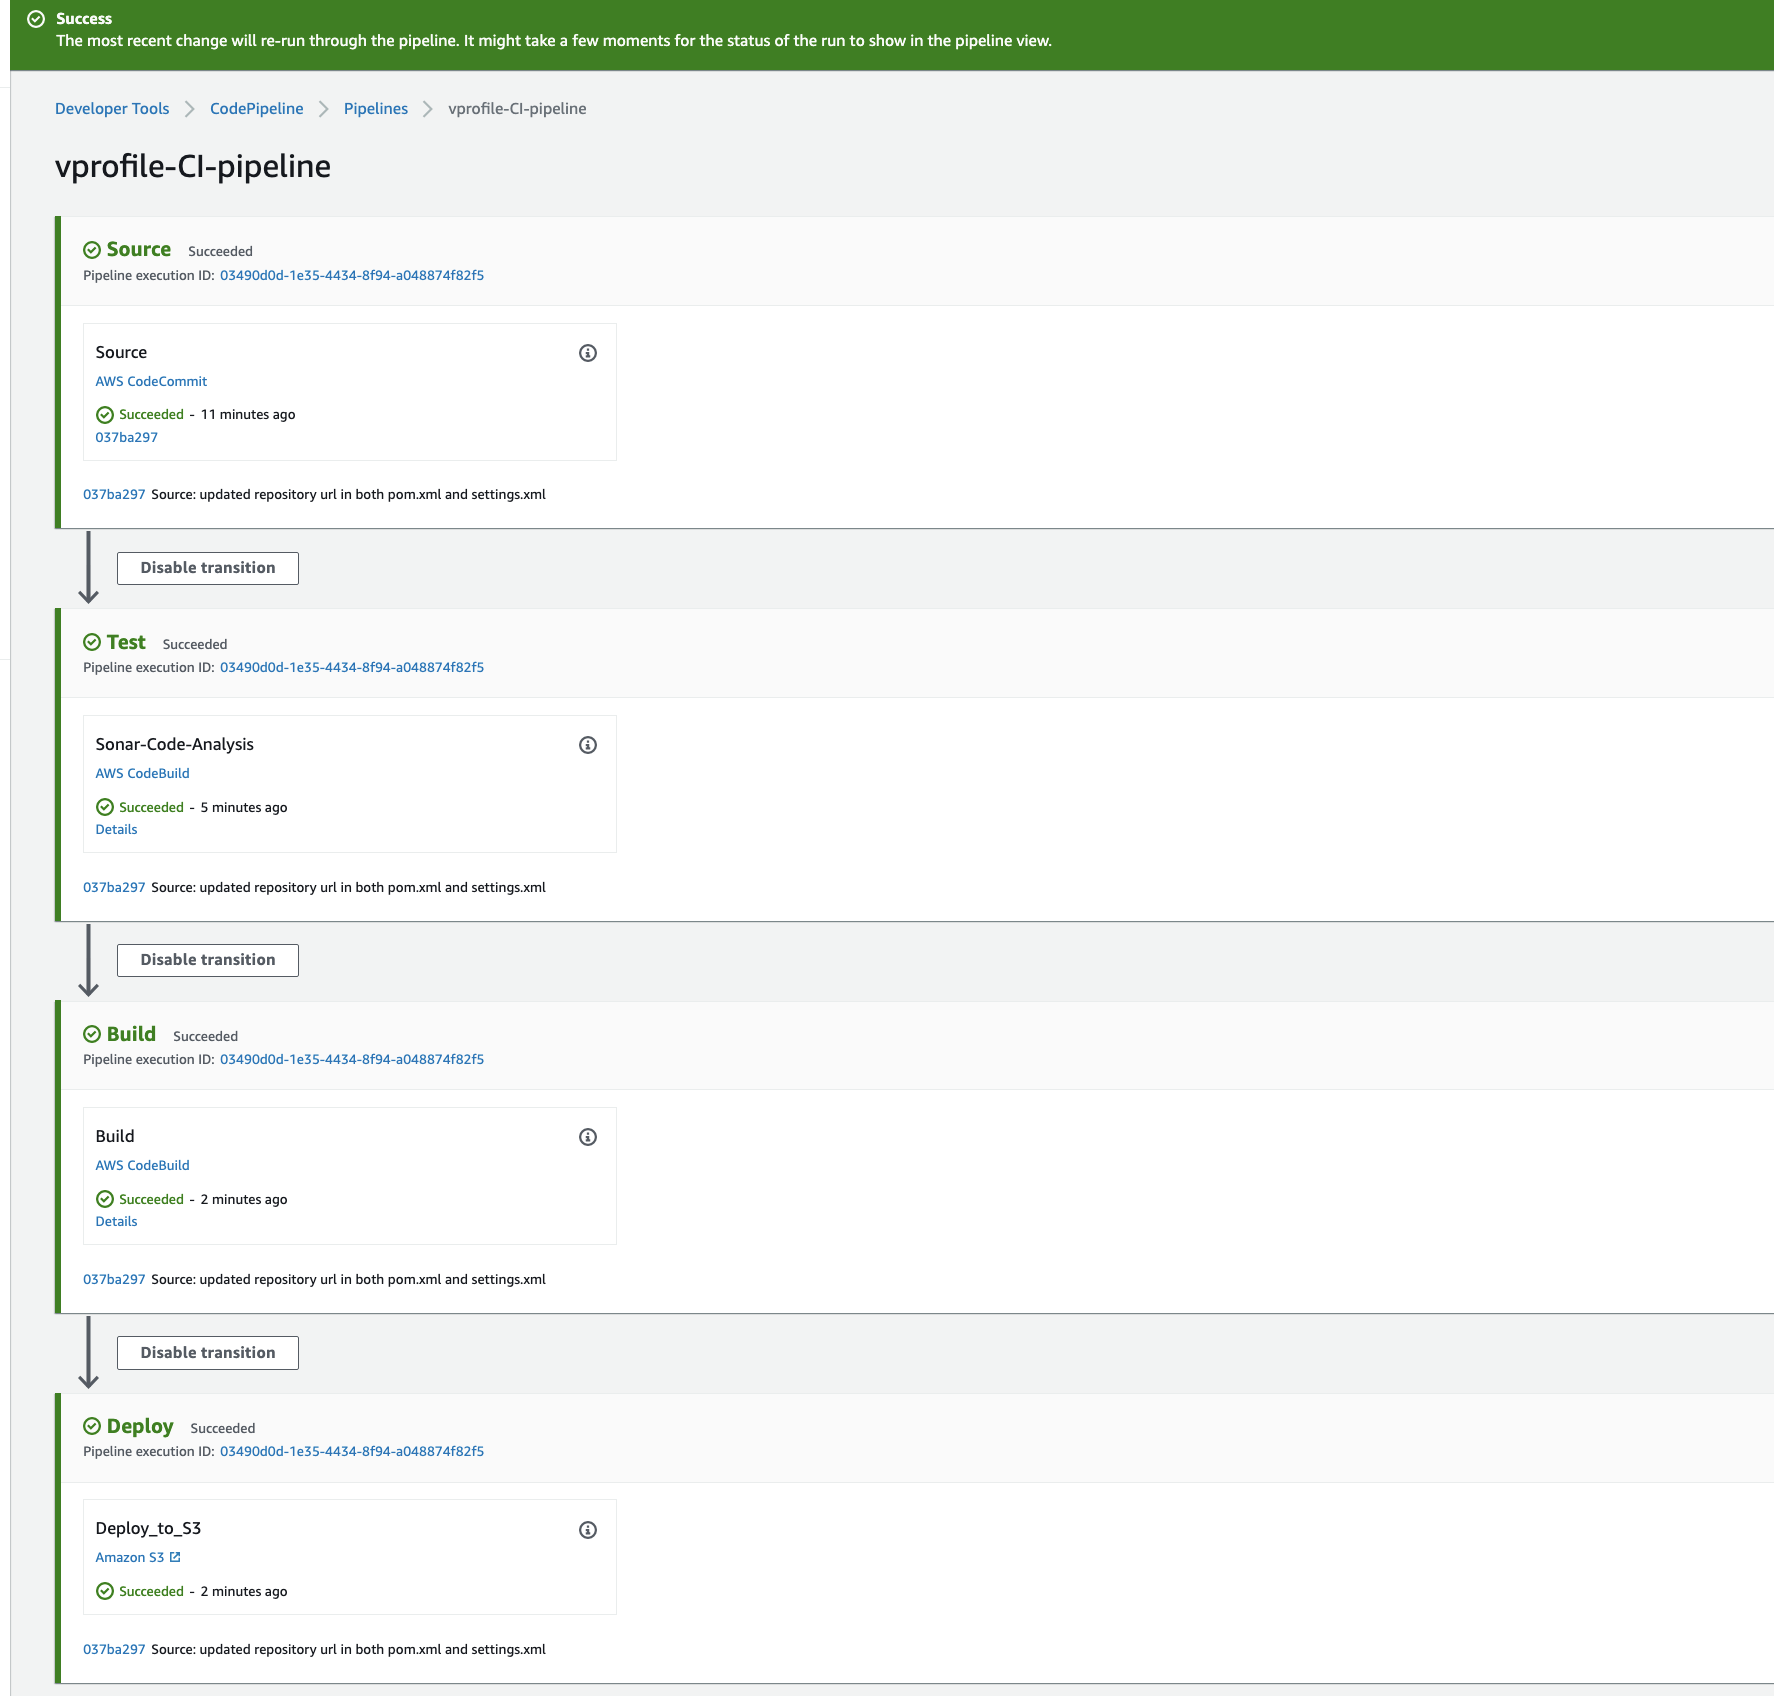

- We can make some changes in README file of source code, once we push the changes CloudWatch will detect the changes and Notification event will trigger Pipeline.
-
We will be creating a beanstalk environment with the below configuration
Application name: vprofile-app
Platform: Tomcat
Capacity: Loadbalanced
          min: 2
          max: 4
Security: choose the key pair been used right from the beginning of the project
Tags:
      Key: Project
      value: vprofile
-
Create a rds database with below configuration
Method: standard create
Engine: MySql
version: 5.6.34
Templates: free tier
instance identifier: vprofile-cicd-project
Create new SecGrp:
* Name: vprofile-cicd-rds-mysql-sg
Additional Configurations:
* initial db name: accounts
-
Navigate to the instances running because the beanstalk automatically generated an instance, the we need to update the security group to allow traffic from beanstalk security group on port 3306
-
Let us get into the beanstalk instance through SSH and initialize the database to install git and mysql
sudo -i yum install mysql git -y mysql -h <RDS_endpoint> -u <RDS_username> -p<RDS_password> show databases; git clone https://github.com/apotitech/vprofile-project cd vprofileproject-all/ git checkout cd-aws cd src/main/resources mysql -h <RDS_endpoint> -u <RDS_username> -p<RDS_password> accounts < db_backup.sql mysql -h <RDS_endpoint> -u <RDS_username> -p<RDS_password> use accounts; show tables; -
Environment health check on the beanstalk loadbalacer needs to be updated to
/login
-
On our codepipeline, navigate the the code repository on branch
cd-aws, we can edit right from the codecommit service. -
Time to edit, for pom.xml, add the correct url from your code artifact connection steps:
<repository> <id>codeartifact</id> <name>codeartifact</name> <url>https://visualpath-392530415763.d.codeartifact.us-east-1.amazonaws.com/maven/maven-central-store/</url> </repository> -
for settings.xml, update below parts with correct url from code artifact.
  <profiles>
  <profile>
    <id>default</id>
    <repositories>
      <repository>
        <id>codeartifact</id>
    <url>https://visualpath-392530415763.d.codeartifact.us-east-1.amazonaws.com/maven/maven-central-store/</url>
      </repository>
    </repositories>
  </profile>
</profiles>
<activeProfiles>
        <activeProfile>default</activeProfile>
    </activeProfiles>
<mirrors>
  <mirror>
    <id>codeartifact</id>
    <name>visualpath-maven-central-store</name>
    <url>https://visualpath-392530415763.d.codeartifact.us-east-1.amazonaws.com/maven/maven-central-store/</url>
    <mirrorOf>*</mirrorOf>
  </mirror>
</mirrors>
-
First, we will go to CodeBuild and change Source for Vprofile-Build & Vprofile-build-Artifact projects. Currently these projects are triggered from ci-aws branch, we will change branch to cd-aws.
-
Create BuildAndRelease Build Project
Name: Vprofile-BuildAndRelease Repo: CodeCommit branch: cd-aws Environment *Managed image: Ubuntu *Standard Image 5.0 We will use existing role from previous Build project which has access to SSM Parameter Store Insert build commands: * From source code we will get spec file under `aws-files/buildAndRelease_buildspec.yml`. Logs: *LogGroup:vprofile-cicd-logs *StreamnameBuildAndReleaseJob -
We need to create 3 new parameters that we used in BuilAndRelease_buildspec.yml file in SSM Parameter store. we have noted these values from RDS creation step, we will use them now.
RDS-Endpoint: String RDSUSER: String RDSPASS: SecureString -
Let's build, we have worked so hard to see the build job


-
In this Build Project, we will run our Selenium Automation scripts and store the artifacts in S3 bucket
-
First we will create an S3 bucket
Name: vprofile-cicd-testoutput-rd (give a unique name) Region: it should be the same region we create our pipeline -
Next, we will create a new Build project for Selenium Automation Tests. Create a new Build project with below details:
Name: SoftwareTesting
Repo: CodeCommit
branch: seleniumAutoScripts
Environment:
* Windows Server 2019
* Runtime: Base
* Image: 1.0
We will use existing role from previous Build project which has access to SSM Parameter Store
Insert build commands:
* From source code we will get spec file under `aws-files/win_buildspec.yml`.
* We need to update url part to our Elastic Beanstalk URL.
Artifacts:
*Type: S3
* Bucketname: vprofile-cicd-testoutput-rd
* Enable semantic versioning
Artifcats packaging: zip
Logs:
*LogGroup: vprofile-cicd-logs
*Streamname: Softwaretestlog
-
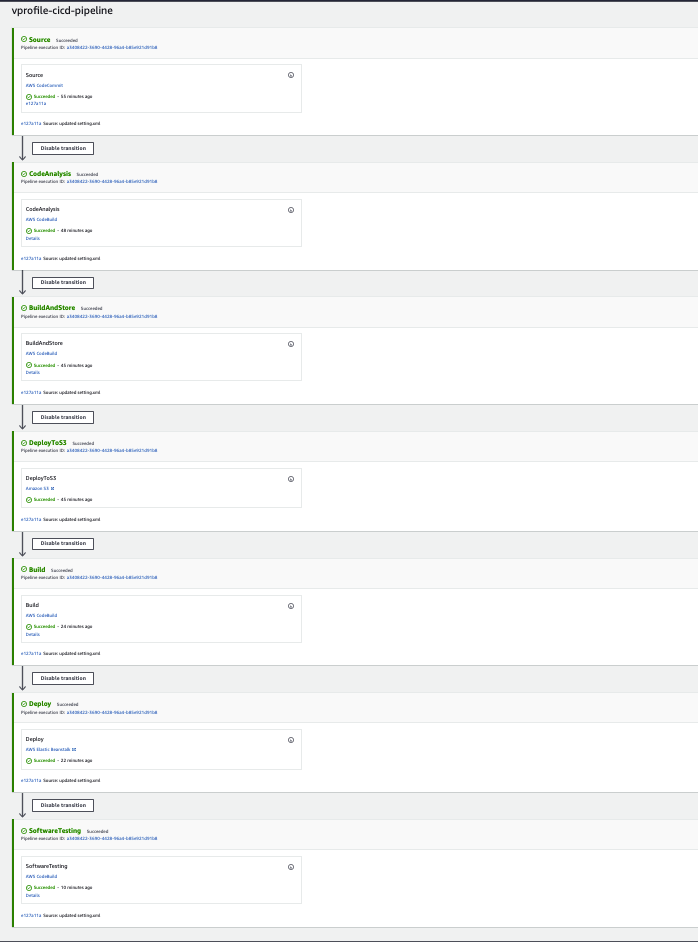
We will create CodePipeline with name of vprofile-cicd-pipeline
Source: * CodeCommit * vprofile-code-repo * cd-aws * Amazon CloudWatch Events Build * BuildProvider: CodeBuild * ProjectName: Vprofile-BuildAndRelease * Single Build Deploy * Deploy provider: Beanstalk * application: vprofile-app * Environment: vprofile-app-env -
We will Disable transitions and Edit pipeline to add more stages.
-
First Stage added after Source:
Name: CodeAnalysis Action provider: CodeBuild Input artifacts: SourceArtifact Project name: Vprofile-Build -
Second Stage will be added after CodeAnalysis stage:
Name: BuildAndStore Action provider: CodeBuild Input artifacts: SourceArtifact Project name: Vprofile-Build-artifact OutputArtifact: BuildArtifact -
Third Stage will be added after BuildAndStore stage:
Name: DeployToS3 Action provider: Amazon S3 Input artifacts: BuildArtifact Bucket name: vprofile98-build-artifact Extract file before deploy -
We need to Edit ouput artifacts of Build and Deploy stages. Go to Build stage
Edit Stage. Change Output artifact name asBuildArtifactToBean. -
Go to Deploy stage,
Edit stage. We changeInputArtifacttoBuildArtifactToBean -
Last Stage will be added after Deploy stage:
Name: Software Testing Action provider: CodeBuild Input artifacts: SourceArtifact ProjectName: SoftwareTesting -
Save and Release change. It will start our CodePipeline.
-
We will select our pipeline. Click Notify, then Manage Notification. We will create a new notification and save.
vprofile-aws-cicd-pipeline-notification
Select all
Notification Topic: use same topic from CI pipeline
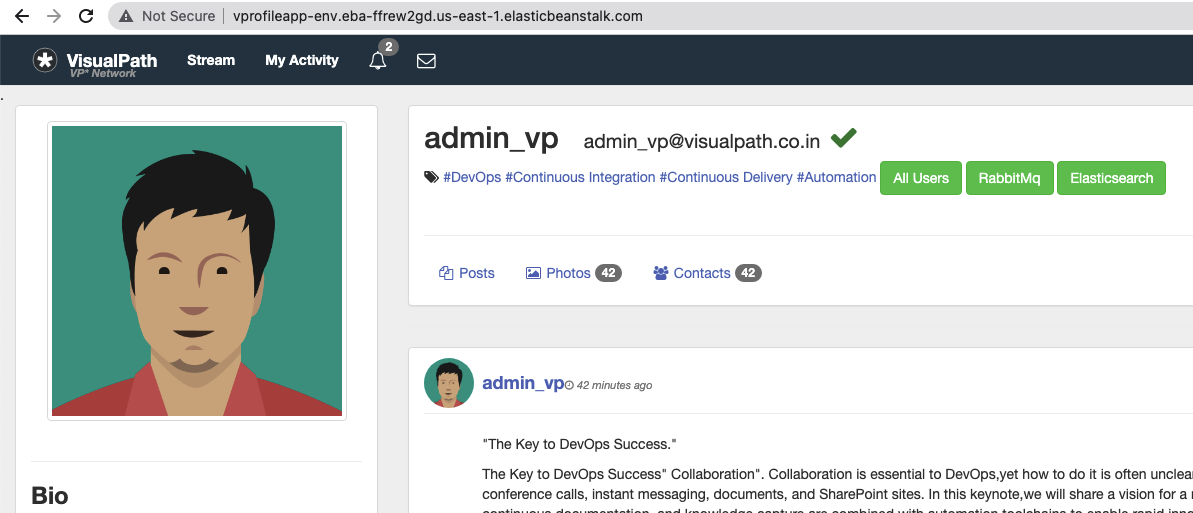
- It's time to test our pipeline.
- We can check the app from browser with Beanstalk endpoint.

